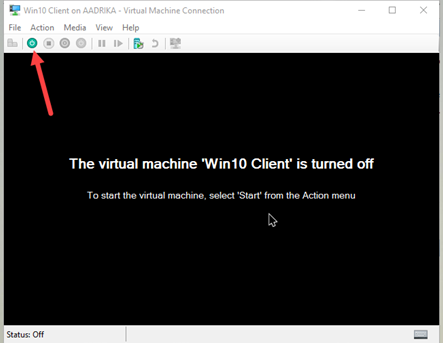
Windows 10 is becoming more versatile and comprehensive after the Updates. Windows 10 is the last version of Windows from Microsoft. They will not release new ones anymore, but instead are constantly rolling out updates for Windows 10. Virtual machines are a highly appreciated feature on this operating system.
| Join the channel Telegram belong to AnonyViet 👉 Link 👈 |
Microsoft improves Windows 10 day by day and is dominating the tech world. After each Update they make it faster, lighter and get rid of the redundancies. In addition, it also allows users to freely turn on and off and monitor programs.
Virtual machine on Windows 10?
Back in the day this was not possible, but today Microsoft has made it possible. You may not need to install 3rd party software but still run the virtual machine. That’s thanks to Microsoft’s Hyper-V program that helps you run virtual machines well.
Although the interface of Hyper-V is not as beautiful and eye-catching as VMWare, the features are also complete. Convenient and it is rated higher security than VMWare, so it is trusted by many businesses.
In this article, I will guide you to enable and use Hyper-V. If you liked this article, please share it with your friends or leave a comment for fun!
Instructions to activate Hyper-V on Windows 10
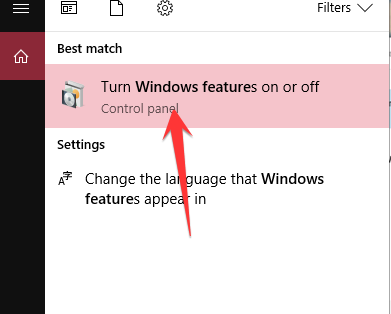
Open Windows 10’s search box -Shortcuts Windows+WILL.
Enter the keyword “Windows features” and select the option as shown below.
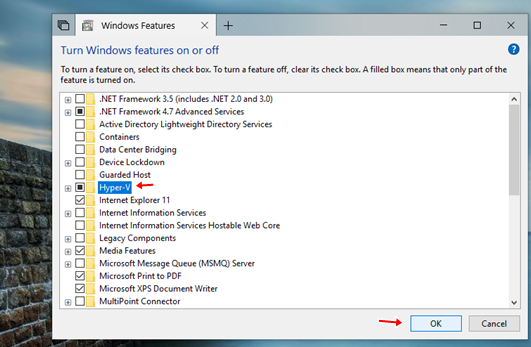
Check the options Hyper-DRAW then press OK to save.
Wait a moment while Windows 10 proceed to set up the necessary packages for windows. After the setup is complete you will see the drive OLD a little heavier because Hyper-DRAW installed with Windows.
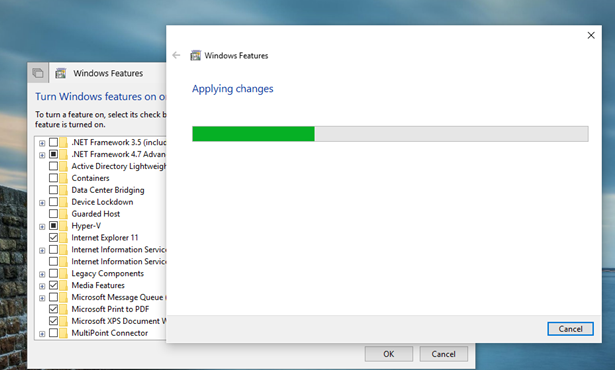
Wait until the activation is completed, then restart the computer to be able to use it Hyper-DRAW.
Hyper-Drawing User’s Guide
You conduct the search by typing the word Hyper-DRAW in Windows 10 search box – Shortcuts Windows+S.
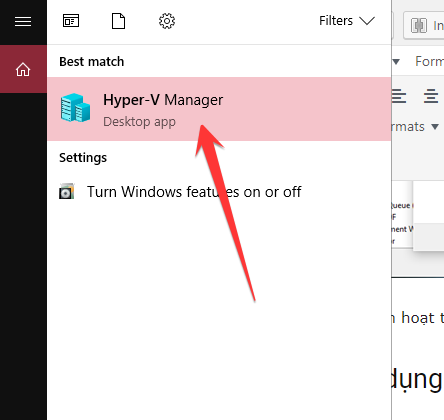
Click on the Hyper-V icon to launch the program.
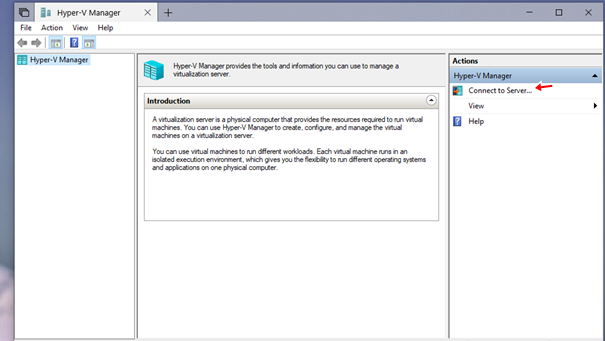
Click the dialog box Connect to Server like the photo below.
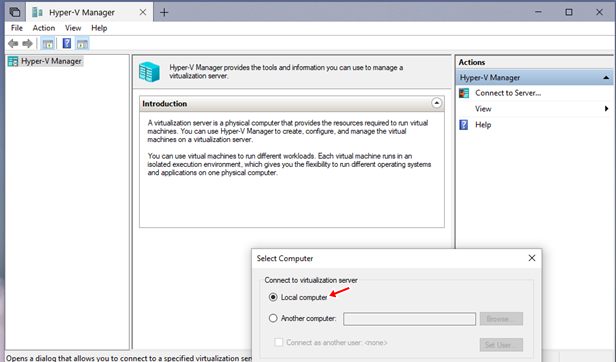
Select Local computer then press OK to save.
Create a virtual machine on Hyper-DRAW
To create a virtual machine, you choose new -> Visual Machine. Initialization dialog will appear as shown below, select Next.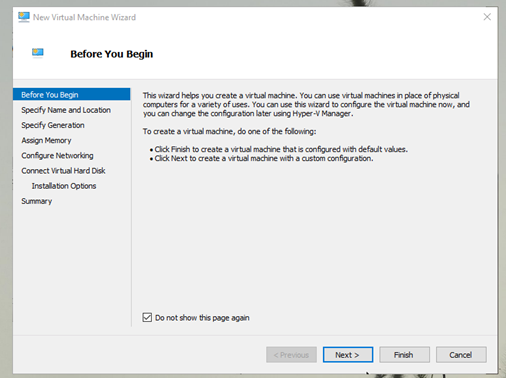
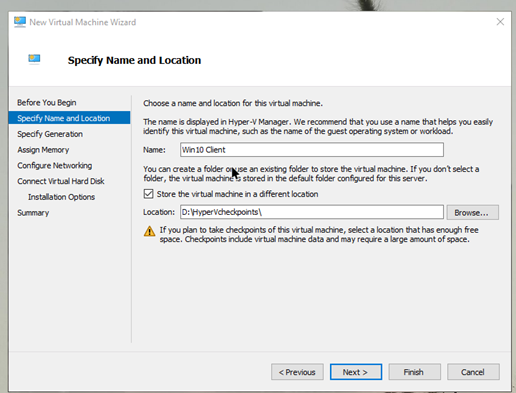
You need to give your new virtual machine a name. Then set the virtual machine storage location in the drive you want. By ticking the option “Store the virtual machine in a different location” then press “Browse…” to specify where to save then press Next.
I recommend that you save on a drive that has plenty of free space for your computer to avoid insufficient memory.
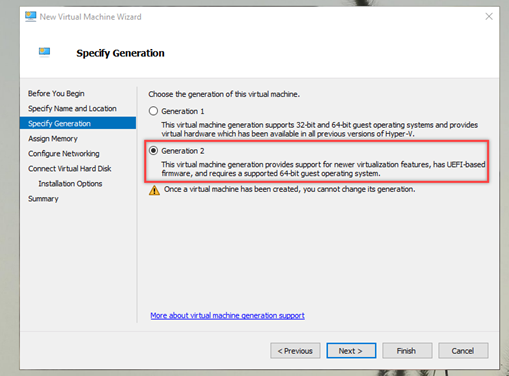
The next step is to select the virtual machine generation. You should choose Generation 2 to make it run smoother. Some computers install error, you choose Generation 1 to reinstall.
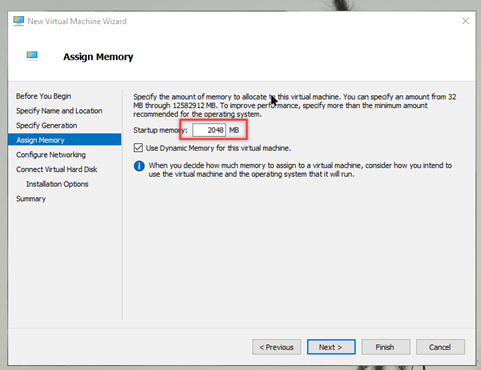
The next step is to set the amount of RAM for the virtual machine. Usually I will put more than 2GB of RAM. This is for you to think and decide for yourself!
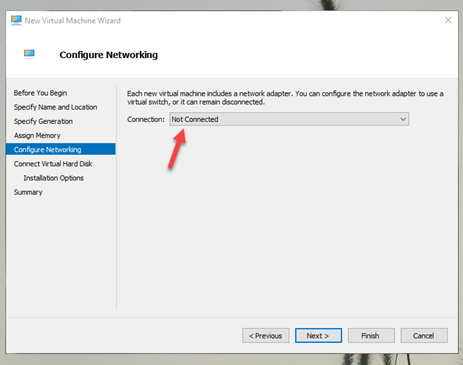
In the connection setting section you change Not Connected wall Default Please.
Next will be the setting of the name, path and capacity of the virtual drive to use for the created virtual machine.
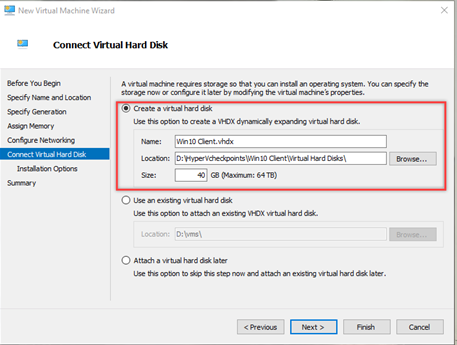
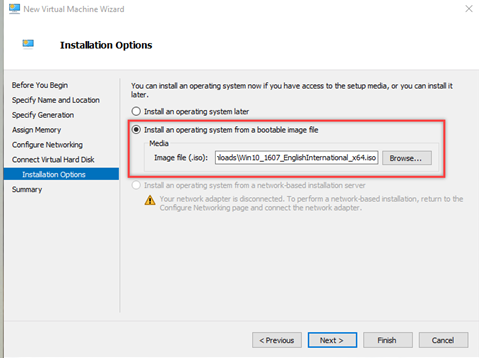
This step is the step that leads to the ISO file of the operating system you want to install. Find that ISO file and select it.
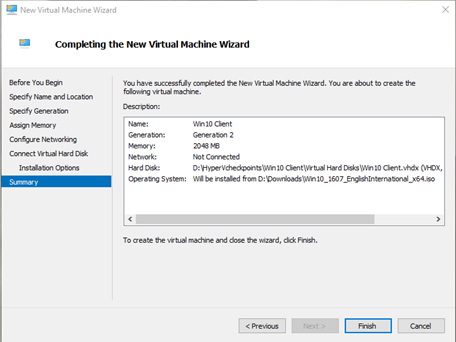
Finally, the program will list all your settings and choices again. You review carefully again, if everything is OK, then click Finish to proceed to create the virtual machine.
Once created, proceed to open the virtual machine and install the operating system as usual.
