
Do you ever need to use a file on your home computer while you’re at the office? Or want to help your parents fix computer errors but live too far away? RustDesk is your savior. This is a completely free, safe and extremely easy-to-use remote computer control software. Don’t worry if you’re not tech savvy, AnonyViet will show you step by step in the easiest way to understand.
| Join the channel Telegram belong to AnonyViet 👉 Link 👈 |
What is RustDesk?
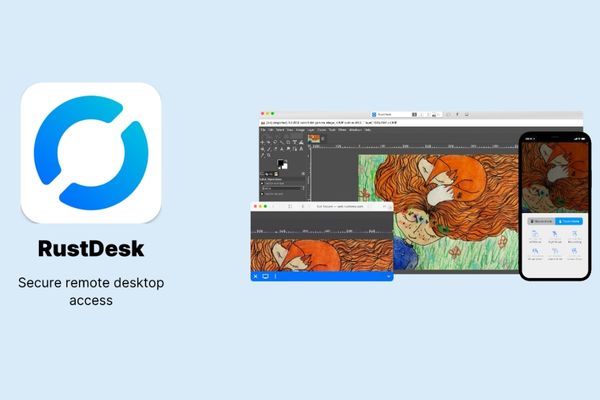
RustDesk is an open source remote computer control software, built with three core criteria: security, privacy and performance. RustDesk’s biggest difference compared to its competitors is the ability to host its own server, giving you full control over your data and infrastructure.
- Absolute security: All connections are end-to-end encrypted according to the TLS 1.3 standard, ensuring that no third party can snoop on your data, even when using a public server.
- Outstanding performance: Written in the Rust programming language, known for its speed and safety, RustDesk delivers a smooth, low-latency experience thanks to a custom video decoder.
- Full features: You can easily control your computer, transfer files between two devices, synchronize your clipboard and chat directly during the connection session.
- Flexibility in use: You can choose to connect via RustDesk’s available public servers for immediate use, or set up your own private server for maximum privacy and control.
Instructions for installing RustDesk client on Windows 11
Installing the client (software on the controlled machine and the control machine) is extremely quick and simple via the Windows command line tool.
- Open Start Menu, type Command Prompt or Terminal.
- Right click on the search result and select Run as administrator.
- In the command line window, type the following command and press Enter:
winget install –id RustDesk.RustDesk
- Wait a moment for Windows to automatically download and install the software.
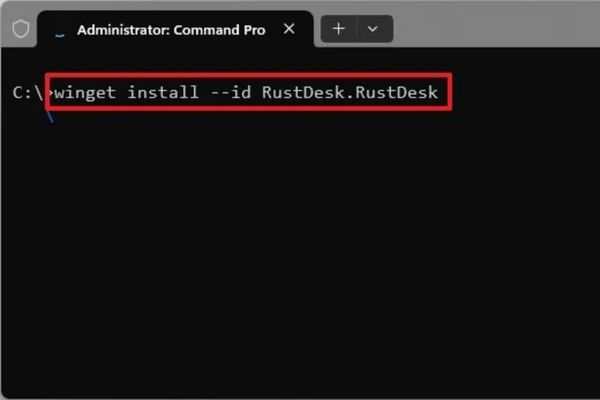
Once completed, you can open RustDesk and start connecting right away. However, at this step, connections will go through RustDesk’s public server. If you want higher security and performance, move on to setting up your own server.
How to set up a self-hosted RustDesk server
To have full control over data and optimize connection performance within the internal network, self-hosting a server is the ideal choice.
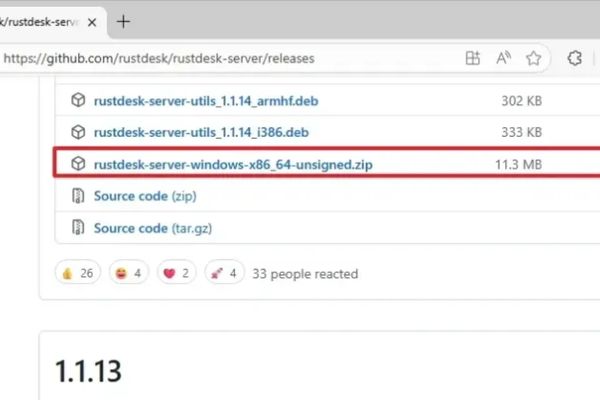
- Once downloaded, right-click on the .zip file and select Extract all… to decompress.
- In the extracted folder, right click on the file RuskDeskServer.Setup.exe and choose Run as administrator.
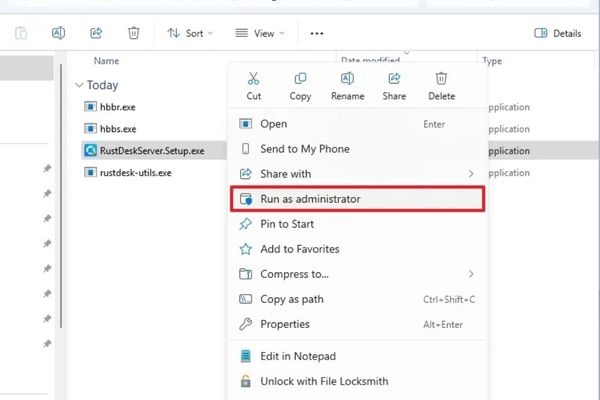
Note: Because this is an unsigned application, Windows may display a warning. Click “More info” and select “Run anyway” to continue.
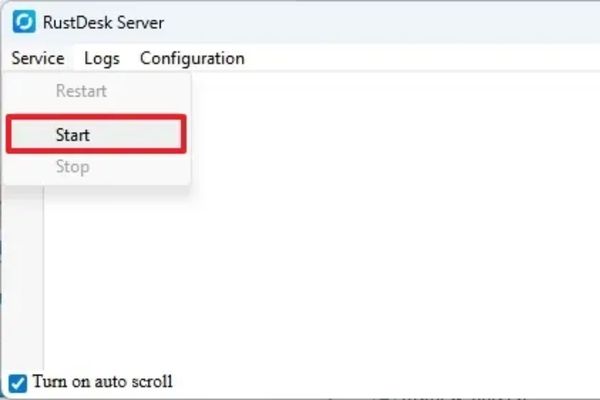
- Once installed, open RustDesk Server from the Start Menu. If the service is not running, go to section Service and choose Start.
- In the RustDesk Server interface, you will see a long string of characters in the entry key. Select and copy (Ctrl + C) this string, because you will need it in the next step.
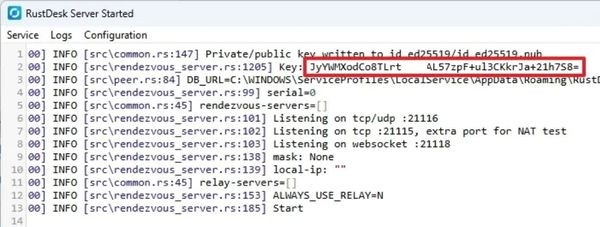
At this point, your server is ready to operate. Its role is as an intermediary that helps clients “find” each other and establish a connection, helping to increase speed and stability.
Once the server is running, you need to “show” client computers how to connect to it instead of the public server.
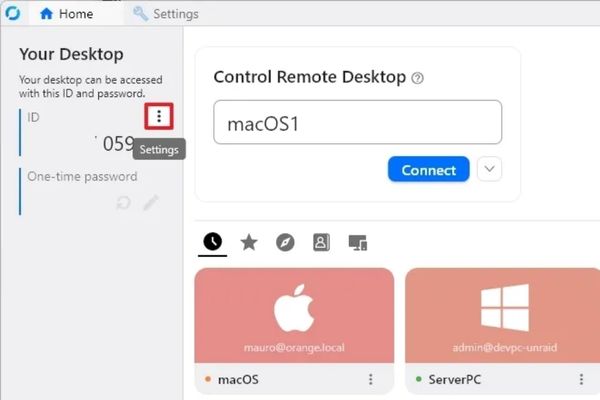
- Open the RustDesk application on your computer.
- Click the menu button (three dot icon) on the left and select Settings.
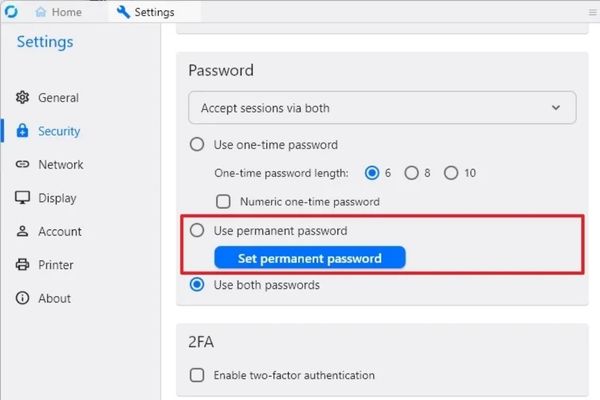
- Set up a permanent password (optional but recommended):
- Switch tabs Security > Click Unlock security settings.
- Select Use permanent password (Use a fixed password) and set a strong password for the device.
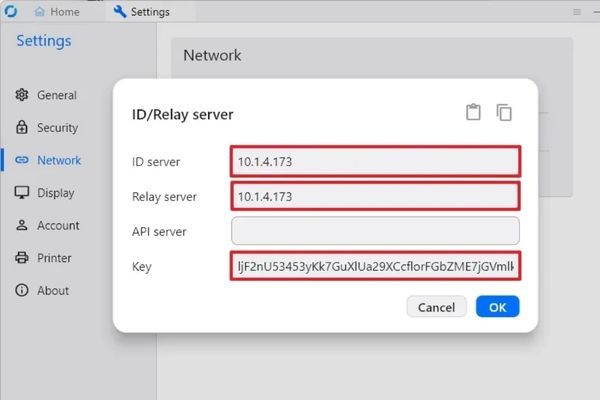
- Switch tabs Network > Click Unlock network settings.
- In the ID/Relay server section, fill in the following information:
Server ID: Enter the IP address of the computer running RustDesk Server.
Relay Server: Enter the same IP address.
Key: Paste the character string “key” that you copied from the server in the previous step.
- Click OK to save.
You need to repeat these configuration steps on all computers that you want to connect through your private server.
How it works: The Client will contact the ID Server (hbbs) to determine the location of the remote device. It will then attempt to establish a direct (P2P) connection. If this is not possible due to firewalls or network restrictions, the session will be forwarded through the Relay Server (hbbr).
To allow devices from outside the Internet to connect to your self-hosted server, you need to open the following ports on the firewall:
- TCP: 21115 (for ID server), 21116 (for relay server), 21117
- UDP: 21116 (used for relay communication)
How to remotely connect to another computer
Once everything is set up, connecting is extremely simple.
- Open the RustDesk application on the computer you use to control.
- In box “Control Remote Desktop“, enter the ID of the computer you want to connect to.
- Press the button Connect.
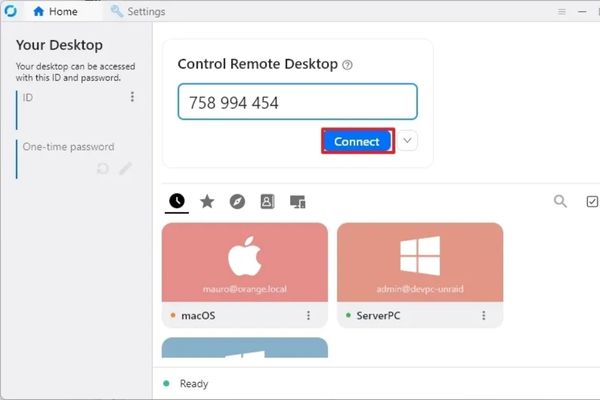
- Enter the password (the fixed password you set) and press OK.
Once connected, a toolbar will appear at the top of the screen. From here, you can access various options like transferring files, chatting, adjusting image quality (for example, select “Good image quality” for the best image), and even record the session.
Conclude
By following the steps above, you can successfully set up a powerful and secure remote control system with RustDesk. Whether you choose the convenience of a public server or the absolute control of a self-hosted server, RustDesk offers a flexible and efficient solution. This is truly a valuable tool for anyone who needs to access and manage Windows 11 devices remotely.