
How to lock notes on iPhone Helps you feel more secure when lending your phone to others. Therefore, private log lines or important data will never be exposed. This operation is extremely simple and anyone can do it right at home. Let’s go together AnonyViet Find out now how to do it!
📢 Join the channel Telegram belong to AnonyViet
Update new articles, cool tools and IT tips fastest
Why is it necessary to protect personal information on the phone?
Did you know that Apple’s default Notes app contains an extremely cool feature? That is the ability to lock individual items without having to lock the entire application. This feature is truly a “savior” if you have a habit of storing sensitive things. Such as passwords for social network accounts, financial and banking information, PIN codes, or simply private diary entries filled with emotions.
Instead of worrying about someone borrowing your device and accidentally reading it, you can completely proactively protect them. What’s more, once you’ve set up protection, all of this content is automatically locked on all of your other Apple devices. The only condition is that note synchronization must be enabled. Thanks to that, your data is always safe whether you are holding your phone or sitting in front of your computer screen.
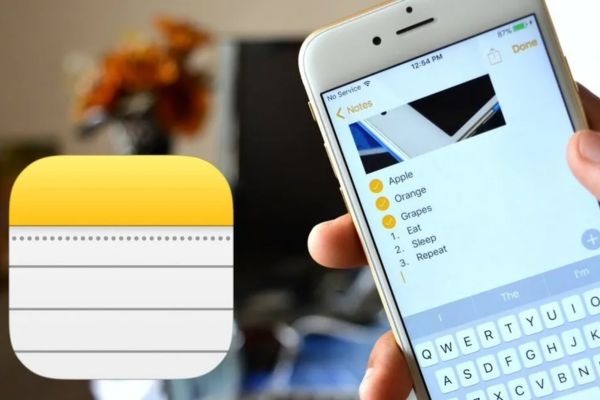
Instructions on how to lock notes on iPhone
Everything is built right into the device by Apple. Below are specific operations for you to follow:
Step 1: First, find and launch it Notes application on the home screen.
Step 2: Next, you open an old item that you want to hide, or create a new one by clicking the edit icon in the bottom corner.
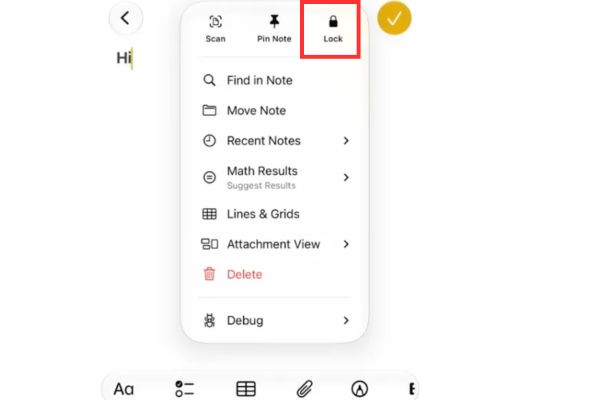
Step 3: Now, pay attention to the top right corner of the screen, you will see the More icon (3 dots). Touch it lightly.
Step 4: From the menu that appears, just select the button Lock.
Once completed, this item will be strictly protected. From now on, it can only be accessed if available Face IDTouch ID or device passcode. It’s really safe and convenient, right?
How to review hidden content?
After successfully locking, many of you will surely wonder how to read or edit the content inside. Don’t worry, opening it is just as easy as locking it.
Step 1: You access the application and find the locked item (usually with a lock image next to it).
Step 2: Tap on it to ask to open it.
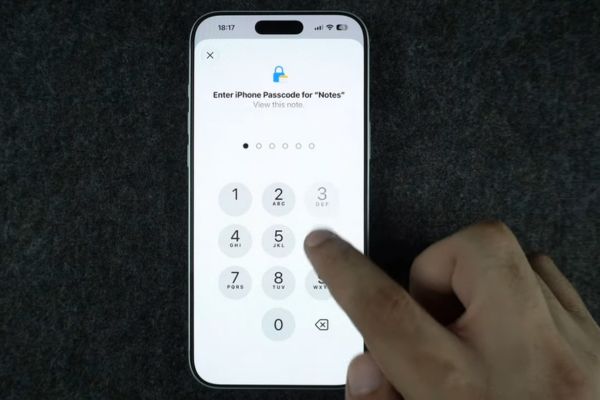
Step 3: The system will ask you to authenticate with your face, fingerprint or password.
Once the correct owner has been verified, the content will appear in full for you to comfortably view and edit. Therefore, you never have to worry about forgetting the information you have saved.
How to remove protection when no longer needed
Sometimes, the information inside is no longer important and you find it a bit annoying to have to scan your face every time you open it. At this point, you can completely remove this protective layer. If you have ever applied the above method of locking notes iPhone and now want to remove it, follow these extremely simple instructions:
Step 1: Launch the Notes application on your device.
Step 2: Find the item you want to remove protection from.
Step 3: Tap on it and authenticate (with Face ID/Touch ID/Passcode) to open the content first.
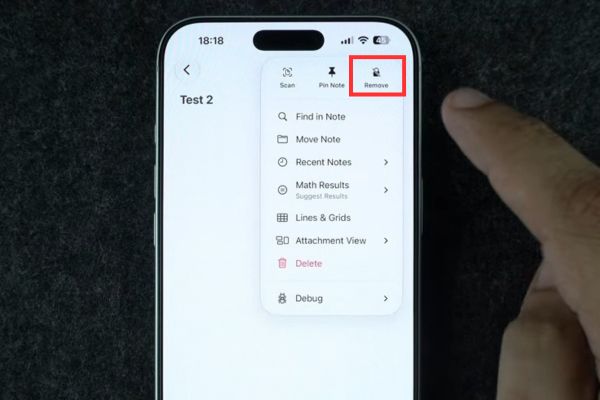
Step 4: Click on the icon 3 dots in the top right corner of the screen.
Step 5: Finally, you touch the button Remove has a crossed out lock image.
That’s it, from now on it has returned to a normal section, anyone who holds the phone can read it without any problems.
Steps to set up a custom password
If you decide to choose the highest security option, set up a separate password. This process is not done directly in the Notes application but must be done in the system Settings.
Step 1: You exit to the main screen and log in Settingsthen scroll down to find the item Apps.
Step 2: Here, you find and click on the item Notes.
Step 3: On the next page, find the section Password and touch it.
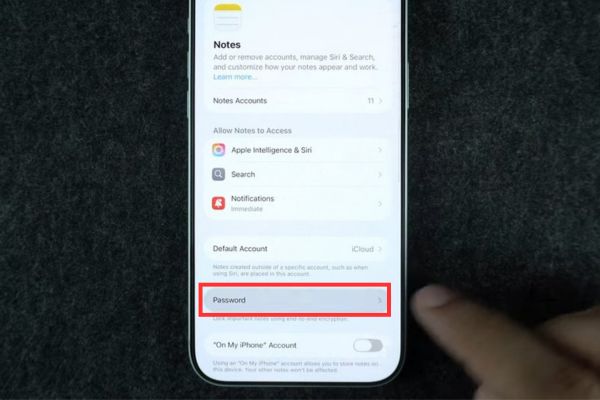
Step 4: Continue selecting the line Use custom password.
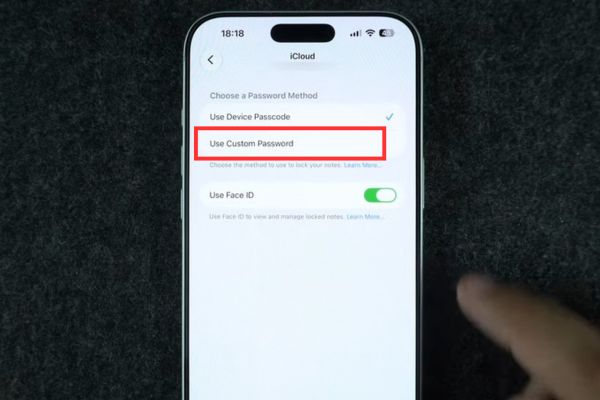
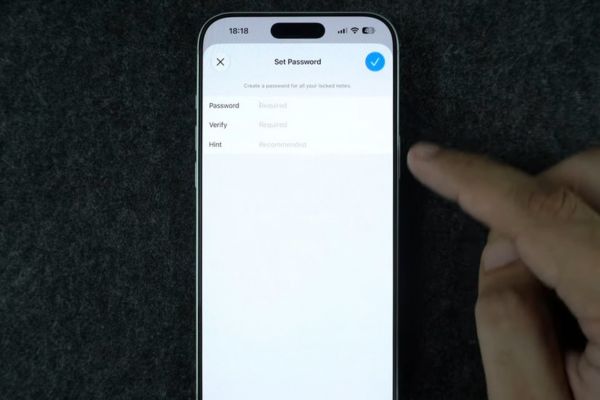
Step 5: The system will ask you to authenticate again. Then, you just need to enter the new password you want and you’re done.
Conclusion
As can be seen, How to lock notes on iPhone This is truly a valuable feature that Apple equips users with. Whether you choose to use Face ID or set up a custom password, your data is always safe. Please share this tip with those around you if you find it really useful.
Frequently Asked Questions (Q&A)
1. Do locked notes sync to iPad or Mac?
Have. All your locked notes are automatically locked and synced across devices with note sync enabled.
2. Can I use Face ID to open notes?
Absolutely. You can use Face ID, Touch ID, or your device’s passcode to authenticate and open content quickly.
3. How to change to using a private password instead of a machine password?
You just need to go to Settings -> Applications -> Notes -> Password. Here, select “Use custom password”, authenticate and set a new password to your liking.