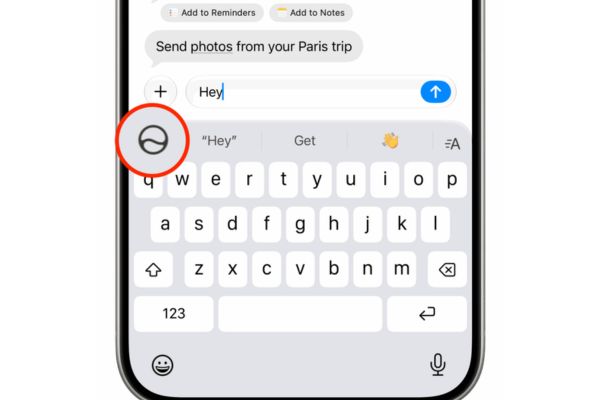

How to expand photos on iOS 27 essentially leveraging the power of Apple Intelligence to save photos with corners. You don’t need to type complicated commands, AI still understands and fills in the gaps. Let’s go together AnonyViet Find out the detailed steps.
📢 Join the channel Telegram belong to AnonyViet
Update new articles, cool tools and IT tips fastest
What is the Extend AI feature and how does it work?
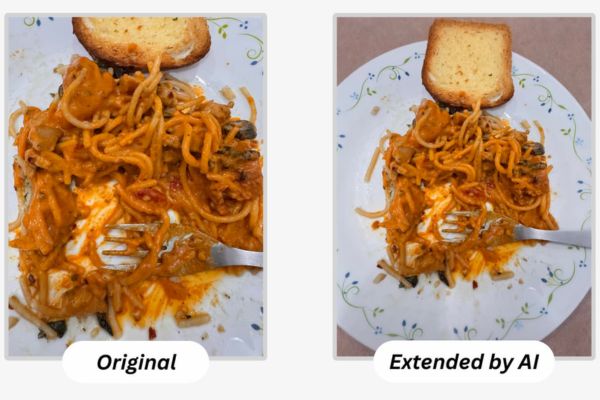
Surely you have heard about dozens of AI tools that create images with text that are taking the technology market by storm today. Apple of course also refused to sit still and watch its competitors thrive when they launched their own Image Playground application. That is it Extend feature built straight into the default Photos app. It uses artificial intelligence to analyze the context, then automatically adds parts of the scene that don’t exist to your photo in a very reasonable way.
Unlike specialized AI tools that always force you to think up long commands, this new feature operates in a completely automatic mechanism. That means you just need to use the familiar basic zoom and crop tool to decide how much new space you want the AI to create for the photo. It’s really easy and anyone can do it! However, it should be noted that a small limitation is that the system only allows creating a maximum of 25 percent of the image area on each side.
List of supported devices
Regarding the list of supported devices, because this feature uses the core Apple Intelligence Extremely heavy so it’s quite picky about the machine. You will need to hold the device in your hand iPhone 15 Pro and above running the latest operating system. For iPad users, your device must use the A17 Pro chip like the new iPad mini line, or use Apple silicon chip for the Air and Pro lines.
On the Mac front, you must own a device running chips from M1 to M6 or the brand new MacBook Neo line running the A18 Pro chip with macOS 27 Golden Gate operating system. Sadly, older Mac lines using Intel chips have officially been left out by Apple in this AI game.
Instructions on how to expand photos on iOS 27
Step 1: Open Photos app on your device and select an image you want to expand.
Step 2: Tap on the edit icon, then you switch to the tab Tools located in the menu bar.
Step 3: Select the tool now Extend.
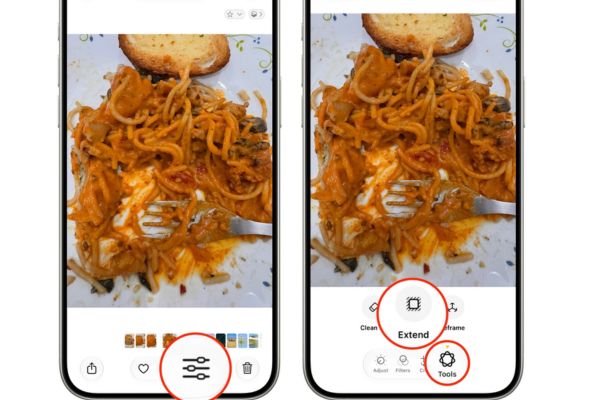
Step 4: Use two fingers together to zoom or drag the corners at the edges of the photo. This helps you adjust how much and how the AI will fill the empty space. When finished, click the button Extend on screen.
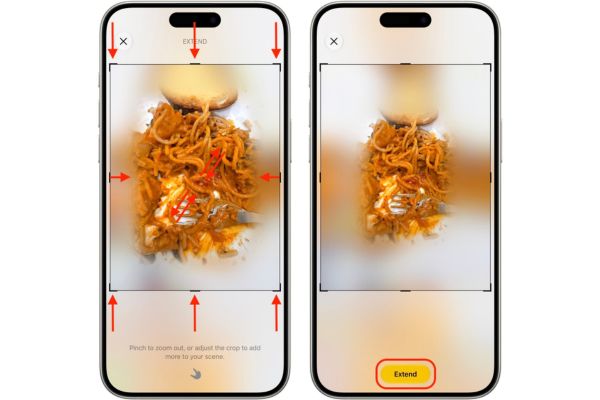
Step 5: Wait a moment for AI to work. Once completed, just touch the new image to compare how it differs from the original.
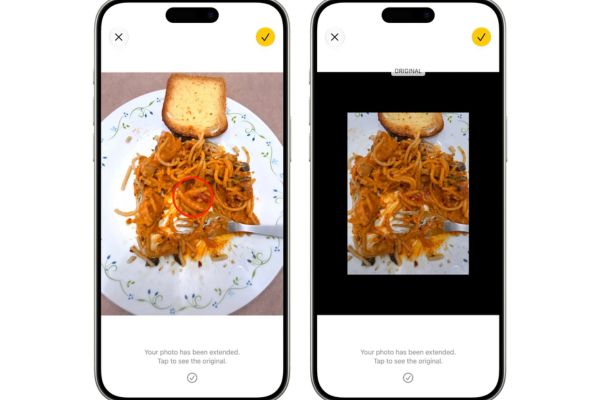
Step 6: If you are satisfied with the results you just created, click on the check mark icon, then select Done to save the masterpiece.
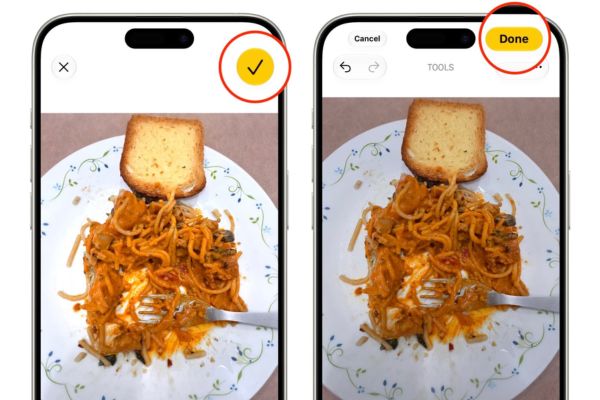
One interesting thing is that this tool edits directly on the original file and does not create a new file. So just go to the same location in the library and you will see it. Currently, Apple has not yet collected AI photos into a separate folder. This sometimes makes me a bit confused when I want to find edited photos again.
In return, if you swipe up to view the information of a photo, you will see the text Modified with Extend An image appears to mark this as a product with the help of AI.

Instructions on how to expand photos on macOS 27
In fact, the operating mechanism on the computer is exactly the same as the way to expand photos on iOS 27 that I just instructed above. Please follow these steps:
Step 1: Launch Photos app on macOS 27 and open the image to be processed.
Step 2: Click on the button Edit located in the top corner.
Step 3: Redirect to tab Tools in the menu bar above.
Step 4: Click the button Extend to call AI to work.
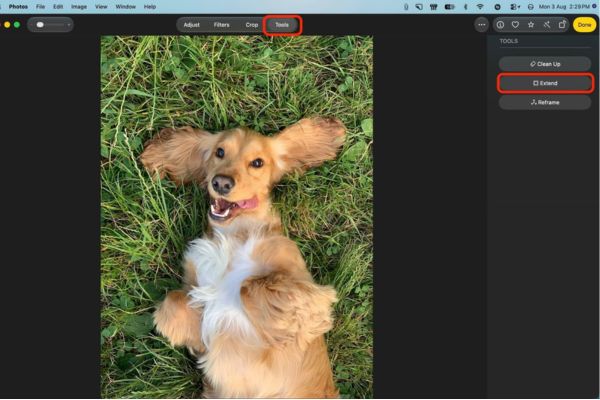
Step 5: Select the desired aspect ratio or drag the edges with the mouse to expand the space on the hypothetical canvas.
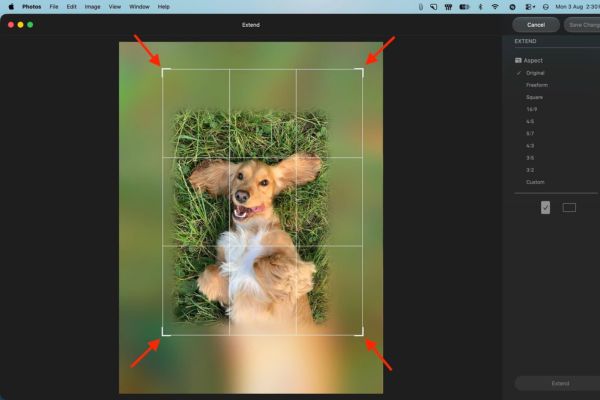
Step 6: Click the button Extend and patiently wait for Apple Intelligence to show off its drawing skills.
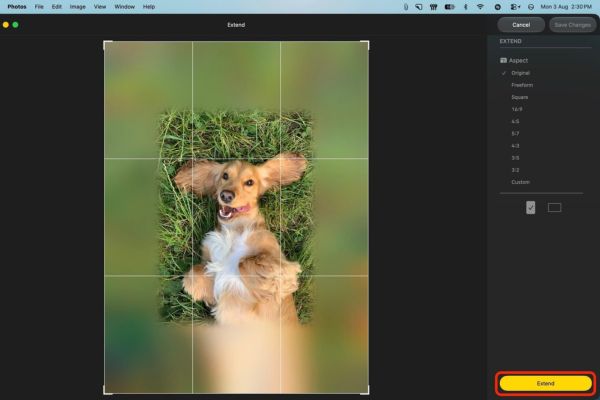
Step 7: Finally, press Save change at the top then select Done is complete.
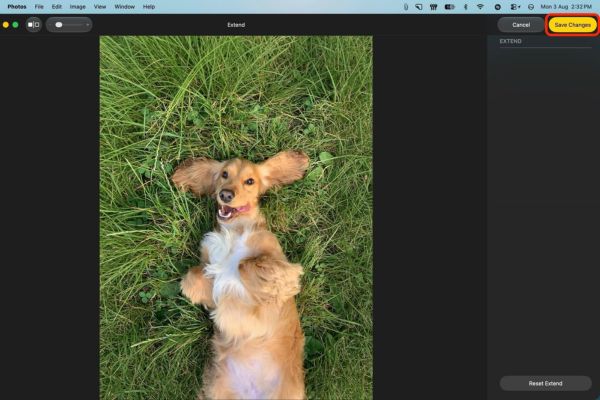
Similar to phones, photos made on Mac are also labeled Modified with Extend. You just need to click on the i icon or press the key combination Command + I you will see it immediately.
How to restore original photos?
Sometimes AI also has processing moves that go underground, making the photo look very funny. If you fall into this situation after trying how to expand photos on iOS 27, don’t worry too much because everything can be saved.
Simply return to the editing screen in the Photos app, whether on iPhone, iPad, or Mac. Then find and tap Revert to Original. Your photo will immediately return to its original state as if there had never been a separation. This feature is actually very psychological, helping users feel more confident when experiencing new technologies.

Conclusion
Overall, How to expand photos on iOS 27 is an extremely useful trick that any Apple ecosystem user should know. Although there are still certain limitations, the convenience it brings cannot be denied.
Frequently Asked Questions (Q&A)
1. Is the Extend feature on iOS 27 free?
Yes, this feature is completely free and built into the Photos app. However, Apple has a daily usage limit, and you can increase this limit by subscribing to iCloud+ or Apple One.
2. Can I use text to ask the AI to draw more details as I want?
No, the Extend feature works automatically based on the photo context. You can only use the zoom and crop tools to select the area you want to expand up to 25 percent on each side, but you cannot enter text commands.
3. How to know if a photo has been edited with AI?
Photos expanded with AI will be labeled Modified with Extend. On iPhone or iPad, swipe up the photo to view, and on a Mac, press Command + I to check the information.