• Home
  • News
  • Software
  • Knowledge
  • MMO
  • Tips
  • Security
  • Network
  • Office
AnonyViet - English Version
  • Home
  • News
  • Software
  • Knowledge
  • MMO
  • Tips
  • Security
  • Network
  • Office
No Result
View All Result
  • Home
  • News
  • Software
  • Knowledge
  • MMO
  • Tips
  • Security
  • Network
  • Office
No Result
View All Result
AnonyViet - English Version
No Result
View All Result

How to connect AirPods to Windows computers and Macbooks

AnonyViet by AnonyViet
January 13, 2025
in Tips
0

Connect AirPods to the computer is a great feature that helps you get the most out of your headphones' wireless capabilities, whether you're using a Windows computer or a MacBook. With a few simple steps, AirPods can easily connect to devices outside the Apple ecosystem, allowing you to experience smooth sound for work and entertainment, from online meetings to private music enjoyment. private.

Join the channel Telegram belong to AnonyViet 👉 Link 👈
How to connect AirPods to Windows computers and Macbooks

How to connect Airpods to Windows computer

Connecting AirPods to a Windows computer is quite simple, it only takes a few steps as follows:

Step 1: First, put your AirPods in the charging case, close the lid and wait a few seconds for them to be ready to connect. Make sure the headphones are at least 20% battery so that the pairing process is smooth.

Step 2: AirPods connect to Windows computers via Bluetooth, so you need to enable this function. Visit Settings > Devices > Bluetooth & other devices to turn on Bluetooth. On Windows 11, you can also turn on Bluetooth easily through the Quick Settings menu.

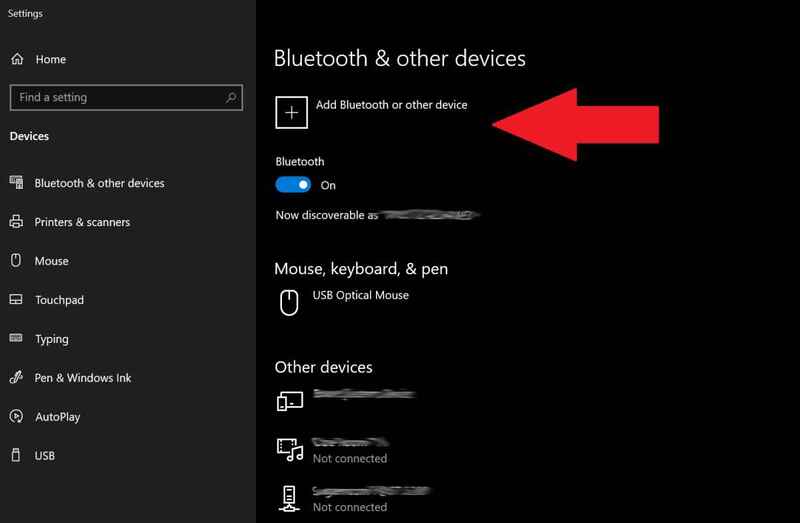
Step 3: At the top of the list, you will see the option Add Bluetooth or other device. Click there to add AirPods.

Click Add Bluetooth or other device

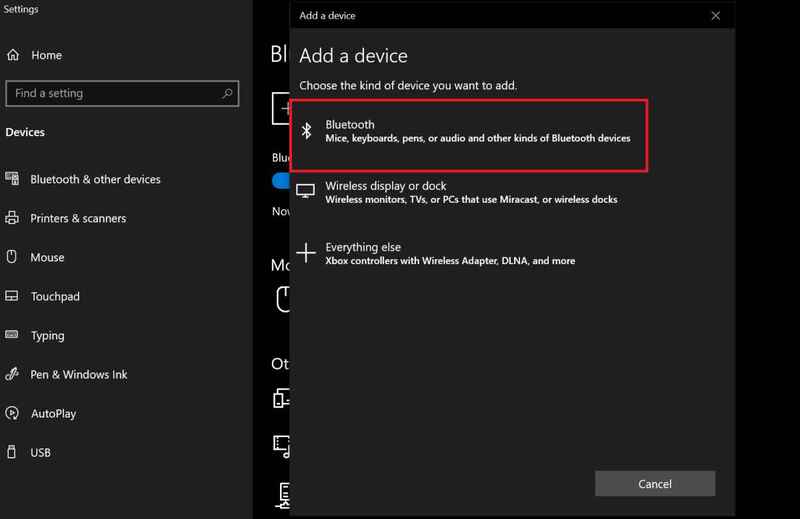
Step 4: In the list of options that appears, select Bluetooth to search for new devices.

Select Bluetooth
Select Bluetooth

Step 5: Open the lid of the AirPods box and Press and hold the small round button on the back box until the LED inside (for older AirPods) or the light on the front (for AirPods Pro) flashes.

Press and hold the small round button on the back of the box

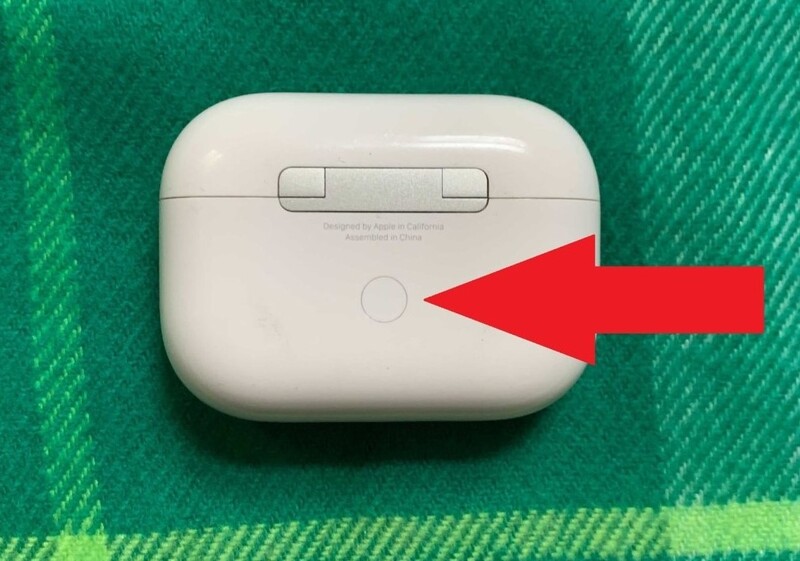
Step 6: After holding the button for a while, the status light will turn on whitesignaling that AirPods are ready to connect.

The status light will turn white

Step 7: After a few seconds, a list of available Bluetooth devices will appear. Find your AirPods icon and click it to connect.

Find the AirPods icon

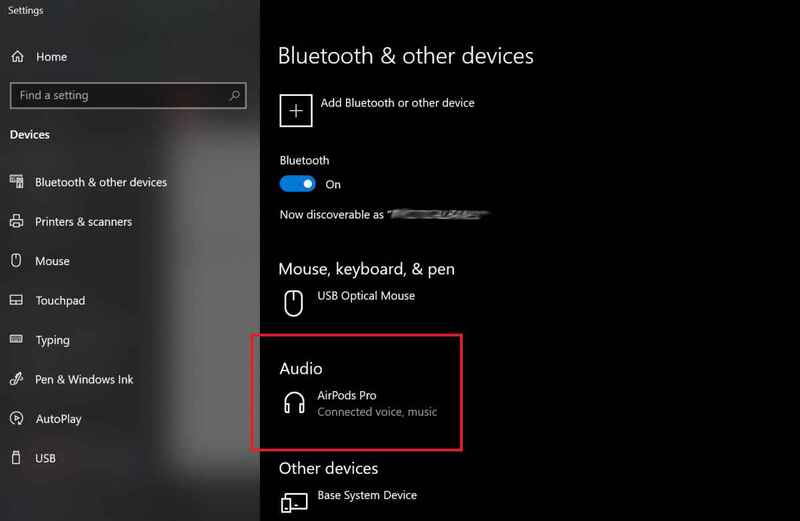
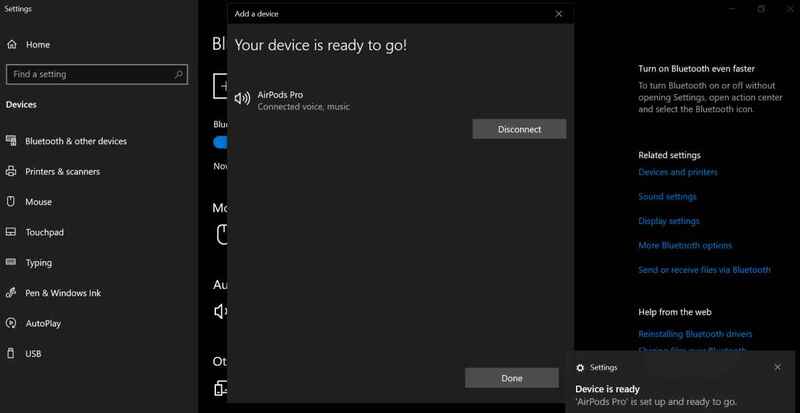
Step 8: A notification will appear indicating your device is ready. Click Done. From now on, AirPods will automatically connect to the computer.

Click Done
Click Done

See more: Instructions for updating software for AirPods

How to connect AirPods to MacBook

Once you have your AirPods connected to your iPhone, they will automatically pair with your MacBook via the feature Apple Handoff. You just need to open the AirPods box, click on options Sound Control in the Menu bar of your MacBook and select your AirPods. However, if you want to do the connection process manually, here's how to do it.

Step 1: Place both earbuds in the charging case and open the lid. Press and hold the setup button on the back of the case (or noise control button for AirPods Max) until the status light flashes white.

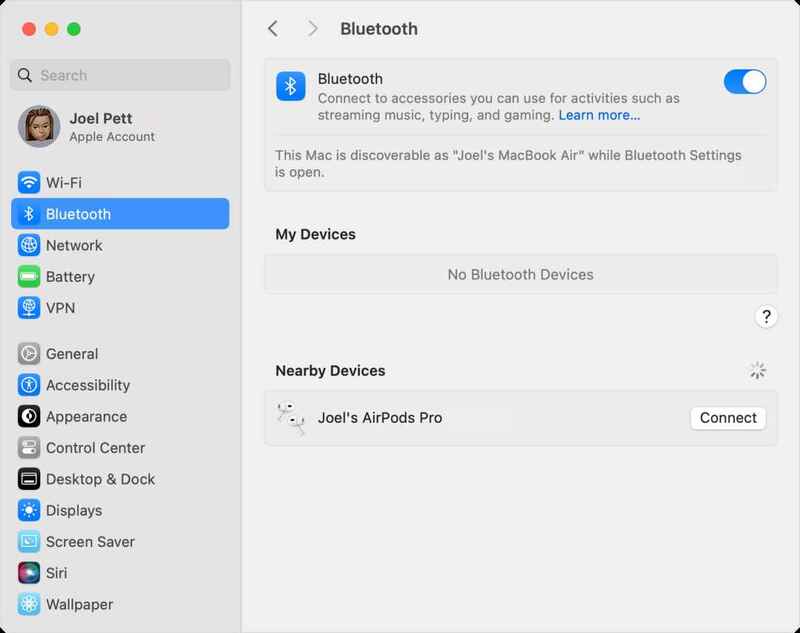
Step 2: On MacBook, open Apple Menu > System Settings > Bluetooth and make sure this feature is enabled.

Step 3: In the Device List section, find your AirPods and click Connect to connect.

Click Connect
Click Connect

See more: How to change Touch Settings for AirPods and AirPods Pro

Conclusion

Connect AirPods to the computer Windows or MacBook are no longer complicated. Whether you need to focus on work or relax with music, AirPods provide convenience and smooth connection on both platforms. With simple steps, you will no longer be limited to the Apple ecosystem and can still take advantage of wireless headphones anytime, anywhere.

Tags: AirPodscomputersconnectMacbooksWindows
Previous Post

Instructions for turning off Meta AI on Facebook and Instagram

Next Post

Instructions for parallel installation of Ubuntu 20.04 with the latest Windows 10 2020

AnonyViet

AnonyViet

Related Posts

Get free Cambridge courses to prepare for IELTS, Starters, Movers
Tips

Get free Cambridge courses to prepare for IELTS, Starters, Movers

June 4, 2026
How to record reaction videos with Android phones, no app needed
Tips

How to record reaction videos with Android phones, no app needed

June 1, 2026
Instructions on how to get Google AI Pro 1 year for free for new accounts
Tips

Instructions on how to get Google AI Pro 1 year for free for new accounts

June 1, 2026
Top free AI tools to help write, test and optimize content
Tips

Top free AI tools to help write, test and optimize content

June 1, 2026
Instructions for receiving Lovable Pro 12 months for free
Tips

Instructions for receiving Lovable Pro 12 months for free

May 29, 2026
Instructions for receiving 1 month of ElevenLabs Creator for free worth
Tips

Instructions for receiving 1 month of ElevenLabs Creator for free worth $22

May 25, 2026
Next Post
Instructions for parallel installation of Ubuntu 20.04 with the latest Windows 10 2020

Instructions for parallel installation of Ubuntu 20.04 with the latest Windows 10 2020

0 0 votes
Article Rating
Subscribe
Login
Notify of
guest

guest

0 Comments
Oldest
Newest Most Voted
Inline Feedbacks
View all comments

Recent News

Get free Cambridge courses to prepare for IELTS, Starters, Movers

Get free Cambridge courses to prepare for IELTS, Starters, Movers

June 4, 2026
How to check network speed on Apple TV when the image is jerky or lagging

How to check network speed on Apple TV when the image is jerky or lagging

June 3, 2026
Instructions on how to prevent acquaintances from seeing your Tiktok

Instructions on how to prevent acquaintances from seeing your Tiktok

June 2, 2026
How to record reaction videos with Android phones, no app needed

How to record reaction videos with Android phones, no app needed

June 1, 2026
Get free Cambridge courses to prepare for IELTS, Starters, Movers

Get free Cambridge courses to prepare for IELTS, Starters, Movers

June 4, 2026
How to check network speed on Apple TV when the image is jerky or lagging

How to check network speed on Apple TV when the image is jerky or lagging

June 3, 2026
Instructions on how to prevent acquaintances from seeing your Tiktok

Instructions on how to prevent acquaintances from seeing your Tiktok

June 2, 2026
AnonyViet - English Version

AnonyViet

AnonyViet is a website share knowledge that you have never learned in school!

We are ready to welcome your comments, as well as your articles sent to AnonyViet.

Follow Us

Contact:

Email: anonyviet.com[@]gmail.com

Main Website: https://anonyviet.com

Recent News

Get free Cambridge courses to prepare for IELTS, Starters, Movers

Get free Cambridge courses to prepare for IELTS, Starters, Movers

June 4, 2026
How to check network speed on Apple TV when the image is jerky or lagging

How to check network speed on Apple TV when the image is jerky or lagging

June 3, 2026
No Result
View All Result
  • Home
  • News
  • Software
  • Knowledge
  • MMO
  • Tips
  • Security
  • Network
  • Office

wpDiscuz
0
0
Would love your thoughts, please comment.x
()
x
| Reply