How to adjust display screen size is an essential skill for anyone who uses a computer. Adjusting the size will help you have a better experience when watching videos, playing games, working or studying. In this article, AnonyViet will guide you how to adjust the display size on Windows 11.
| Join the channel Telegram belong to AnonyViet 👉 Link 👈 |
Why is it necessary to adjust the display screen size?
Display ratio, also known as DPI (Dots per inch), is a unit of measurement for the number of pixels that can be displayed on one inch of the screen. Display scale affects the size of on-screen elements such as text, icons, apps, and other elements. If you increase the display scale, things will appear larger, while decreasing the display scale will make them smaller.
Adjusting display scaling is important if you have poor eyesight or just want to make it easier on your eyes. Additionally, if you use a screen with high resolution but small size, you also need to adjust the display scale to avoid blurring or difficulty reading.
How to adjust display screen size
Method 1: Adjust using Display Settings
The simplest way to adjust the above display scale Windows 11 is to access settings on Windows. You can follow these steps:
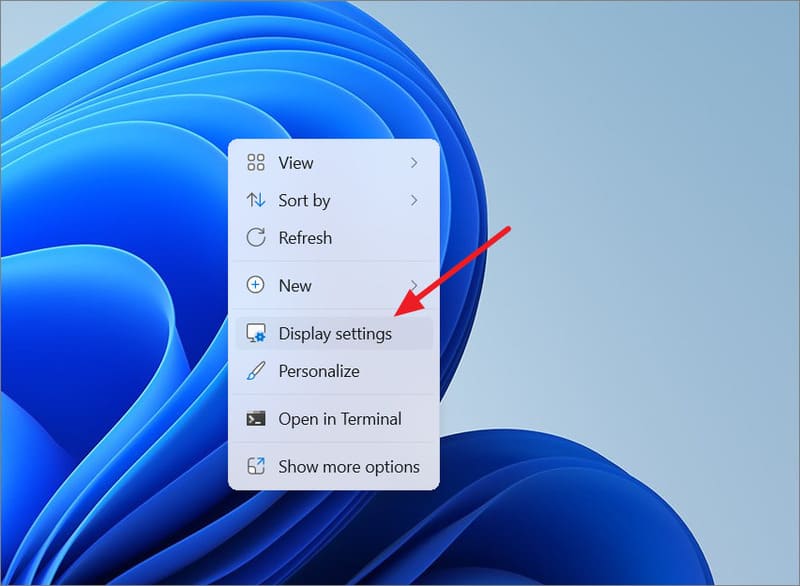
Step 1: Right click anywhere on the wallpaper and select 'Display settings'
Or you can press the keyboard shortcut Windows + I > Select 'System' > 'Display.'
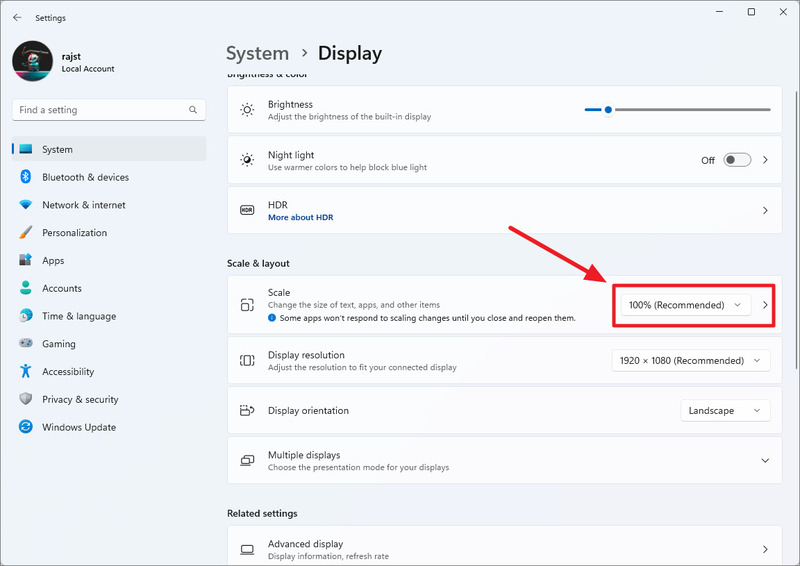
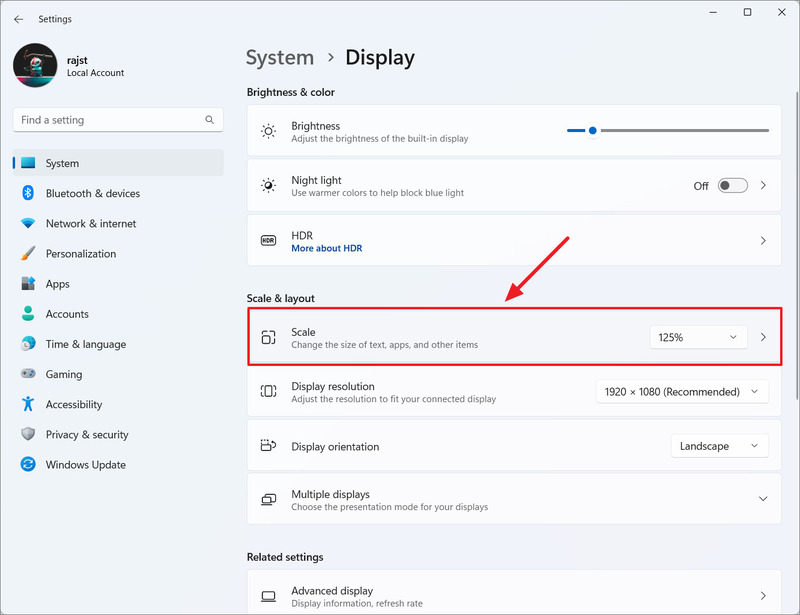
Step 2: Scroll down to 'Scale & layout' and click the drop-down list next to 'Scale'
Step 3: Choose an appropriate scale setting. The available options are 100%, 125%, 150% and 175%.
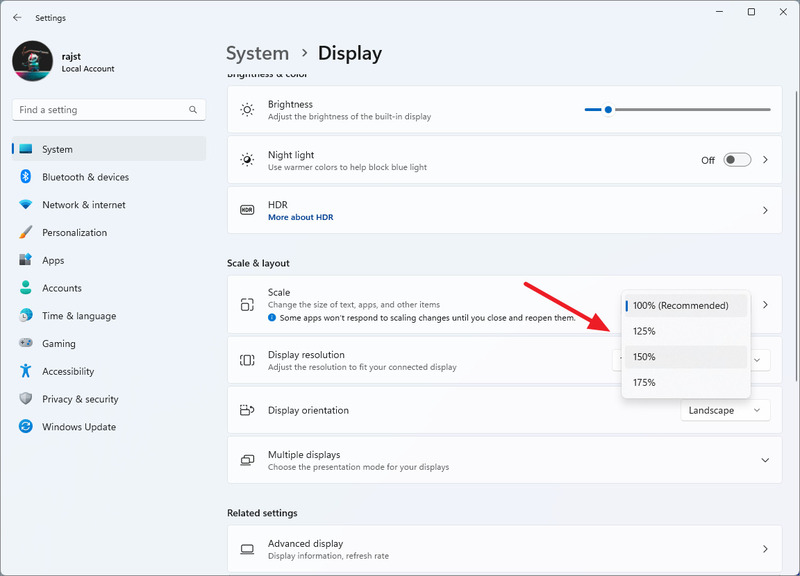
Step 4: Once selected, the size of text, icons, and interface elements will change accordingly.
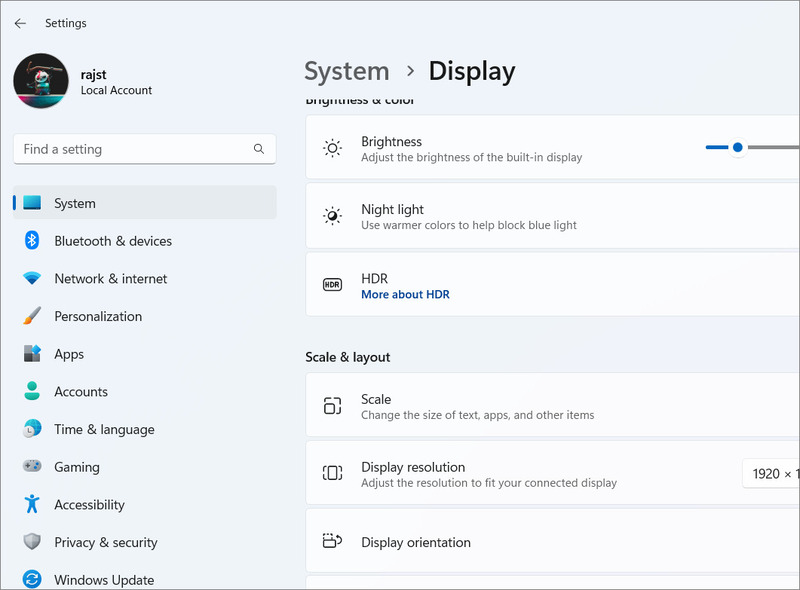
Step 5: If the default options are not suitable, you can set a custom ratio. by clicking directly on the 'Scale' box instead of the drop-down list.
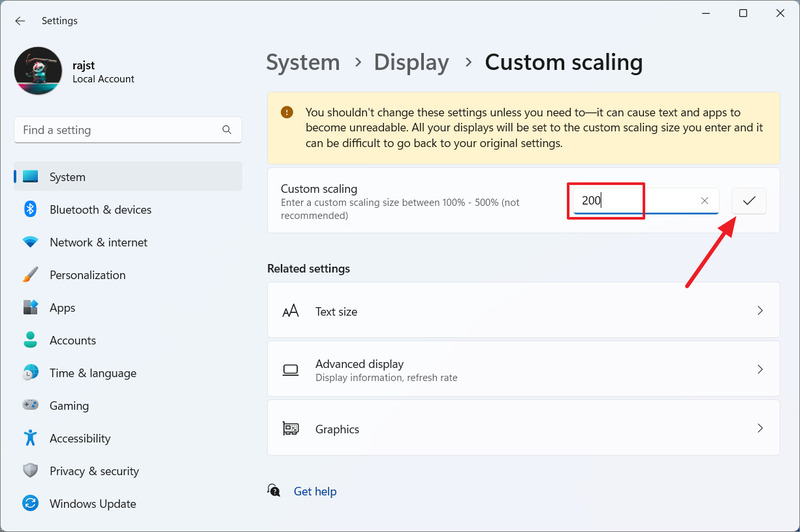
Step 6: Enter a custom scale value from 100% to 500% in the text box and click the check mark
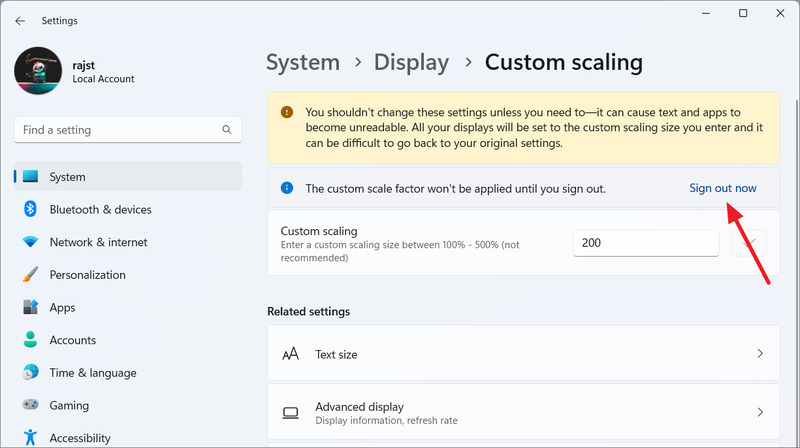
Step 7: To apply the new rate, click 'Sign out now' and then sign in again.
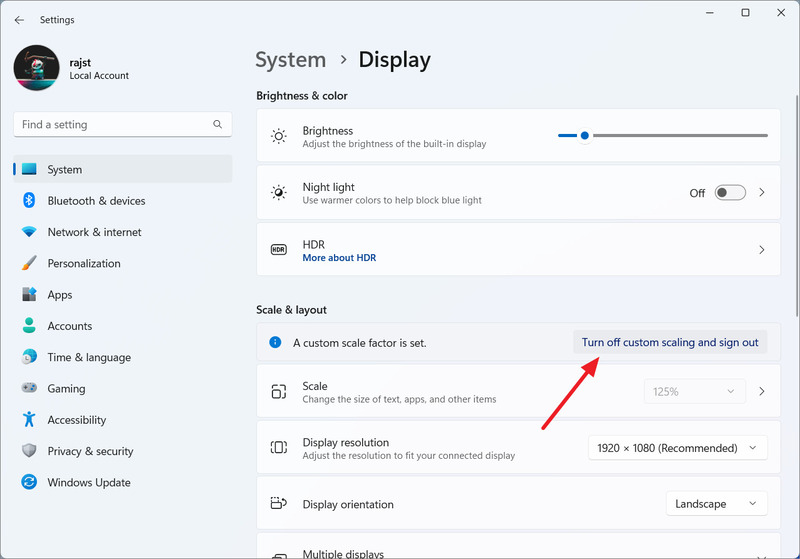
Step 8: After setting a custom scale, the 'Scale' menu will be disabled. If you want to go back to the previous default settings, you must turn off custom scaling by clicking 'Turn off custom scaling and sign out'
Method 2: Adjust using Registry
Although not recommended, you can still change display scaling settings using Registry Editor as a fallback if the regular Settings app doesn't work.
This is another way to configure custom scaling on Windows 11, but remember to back up the Registry before making any changes.
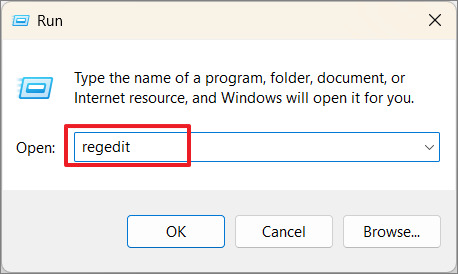
Step 1: Press Windows + R, then type regedit and press Enter to launch Registry Editor.
Step 2: Go to the folder below
HKEY_CURRENT_USER\Control Panel\Desktop
Step 3: Find and double-click 'LogPixels' on the right panel. If you can't find it, right-click in the right pane, select New > DWORD (32-bit) Value and name the item LogPixels, and press Enter.
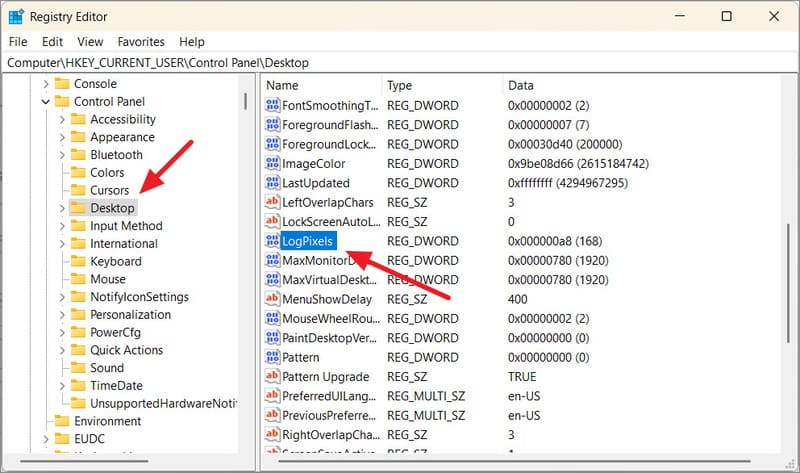
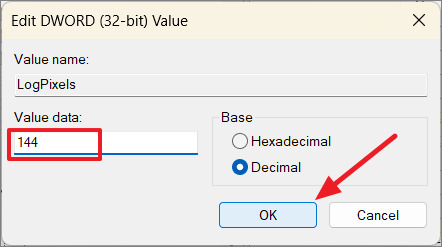
Step 4: Then, select Base as 'Decimal', enter one of the following values for your desired size and click 'OK'.
- 96 -> 100%
- 120 -> 125%
- 144 -> 150%
- 192 -> 200%
- 240 -> 250%
- 288 -> 300%
- 384 -> 400%
- 480 -> 500%
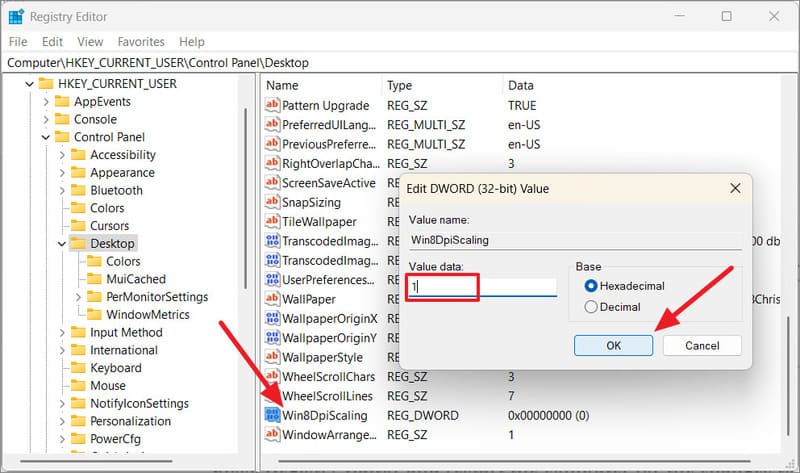
Step 5: Then, find and double-click 'Win8DpiScaling' in the right panel. If it's not there, right-click > select New > DWORD (32-bit) Value, name it Win8DpiScaling and press Enter.
Step 6: In value data, enter 0 (to disable custom scaling) or 1 (to enable custom scaling) and click 'OK'.
Step 7: Close the Registry window and restart the computer for the changes to take effect.
Epilogue
How to adjust display screen size It's not too difficult or complicated. You just need to know how to use the options and tools available on the device. By adjusting the screen size, you will be able to enjoy benefits such as: enhanced image quality, enhanced performance, reduced stress and eye strain. Wishing you a successful application!


