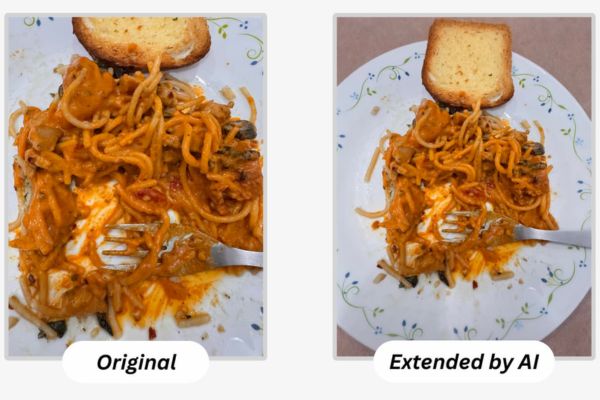

How to change the photography angle using AI through the Reframe tool will definitely surprise you. It uses 3D spatial data to intelligently fill in missing pixels. Thanks to that, your photo will have a completely new look. Let’s go together AnonyViet Explore this cool feature.
📢 Join the channel Telegram belong to AnonyViet
Update new articles, cool tools and IT tips fastest
The power of the Reframe tool
Recently, the online community has been buzzing about the super awesome Reframe feature Apple Intelligence. To put it simply, this is a tool that helps you change the angle of a captured photo. In fact, this AI way of changing photo angles works based on the 3D spatial information of the photo. It is identical to the technology platform that helps you set moving 3D Lock Screen wallpapers or expand images when set as wallpaper.
When you move the subject up, down, left or right on the editing screen, AI will automatically calculate. It then fills in the necessary pixels to recreate missing parts of the subject as well as the edges around the photo. Thanks to that, the photo looks extremely natural and not fake.
This feature works best with photos you take with your camera iPhone. If you use images downloaded from the internet, it still supports quite well. However, through practical testing, I discovered something quite interesting: all screenshots seem to be blocked by the system, not allowing the use of this Reframe tool.
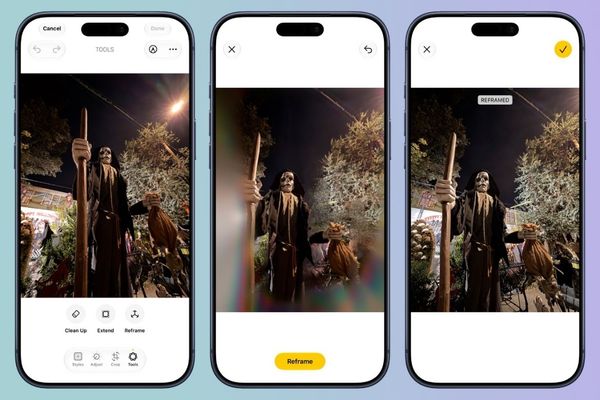
How to change the photography angle using AI on iPhone and iPad
If you are holding a supported iPhone or iPad, follow the steps below to experience it now.
Step 1: First, you need to update your device to iOS 27 or iPadOS 27.
Step 2: Set up new Siri. As a result, the Apple Intelligence system must also be successfully activated on the device.
Step 3: Open the familiar Photos app and touch any photo you want to edit.
Step 4: Click the edit icon Edit.
Step 5: Switch tabs Tools and touch the item Reframe.
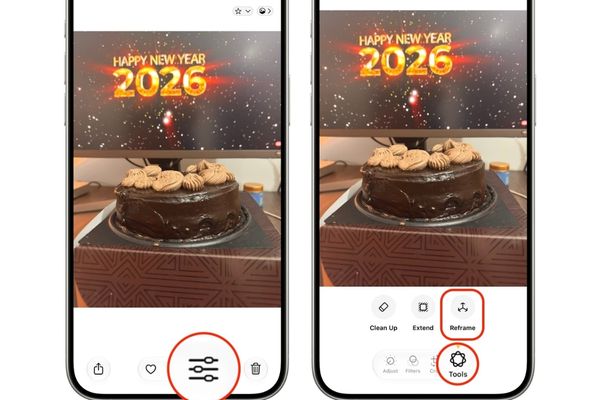
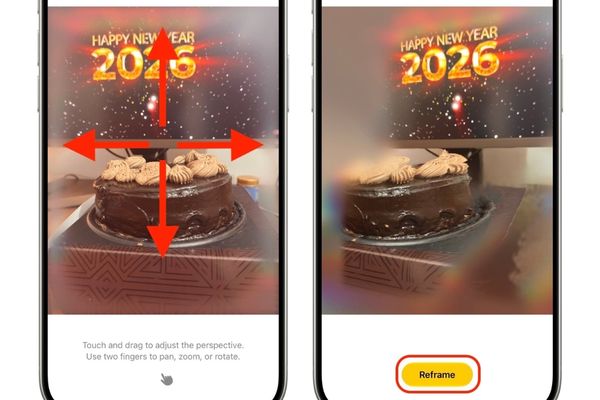
Step 6: After the system has finished preparing the image, you can freely touch and drag the photo up, down, left or right as you like. You can also use two fingers to rotate, zoom in for more space or rotate the image to best suit your eyes.
Step 7: Once you are satisfied with the subject’s new camera angle, click the button Reframe. At this point, you just need to wait a bit for AI to work its magic, filling in all the blurred or absent pixels. When you change the photography angle using AI, you will see that the machine processes very smoothly.
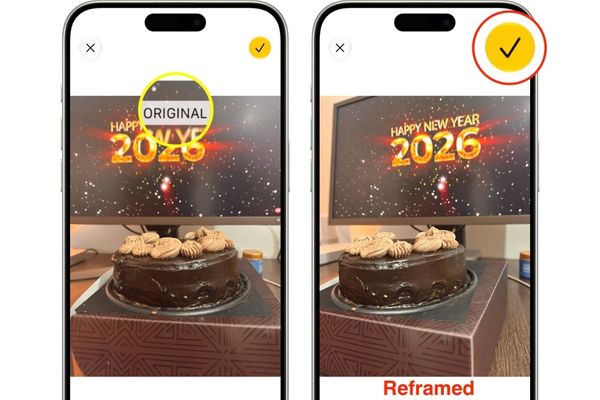
Step 8: Tap the screen to compare the newly reframed version with the original photo. If you are satisfied, click on the mark icon checkmarkthen select the button Done to save the results.
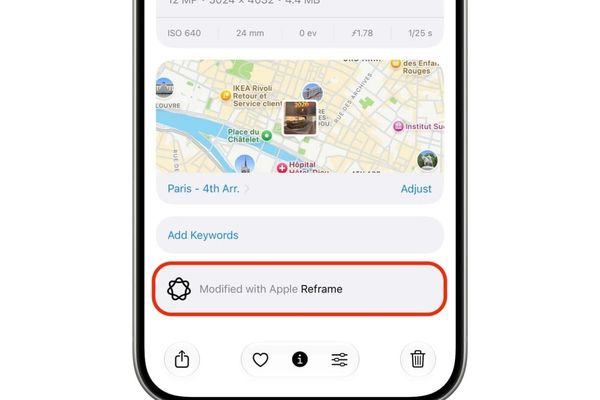
If the photo has been tampered with with this tool, the system will display the text Modified with Apple Reframe.
How to change photo angle using AI on macOS 27
Many of you wonder if it is difficult to change the photography angle using AI on Mac, the answer is that the process on Mac is similar to that on iOS.
Step 1: You open the Photos app on Mac, choose to view an image and then click the button Edit.
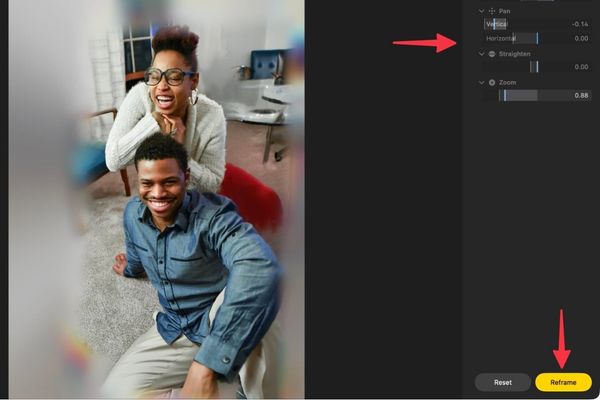
Step 2: Navigate to tab Tools located at the top and select tools Reframe on the right side of the screen.
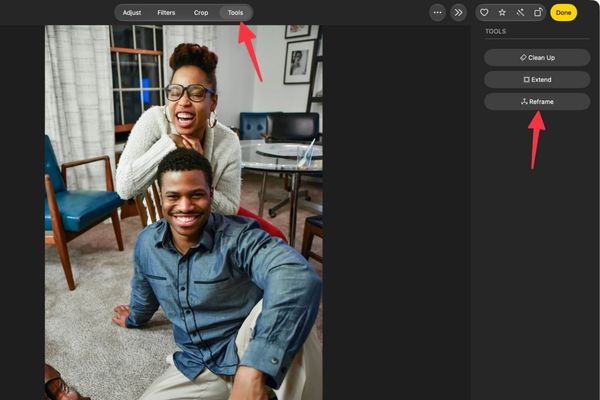
Step 3: Use the on-screen sliders to adjust vertical and horizontal rotation. You can move the image subject vertically and horizontally, straighten the image or zoom in and out as you like. If you accidentally pull too far, just click the Reset button to start from the beginning.
Step 4: Finally, click the button Reframe and then select Done to save the edited image.
Conclusion
Hopefully through this article, you have a clear understanding How to change the photography angle using AI on both phones and Mac computers. This is definitely a feature that everyone should try once to see how good AI technology is these days. Don’t forget to share your results with friends and relatives.
Frequently Asked Questions (Q&A)
1. Can this Reframe feature be used for screenshots?
According to actual testing, no, all screenshots are blocked by the system and the Reframe tool cannot be used for editing.
2. How do I know if a photo has been edited with this tool?
You just need to swipe up the photo to see detailed information. If the photo has been edited with AI, the system will display the words Modified with Apple Reframe.
3. If I don’t like it after editing, can I restore the original photo?
Absolutely, this feature is reversible. You just need to return to the editing interface and click the red Revert button and the photo will return to its original state.