If you are looking How to remove photo background with Paint in Windows 11, You’ve come to the right place. This is one of the interesting and useful features of Paint software, a free and popular image editing software of Windows 11. You can use this feature to remove unnecessary parts of the image, or add new and unique backgrounds.
| Join the channel Telegram belong to AnonyViet 👉 Link 👈 |
Starting with version 11.2306.30.0, the Paint app has a new feature that can identify subjects in a photo and remove the background with just one click. So you don’t need to pay for third-party photo editing apps or services to do that.
How to remove photo background with Paint in Windows 11
Step 1: Launch the Paint application on your computer > Click ‘File’ > Select ‘Open’
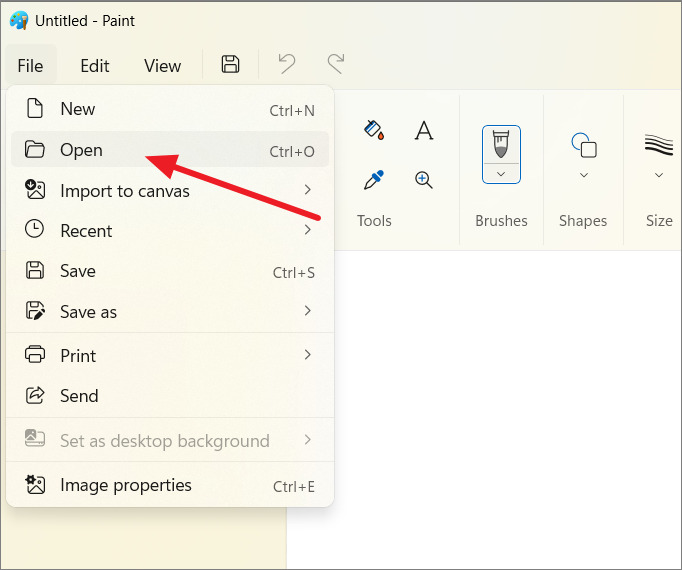
Select the photo you want to remove the background > Select ‘Open’
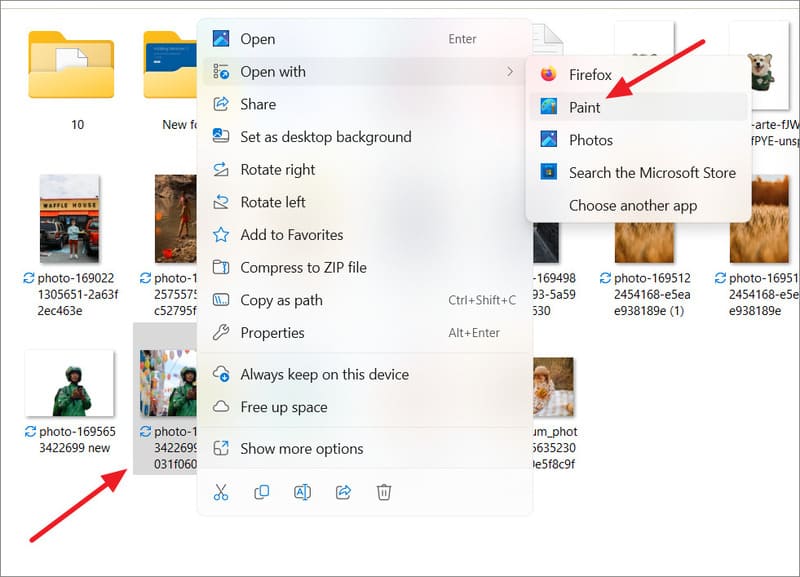
Or alternatively, you can access the image in File Explorer, right click on it > Select ‘Open with’ > Paint
Step 2: Once the photo is loaded into the Paint window, simply click the ‘Remove Background’ button (the icon of a person with stripes).
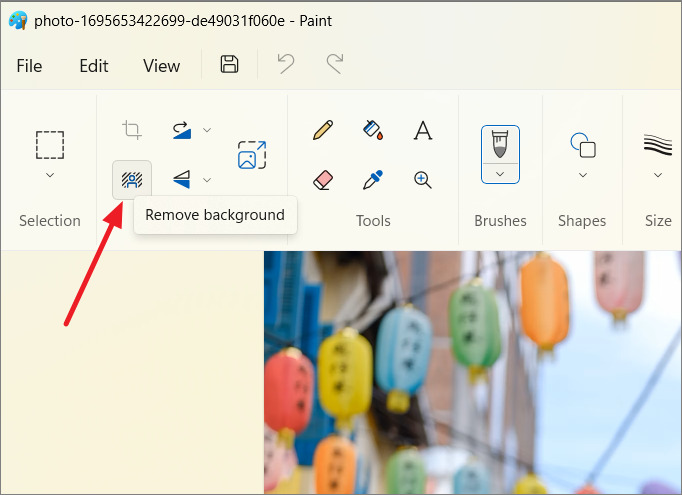
In a few seconds, the background of your photo will magically turn transparent!
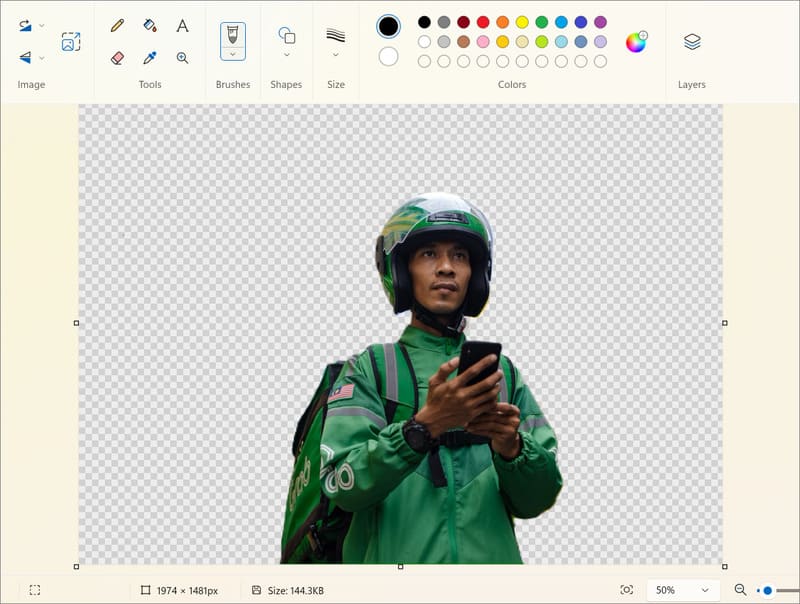
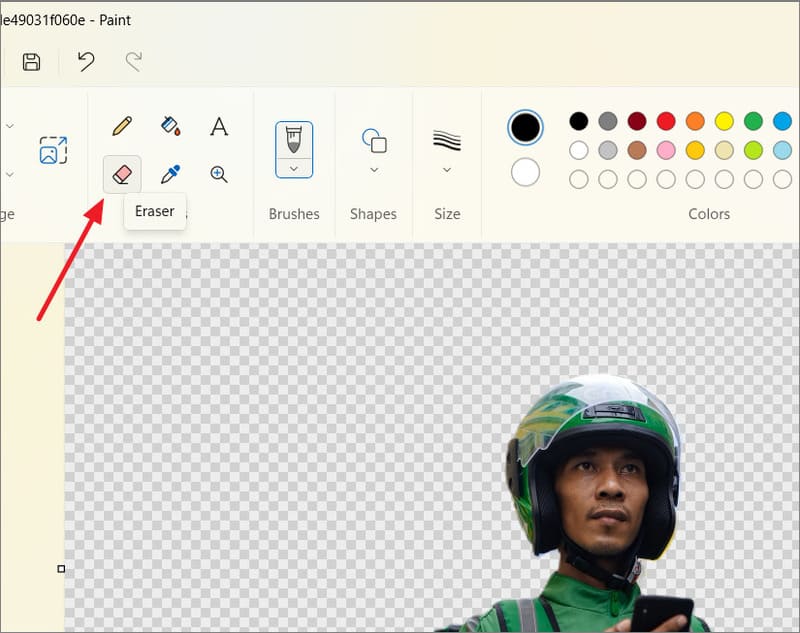
Step 3: If the tool misses any, you can tweak it with the ‘Eraser’ tool to make specific areas of the image background transparent.
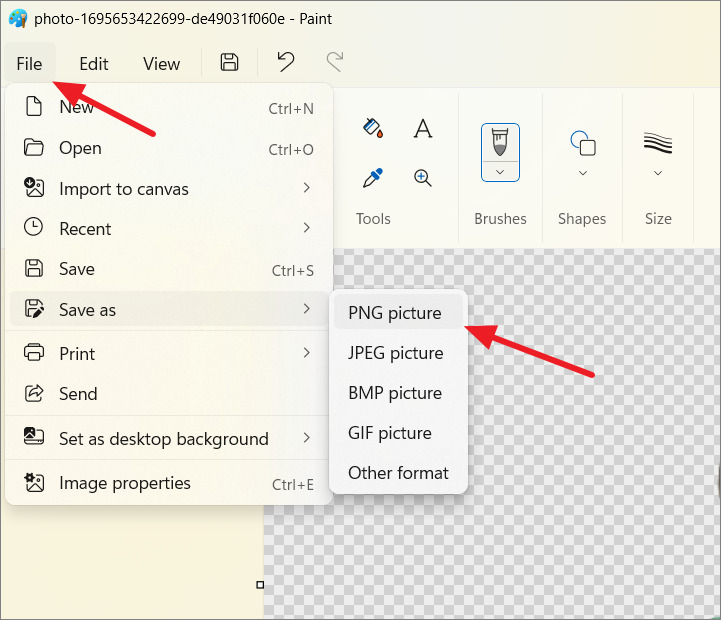
Step 4: Once you’re satisfied with the result, it’s time to save the photo. To do that, click on the ‘File’ tab, select ‘Save as’ and select the ‘PNG Image’ option to save the image with a transparent background.
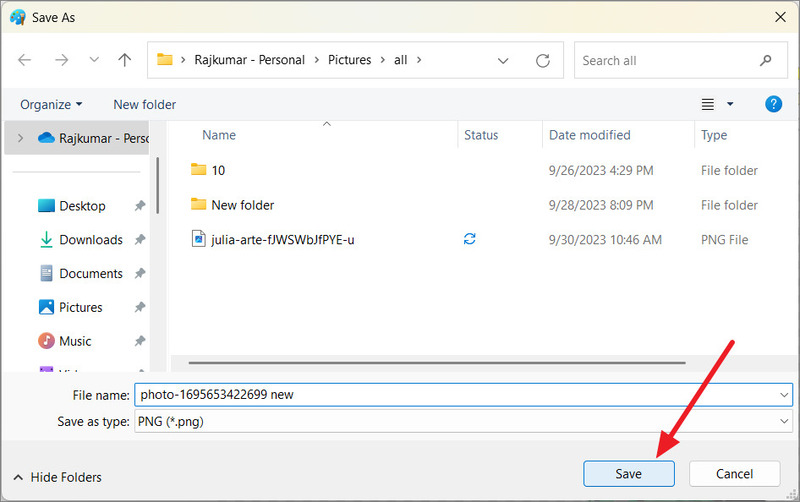
Step 5: Finally, choose where you want to save the photo, rename the file and click the ‘Save’ button.
The other great thing about this app is that the resolution of your photo will stay the same, so you don’t need to worry about it being reduced when using Paint.
Epilogue
Paint is a simple but effective drawing application on Windows 11. You can use it How to remove photo background with Paint in Windows 11 to remove unwanted background in your image quickly and easily. Good luck!


