How to schedule computer shutdown in Windows 11 is one of the useful tips you should know if you want to save energy and protect your computer. You can set a time for the computer to automatically power off. In this article, AnonyViet will show you 4 ways to do this trick simply and quickly.
| Join the channel Telegram belong to AnonyViet 👉 Link 👈 |
Why should you schedule a computer shutdown?
Turning off the computer is necessary to let the computer’s internal components cool down. However, exporting videos or downloading games can force you to leave the computer running, leading to no time to rest. Failure to turn off the computer can be harmful in the long run as it will affect the life of the electronic components and will also affect the performance of the computer.

Therefore, schedule an automatic shutdown of your computer to let it rest before you start work the next day. There are many ways you can do that, and here are the 4 most popular and easy to do:
4 ways to schedule computer shutdown in Windows 11
Method 1: Use the Run tool
This is the most convenient and fastest way to schedule a computer shutdown. Proceed as follows:
Step 1: Press the Windows + R key on the keyboard to open the Run Command tool on the screen. Then, type or copy the following command into the text box and press Enter.
shutdown -s -t
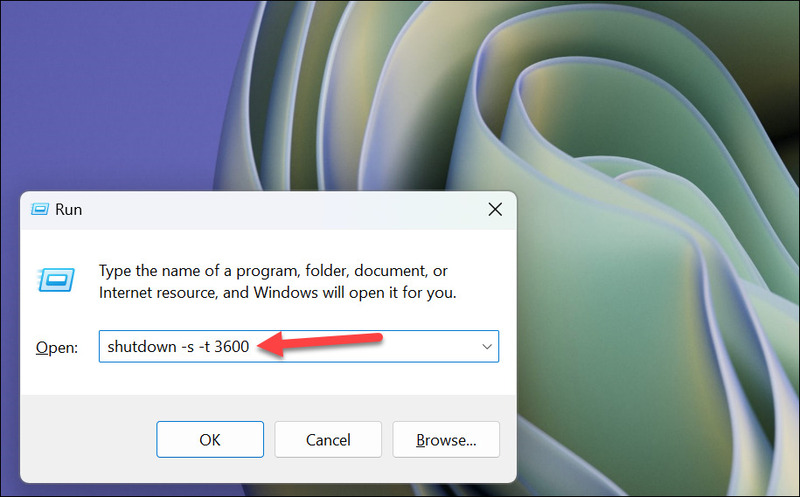
If you enter the number of seconds as 1, the computer will be turned off for 1 second. Other corresponding values that you can refer to include:
- 3600 (1 hour)
- 7200 (2 hours)
- 10800 (3 hours)
- 14400 (4 hours)
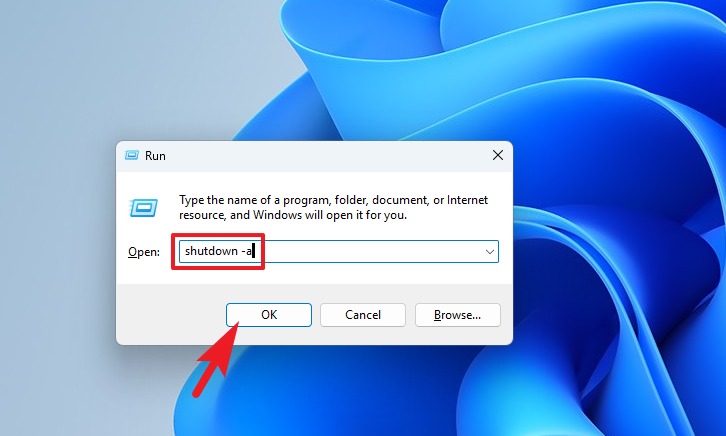
In case you want to cancel the automatic shutdown command, paste the following command and press Enter:
shutdown -a
Method 2: Use Terminal
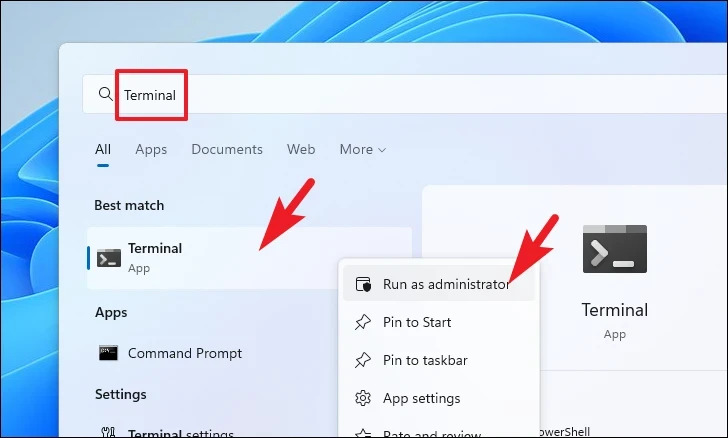
Step 1: First, go to Start Menu and type “Terminal”. Then, from the search results, right-click on the “Terminal” box and select “Run as administrator” to continue.
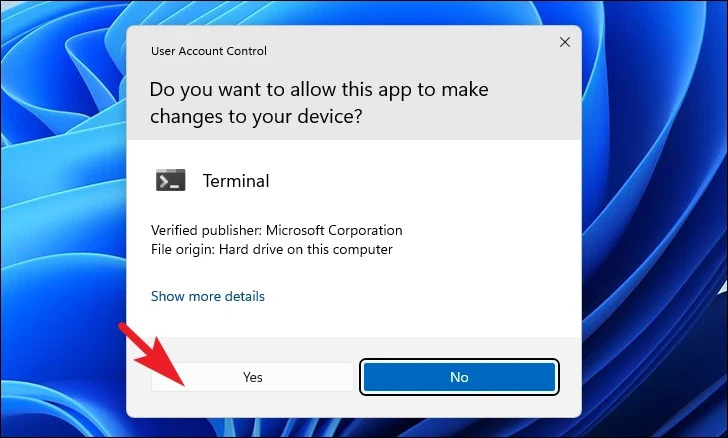
Step 2: A UAC (User Account Control) window will appear on your screen > Click “Yes”
Step 3: Next, click the down arrow icon and select “Command Prompt”
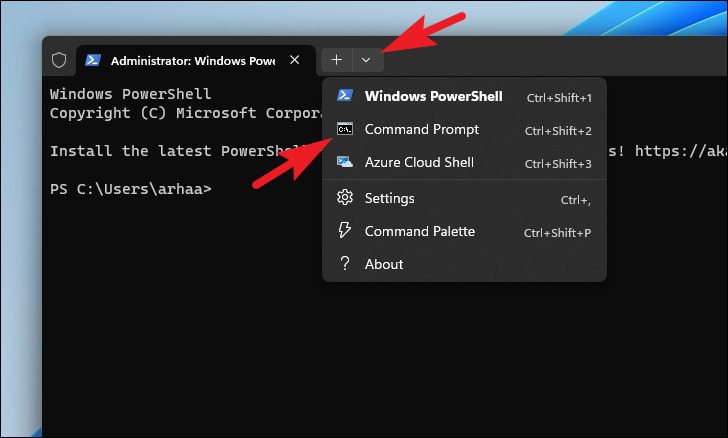
Then, paste the following command and press Enter:
shutdown -s -t
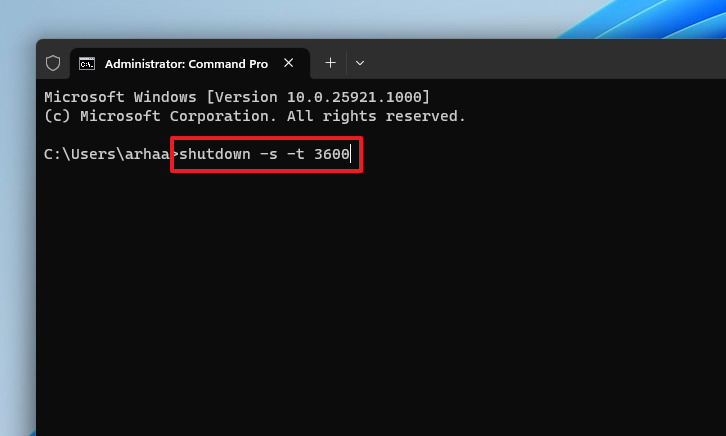
In there, remember to replace
Method 3: Use Task Scheduler
Step 1: First, go to Start Menu and type “Task Scheduler” to search. Then, click on it from the search results.
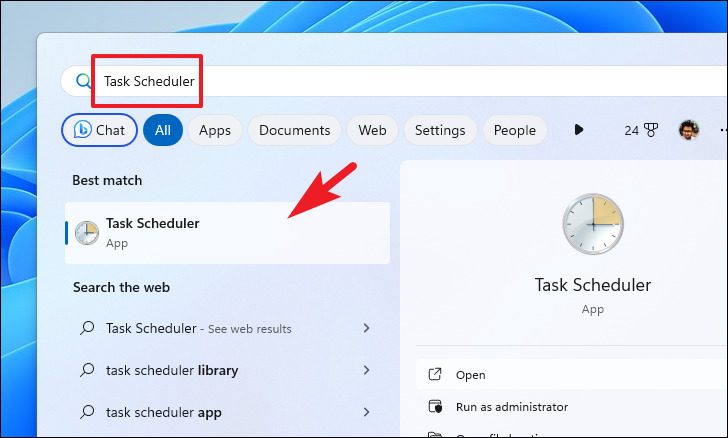
Step 2: Click “Create Basic Task” on the right side of the window.
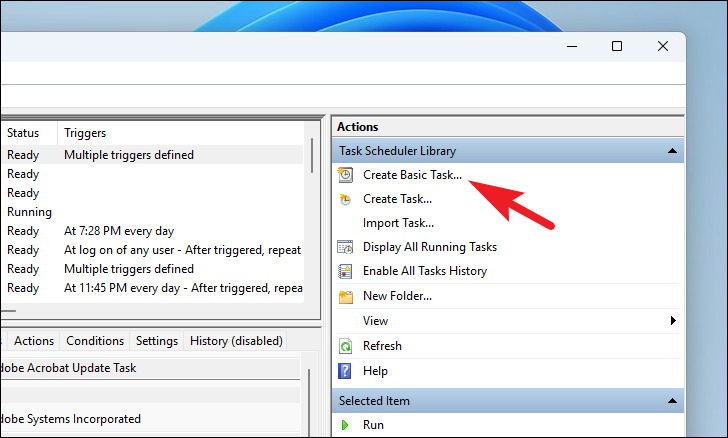
Step 3: Select the “One time” option > Click Next to continue
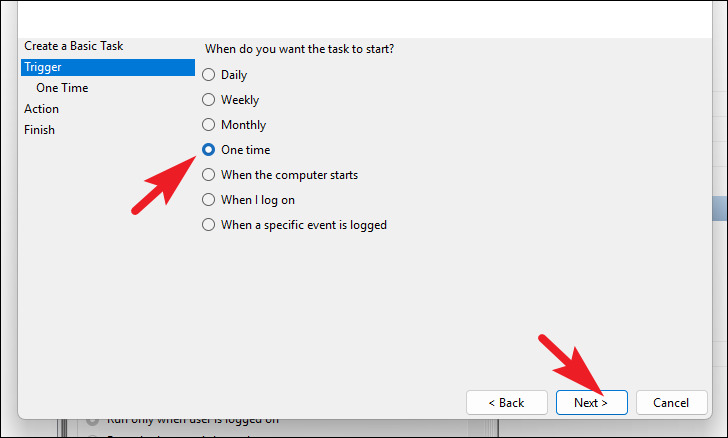
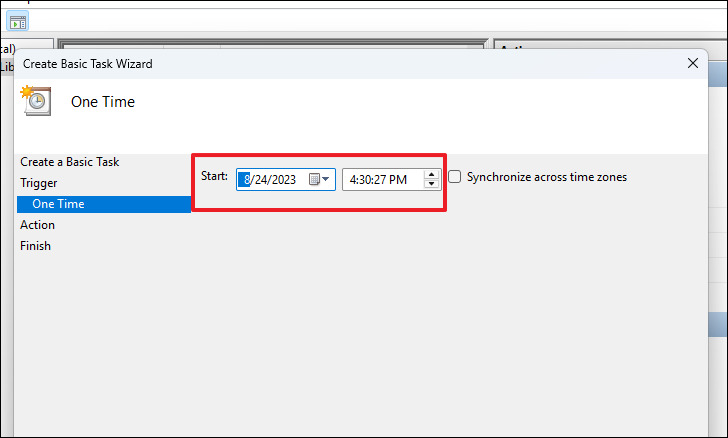
Step 4: Select a date and time to schedule a shutdown > Click Next
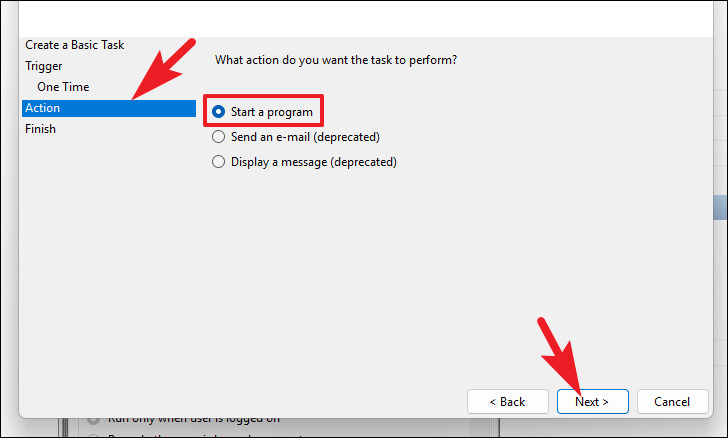
Step 5: Select “Action” from the left sidebar. Then, select “Start a program” > Click Next
Step 6: Paste the following address and type -s in the Add arguments section > Click Next
C:\Windows\System32\shutdown.exe
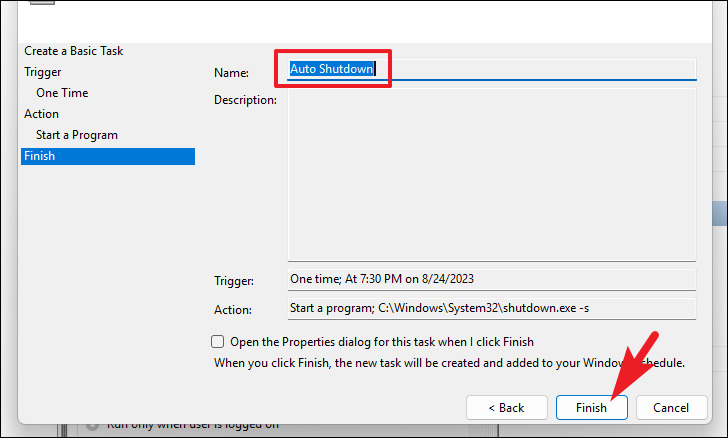
Step 7: Give the task a suitable name and then click “Finish” to complete.
Method 4: Create shortcut on Desktop
To create one shutdown shortcut automatically, you do the following:
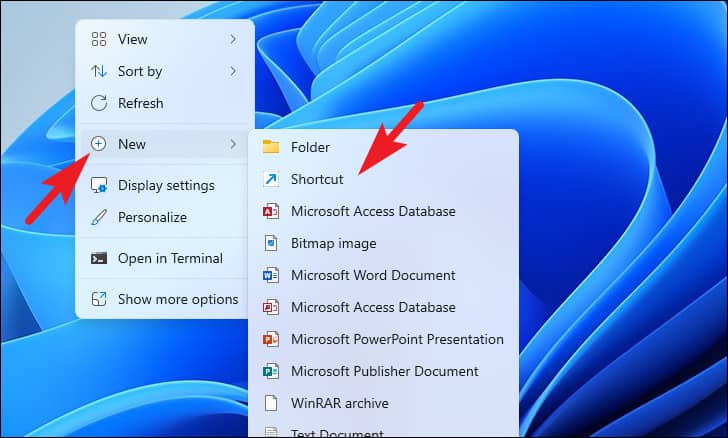
Step 1: Right-click on Desktop and select “New” > Select “Shortcut”.
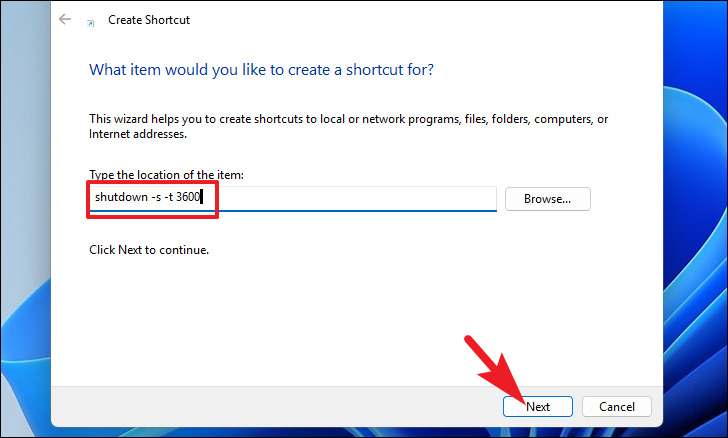
Step 2: Paste the following command and click “Next”
shutdown -s -t xxxx
Note: Replace ‘xxxx’ with the time in seconds, as shown
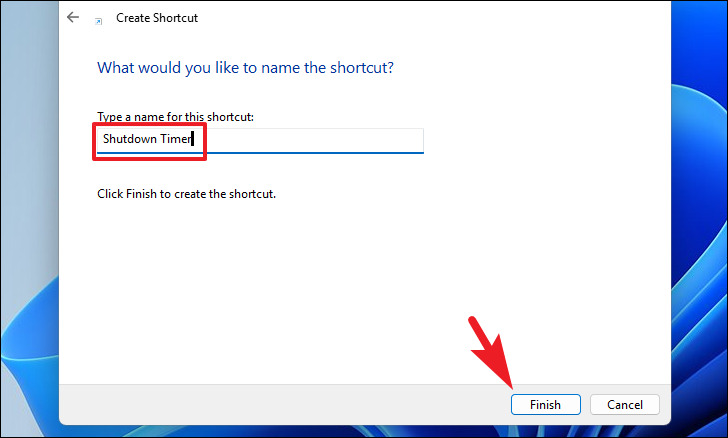
Step 3: Name the shortcut and click “Finish”
Once created, you will see the shortcut on the Desktop. Just click on it to schedule a shutdown.

Epilogue
So I introduced to you 4 How to schedule computer shutdown in Windows 11, including using Run, Terminal, Task Scheduler and creating shortcuts. You can choose which way suits your needs and abilities to do it. Scheduling to turn off your computer will help you save energy, protect your device and increase work efficiency. Wishing you a successful application!


