How to upload files to ChatGPT is one of the useful tricks, giving you more creative possibilities and flexibility when using this AI tool. So how to upload documents to ChatGPT? Let’s find out through the following article!
| Join the channel Telegram belong to AnonyViet ???? Link ???? |
Upload files to ChatGPT for what?
Uploading documents to ChatGPT gives you many benefits, especially if you are a developer or user who wants to get the most out of AI. Some of the key benefits are:
- Process different file types and generate responses that match their contents. This allows you to quickly and efficiently test, debug, improve or optimize your code, text or data.
- Create creative and interesting types of content from different file types. For example, you can create a poem from a text file, a song from a CSV file, a game from a JavaScript file, or a meme from an HTML file.
- Learn and improve your skills in different fields. For example, you can learn to program by uploading JavaScript or Python files, learn to write by uploading text files, or learn to analyze data by uploading CSV files.
How to upload files to ChatGPT very quickly
Step 1: First, go to ChatGPT’s homepage, type the following command:
Generate a Js script that creates a button with the text 'Submit File' and inserts it into the DOM before an element with the class '.flex.flex-col.w-full.py-2.flex-grow.md\:py-3.md\:pl-4'. The button should have a green background color, white text color, 5px padding, no border, 5px border radius and 5px margin. The script should also create a progress element and insert it into the DOM before the same element. The progress element should have a width of 99%, height of 5px and a grey background color. Inside the progress element, there should be another div element representing the progress bar with a width of 0%, height of 100% and blue background color. When the button is clicked, it should create an input element of type 'file' that accepts '.txt', '.js', '.py', '.html', '.css', '.json' and '.csv' files. Once a file is selected, using an async it should be read as text and split into chunks of size 15000. using async Each chunk should be submitted into a conversation by doing the following:
async function submitConversation(text, part, filename) {
const textarea = document.querySelector("textarea[tabindex='0']");
const enterKeyEvent = new KeyboardEvent("keydown", {
bubbles: true,
cancelable: true,
keyCode: 13,
});
textarea.value="Part ${part} of ${filename}: \n\n ${text}";
textarea.dispatchEvent(enterKeyEvent);
}.
The progress bar should be updated after each chunk is submitted within the for loop as follows
progressBar.style.width="${((i + 1) / numChunks) * 100}%";
and should also check if chatgpt is ready with this code:
chatgptReady = false;
while (!chatgptReady) {
await new Promise((resolve) => setTimeout(resolve, 1000));
chatgptReady = !document.querySelector(
".text-2xl > span:not(.invisible)"
Once all chunks have been submitted, the progress bar should turn blue
This prompt will help you create:
- One button Submit File
- A progress bar keeps track of how far the data is absorbed by ChatGPT
- Components define file formats, if the file contains more than 15000 characters, it will be split into several pieces and then included in ChatGPT
- Contains code instructing how it inserts information into ChatGPT
Wait a few minutes for ChatGPT to output the JavaScript code
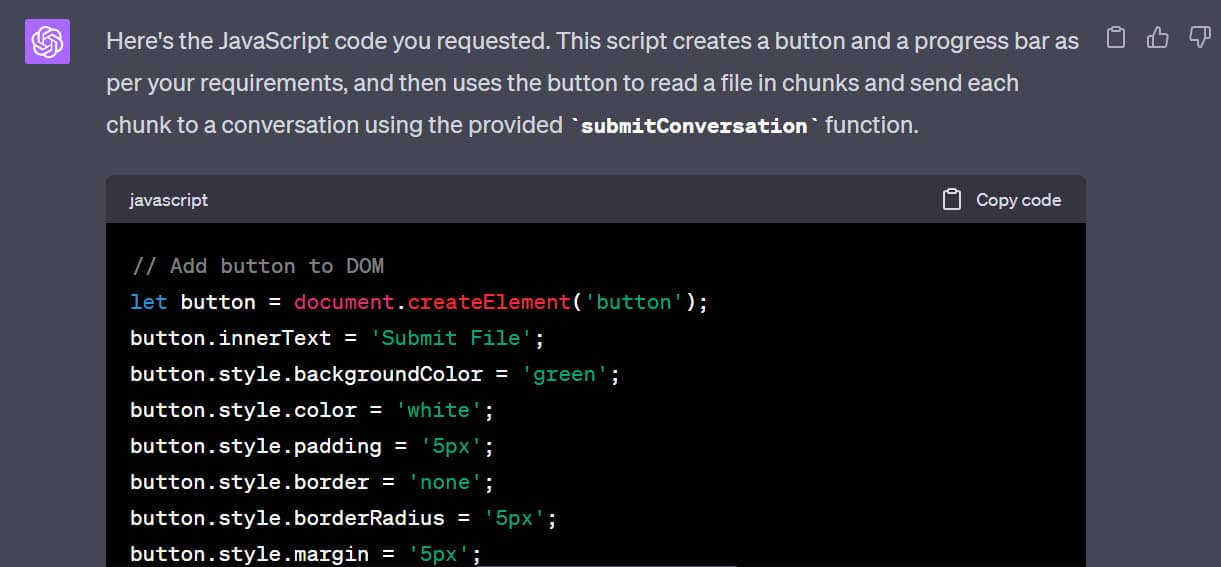
Step 2: Click “Copy code” to copy the code
Step 3: You right-click > Inspect
Step 4: Select the “Console” tab > Paste all the code you just copied here > Enter
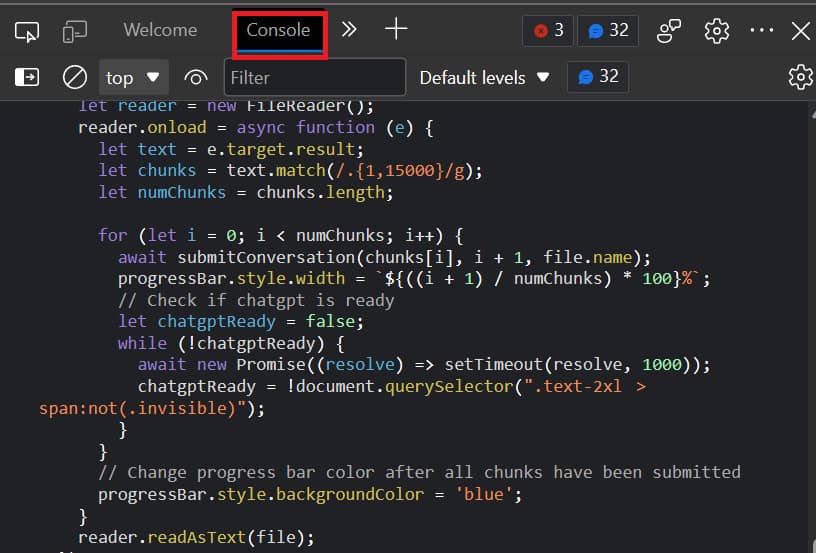
You will now see an additional “Submit File” button appear right below

Step 5: You can click the button to add your document. The blue bar is the progress bar, when it runs out, the text is uploaded.

Note: Supported file types include:
- Text file (.txt)
- JavaScript files (.js)
- Python files (.py)
- HTML file (.html)
- CSS file (.css)
- JSON file (.json)
- CSV file (.csv)
How to convert a code snippet into a Bookmark
If you want more convenience when using ChatGPT and don’t want to re-enter this code every time you want to upload a file to ChatGPT, you can turn this code into a bookmark for more convenient use.
Step 1: You click “Copy Code” to copy the previous code
Step 2: Click “New Chat” to open a new chat frame
Step 3: Type the command “please convert the following code into bookmarklet” then paste the code in > Enter
Step 4: At the result ChatGPT output, click “Copy Code”
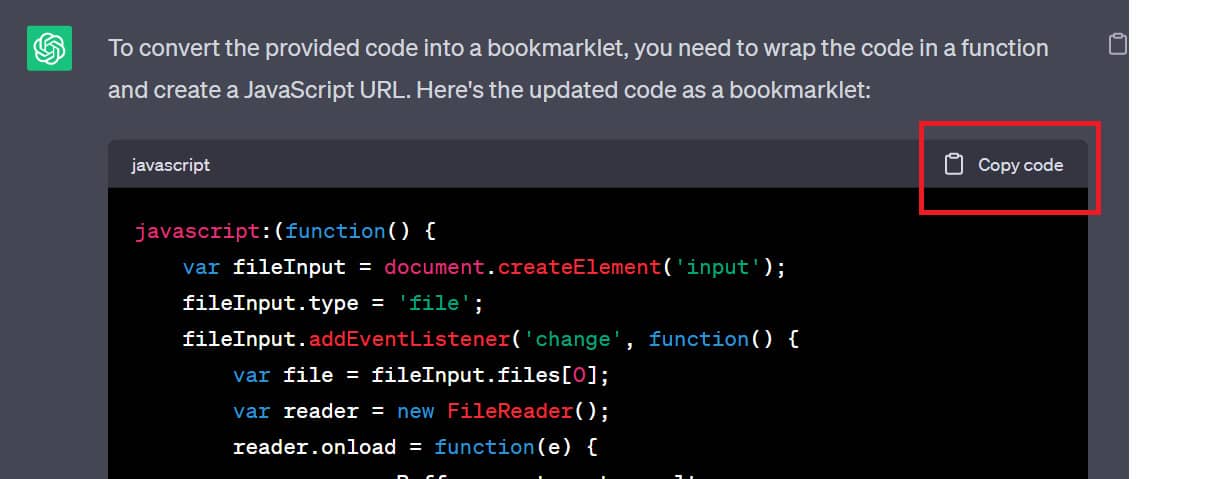
Step 5: Click on the Bookmark icon on the toolbar > Select “More”
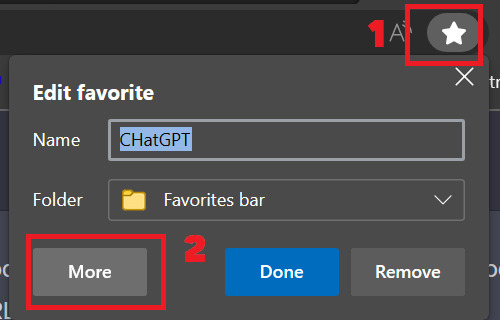
Step 6: Enter the name of the bookmark (whatever name you enter as long as it is easy to remember)
Paste the code in the URL section
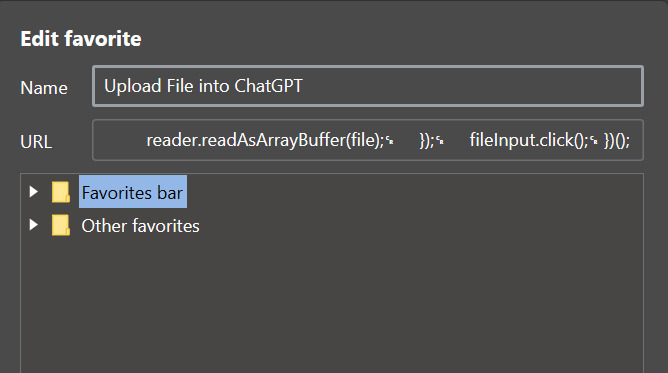
Then click Save. The newly created bookmark will appear on the toolbar
So later, when you want to add a Submit File button to upload the document, you just need to click on this bookmark to exit, without having to re-run the code that takes time.
Epilogue
By using the code that I introduce in the article, you can easily do it how to upload files to ChatGPT and get the desired result. You can even turn this code into a booklet for your convenience. This gives you more creativity and flexibility when using ChatGPT. Good luck with your application!


