Android 14 has now been released as a developer preview for Pixel phones. Although this release only comes with a few changes for users, I think you guys still want to give it a try. So in this article, I will guide you to install Android 14.

Devices that support Android 14
Android 14 Developer Preview is currently only available for Google Pixel devices. Currently, Android 14 only supports the following devices:
| Join the channel Telegram belong to AnonyViet 👉 Link 👈 |
- Pixel 7 and 7 Pro
- Pixel 6 and 6 Pro
- Pixel 6a
- Pixel 5 and 5a
- Pixel 4a (5G)
As you can see, the standard Pixel 4a is not eligible and will not receive the Android 14 update. Also, the Pixel 4 series has reached the end of its life cycle and will not receive the update this year.
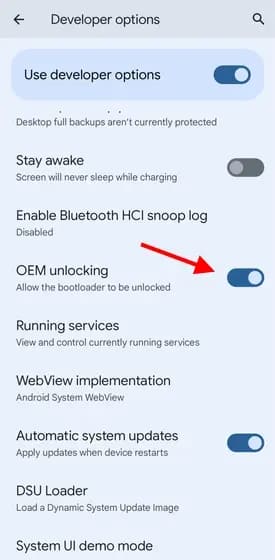
You also need to enable the “OEM unlocking” feature to support the installation process.
How to install Android 14
First, you need to connect your phone to your computer using a USB-C cable. Then follow the steps below to continue.
Note: The installation process will erase all data on your device. So before installing, back up your data to be safe.
Step 1: Access Google Android Flashing Tool.
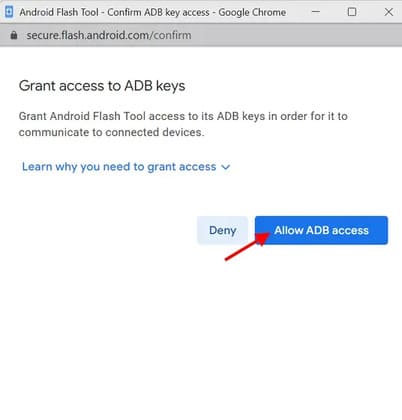
Step 2: Press “Allow ADB Access” when you open the website.
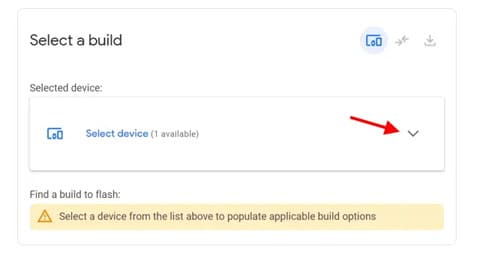
Step 3: From the menu that appears, click the down arrow to select your device.
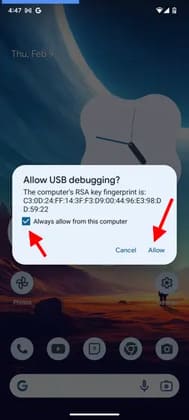
Step 4: If this is your first time connecting your Pixel phone to your computer, you’ll need to approve the connection from your phone. Just tap on “Allow” and remember to choose Always Allow.
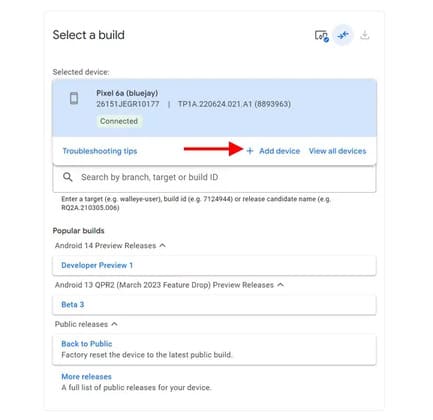
Step 5: Once you approve the connection, your Pixel device will immediately appear in the menu. Click “Add Device“.
Step 6: Now, a browser window will appear and ask you to select the device on which you want to install Android 14. Select your Pixel device and click the “” button.Connect“.
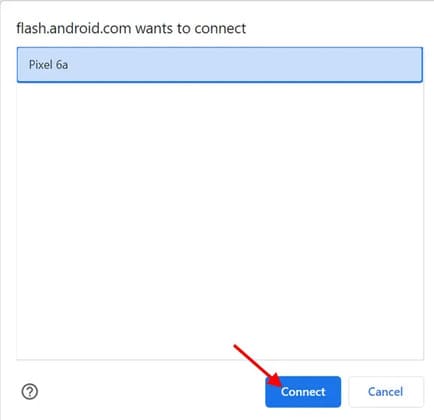
Note: You may be asked by the browser to reselect your device at any point during this process. You just need to follow the steps above. However, if you don’t see your phone appear, disconnect it from the computer and reconnect it to make it appear again. You also need to make sure you have installed USB driver fit.
Step 7: You should now see a list of available builds for your Pixel phone. We will choose Developer Preview 1 in Android 14.
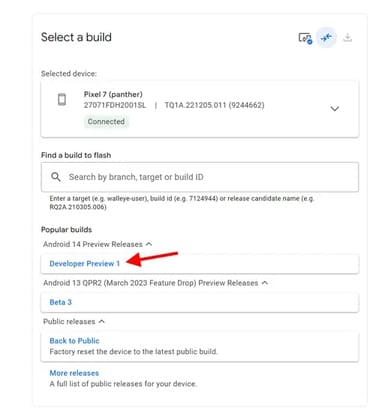
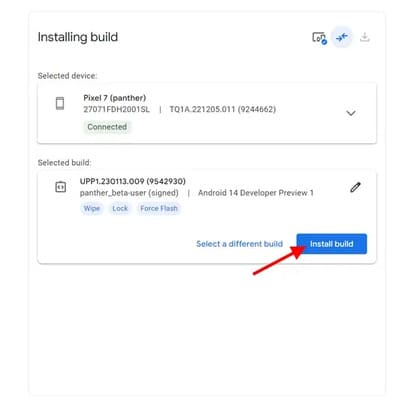
Step 8: Android 14 build is now ready to install on your device. Next click on the “Install Build” to begin.
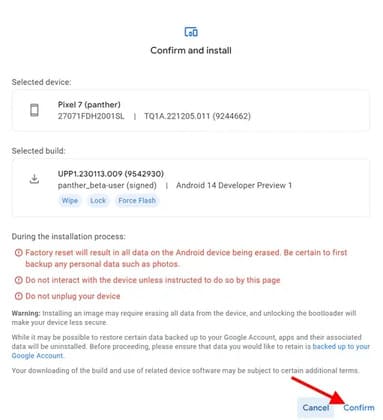
Step 9: Before the process finally starts, you’ll get a warning telling you what you’re installing. Click “Confirm” to continue.
Step 10: Accept the license terms that appear by clicking the “I Accept“.

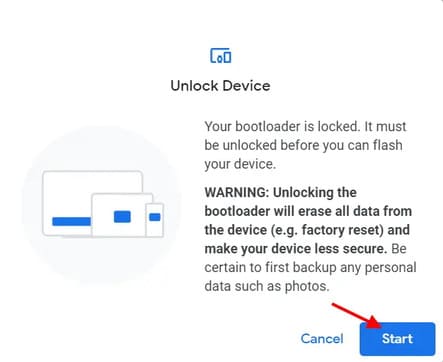
Step 11: The installation will now begin. Do not unplug the phone nor touch the screen of the device at this time.
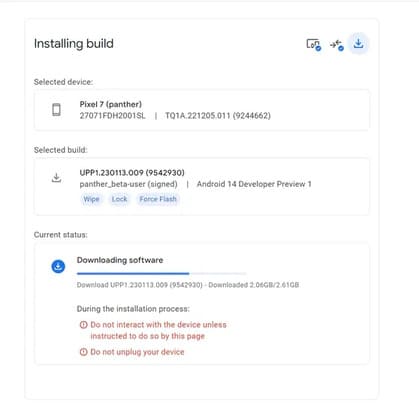
Step 13: Android 14 download will begin. As you can see, the flash tool does all that automatically.
Step 14: Once downloaded, Android 14 DP1 will flash the build to your device. You may see your Pixel device showing different options and settings screens. As mentioned earlier, don’t touch anything at this time.
Step 15: The last option will ask you to lock the bootloader to complete the flashing process. Click the button “Done” to complete.
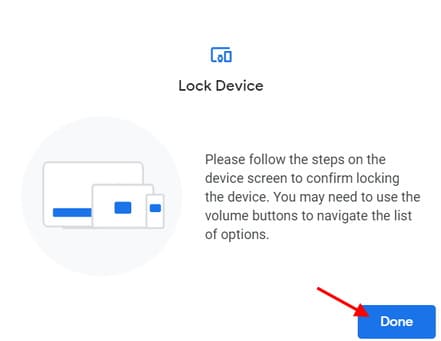
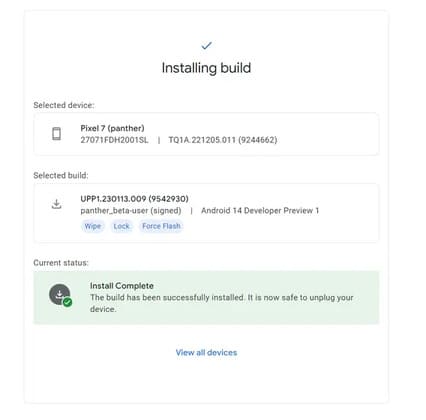
Step 16: So that’s it then. Android 14 is already installed on your device. You can now unplug your phone from your computer and start setting it up.
I hope this guide helps you to easily install the latest Android 14 update on your device. While the latest build doesn’t really have many changes for users, it’s still very interesting and has new features like app cloning, etc.


