It seems that more and more software automatically helps users optimize and free up RAM on Windows. However, the use of such software sometimes does not bring the desired results, but also causes additional problems for Windows such as crashes, slow startup, etc.
| Join the channel Telegram belong to AnonyViet 👉 Link 👈 |
If you are concerned and do not want to use this type of software, you can use the tool that has been loved by Windows experts since it was released to support the version of Windows Vista until now. is Empty Standby List. In a word, this is a RAM cleaning and freeing tool for Windows, and users can use it by entering the corresponding commands. Describing the whole thing works manually.
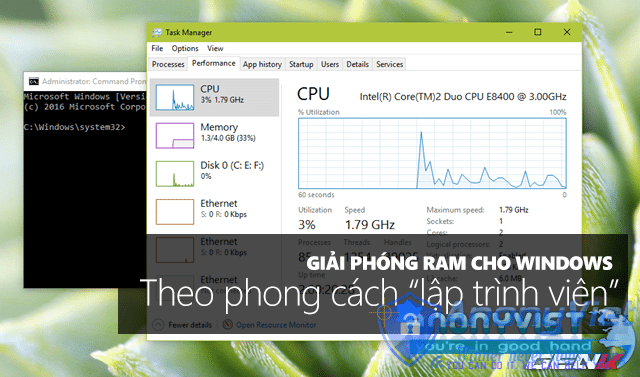
So specifically how to use Empty Standby List? What are the commands that users can use in the Empty Standby List? Please read the following content.
First, go to link here to download the Empty Standby List. Currently, this tool fully supports all versions of Windows, including Windows 10, Windows 7 (64 bit), Windows 8, Windows Server, Windows Vista (32 bit) and Windows Vista (64 bit).

Empty Standby List requires no installation and is very secure.
After downloading, move the file to the path “C:Windows“.
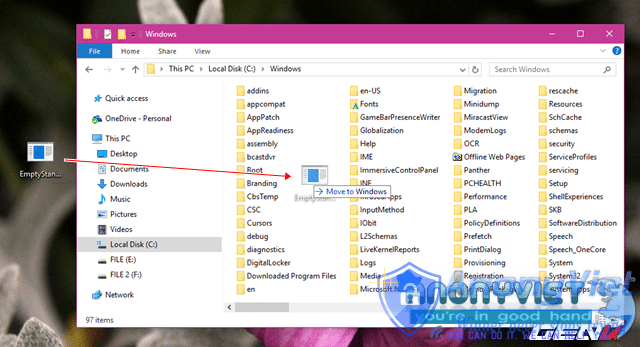
Copy the Empty Standby List packet after downloading and paste it into the Windows folder in the “C” partition.
Next, launch the Command Prompt command line window with the highest administrative rights by right-clicking the Start button and selecting Command Prompt (Admin). Or you go to Start and click “cmd” right-click -> select Run as administrator to run Command Prompt with Admin rights.
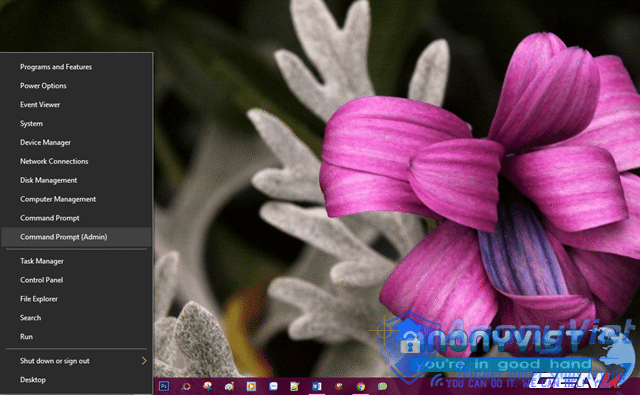
Launch Command Prompt with highest administrative privileges.
Command Prompt appears, now we will proceed to enter the following command to ask Empty Standby List to move all data currently on RAM to the file “pagefile.sys” located in partition “C” ” system.
EmptyStandbyList.exe worksets
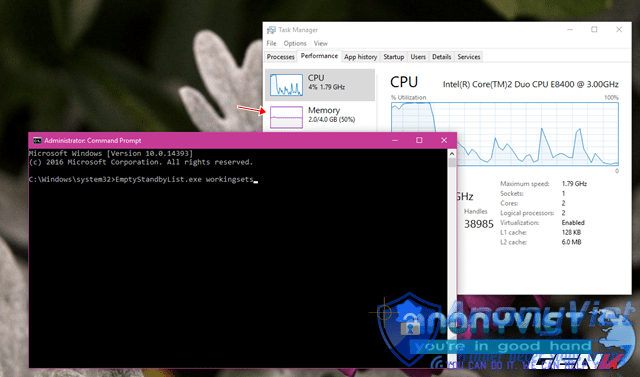
The amount of RAM occupied initially before running the command is 2GB/4GB.
Surely you can clearly see the change in the amount of RAM in the Task Manager window before and after running the above command, right? This move will reduce the performance of Windows at first, but after a few seconds the system will work smoothly again.
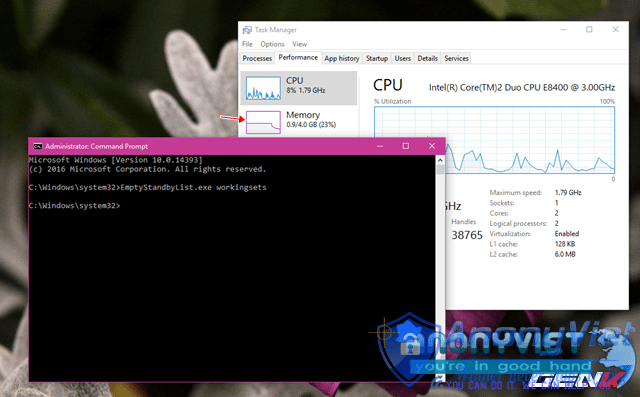
After executing the command, the occupied RAM is freed more than 50% of the original occupied space.
If you do not know, Modified Page File is considered as a file containing software data that users often use, these data will be temporarily saved into Modified Page File located on RAM for users to access. Quick output the next time you use it.
And we can see the size of the Modified Page File by launching Resource Monitor and clicking on the “Memory” tab. The Modified Page File will be displayed with an identifying color of yellow, along with the size parameter it is “taking up”.
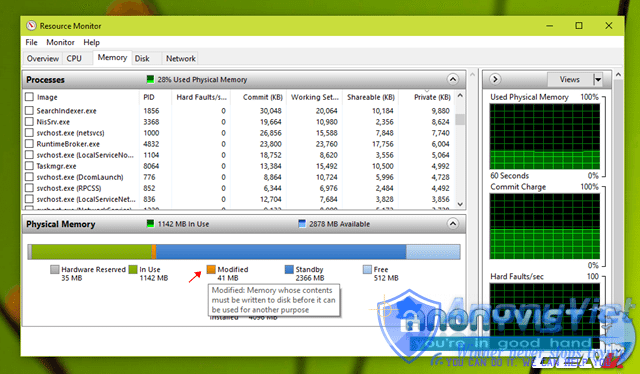
“Recognize” Modified Page File.
To “process” the data stored in the Modified Page File, use the following command:
EmptyStandbyList.exe modifiedpagelist
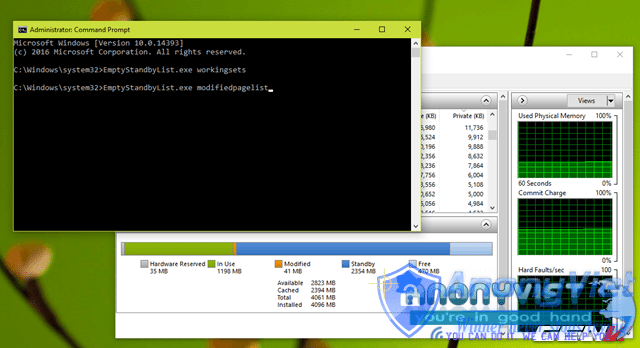
Modified Page File size before command execution.
As soon as the above command is launched, the data in the Modified Page File will be cleaned up.
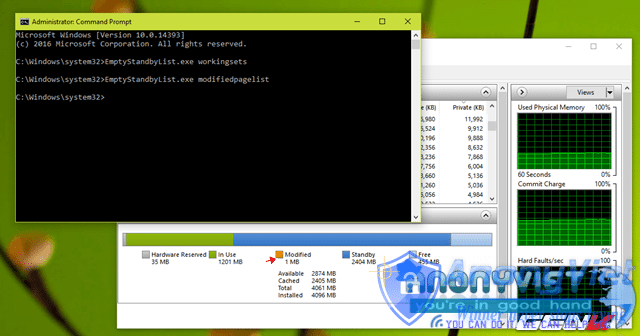
Modified Page File size after executing the command.
Besides Modified Page File, you can see another storage area called “Standby” which is quite large in size. It can be understood that this is the data part of the software that you have used before and is currently in the “waiting” state. And to clean up this part for “empty” too, you can use the following command:
EmptyStandbyList.exe standbylist
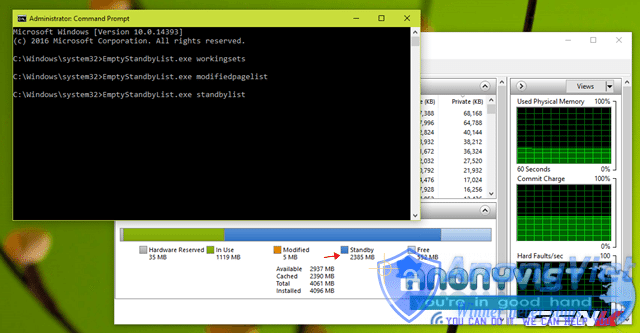
Standby capacity before command execution.
One advice you need to pay attention to is to only use the above command when you have finished your work or before you start working because it is possible that the computer performance will be significantly reduced after running the command, but only 1 up to the first 2 minutes. However, the result is great because everything will work “smoother” than before.
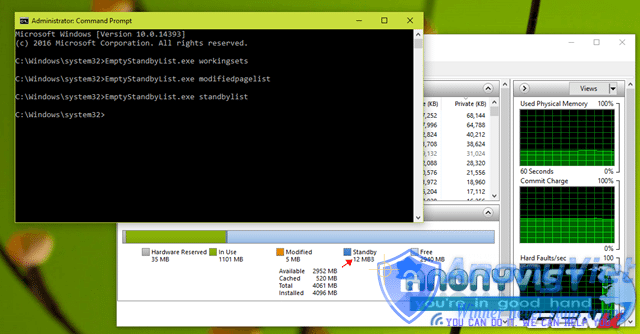
Standby capacity after command execution.
And finally, to clean up the unnecessary data that is still stored by the system in RAM, use the following command:
EmptyStandbyList.exe priority0standbylist
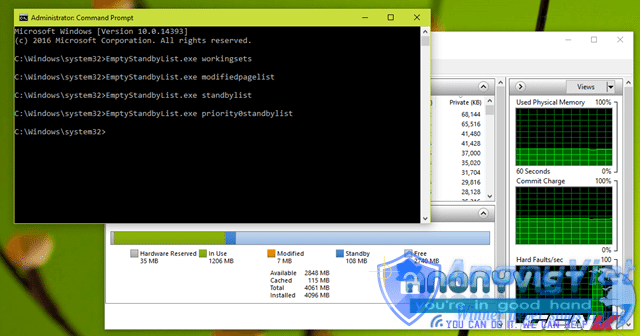
Clean up the rest.
After completing the above 4 commands, Windows performance will increase significantly and you will feel that all operations are smoother than before. Now you can start your work on the computer.
In case you do not want to have to memorize and enter each command as above, you can create a simple shortcut to run the above commands automatically as follows.
Right-click on the Desktop and select New > Shortcuts. Then enter the following command into “Type the location of the item”.
C:WindowsSystem32cmd.exe /c command_you_want_to launch
In there “command_you_want_to launch” is 1 of the 4 commands above. For example, here we will choose the command “EmptyStandbyList.exe standbylist” then the complete command for the line “Type the location of the item” will be:
C:WindowsSystem32cmd.exe /c EmptyStandbyList.exe standbylist
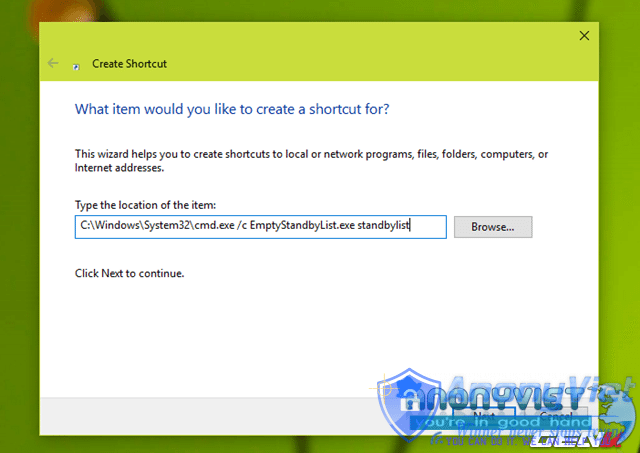
Complete command.
Your next job is to name and change the icon for this shortcut as you like. When needed, just double click on this shortcut.
Source: GenK


