
If you are dealing with a lot of software at the same time, opening multiple windows will make the Desktop cluttered. Every time Alt+Tab or find software on the taskbar is a torture. Don’t worry, show up on Windows 10 has Virtual Desktop function (virtual Desktop) to help you create more Desktop screens. With Virtual Desktop, you can expand your workspace infinitely without having to buy a bigger monitor, organize groups of related tasks together, and easily switch between them. When you want, you just need to press a few shortcuts and you’re done.
| Join the channel Telegram of the AnonyViet 👉 Link 👈 |
How to open Virtual Desktop – Virtual Desktop Windows 10
Virtual Desktop Also known as virtual Desktops are sub-Desktop screens to contain working windows. Creating Virtual Desktop will help you manage programs more scientifically. Eg, Desktop 1 you will save the working windows, Desktop 2 will save the entertainment windows.
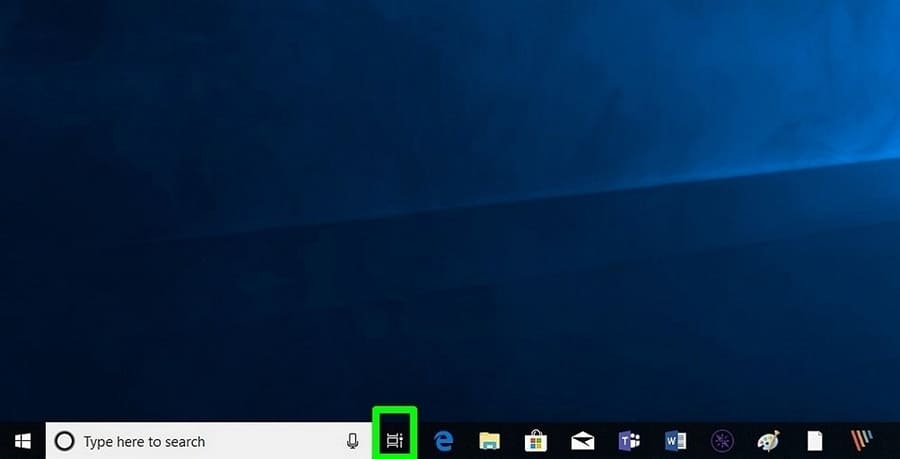
First, check if there is a Task View icon on the Taskbar? If not, right click on the taskbar and select Show Task View button

On the taskbar, select the . icon Task View next to Windows Search.
New Desktop will appear in the upper left corner of the screen.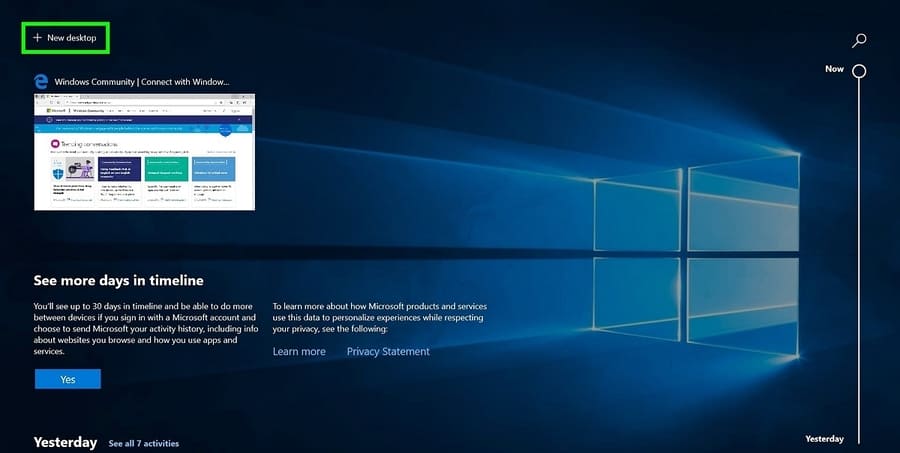
Below section New Desktop, you will see all the applications or windows you have open as well as your Timeline (history of recently opened files, projects).
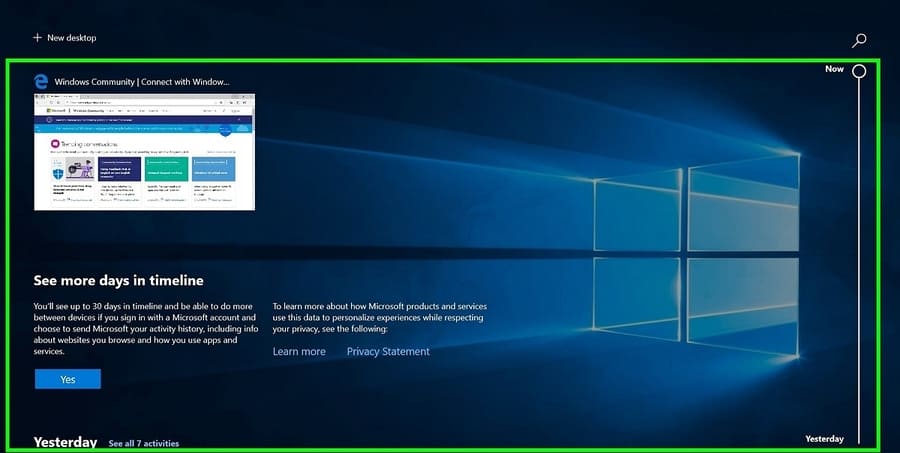
Create Virtual Desktop – Virtual Desktop
Windows 10 allows you to create unlimited virtual desktops, but make sure you have enough RAM to open multiple Desktops at the same time. Each time you create a new virtual desktop, you’ll see a scaled-down version of it TaskView. Select any virtual desktop to open or use the keyboard shortcuts that I will guide below.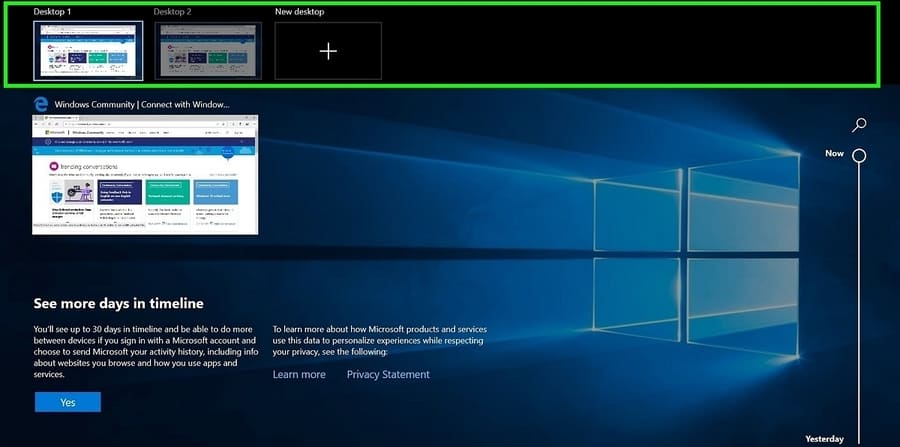
Add or remove Virtual Desktop
Select Task View on the taskbar then press + New Desktop to create a new virtual desktop. See which apps have opened with the Timeline by scrolling down. Click on the sign X at the top of each virtual desktop to delete it when you’re done using it. Any applications you have open on the virtual desktop will switch to the main screen if you delete that desktop. To avoid this, make sure you close all those windows before deleting that desktop.
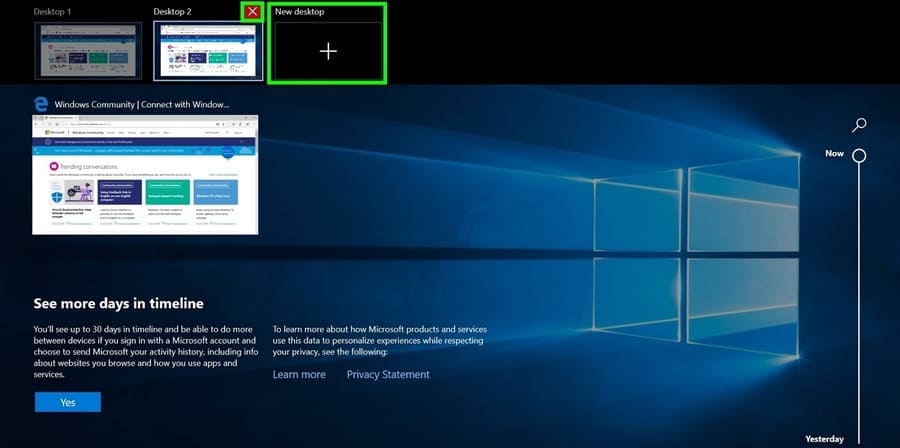 Customize Virtual Desktop
Right-click any open window to manage the view on your virtual desktop.
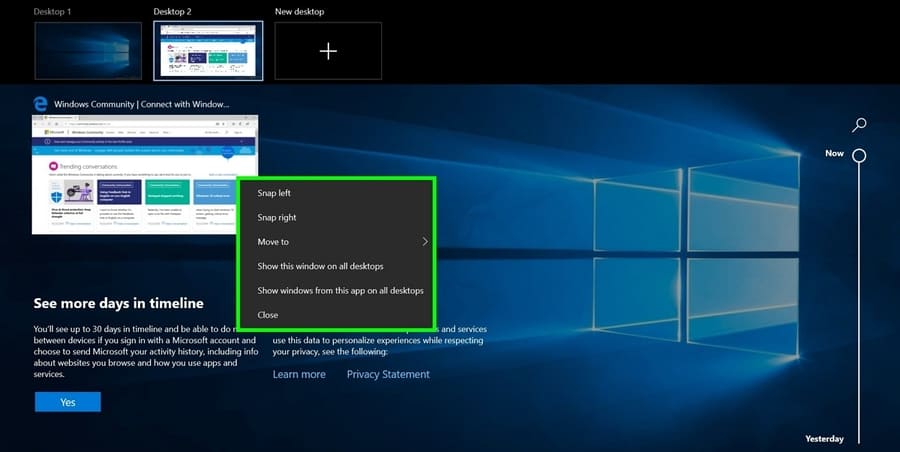
Use keyboard shortcuts snap to split your window across the screen.
Explore other options on this menu:
- Move to: Move the selected application to the desktop in the menu
- Show this windows on all desktops: Show this app on all desktops
- Show windows from this app on all desktops: Show windows of this application on all your desktops.
- Close: Close the software on the current Desktop.
Shortcuts in virtual desktops
Open Task View and move between virtual desktops with the keyboard shortcuts below:
- Windows + Tabs: Open Task View
- Alt + Tab: Show all open applications. Press Tab while holding Alt allows you to move between them (this is all too familiar, comrades)
- Windows + Ctrl + Left/Right Arrow: Allows you to quickly move between virtual desktops
- Windows + Ctrl + EASY: To create a new virtual desktop without Task View.
- Windows + Tab: To turn on Task View.
Multitasking
There are two settings for virtual desktops on Windows 10. Click Windows + I to open Settings. Select Systems – > Multitasking, then scroll down to section Virtual Desktops.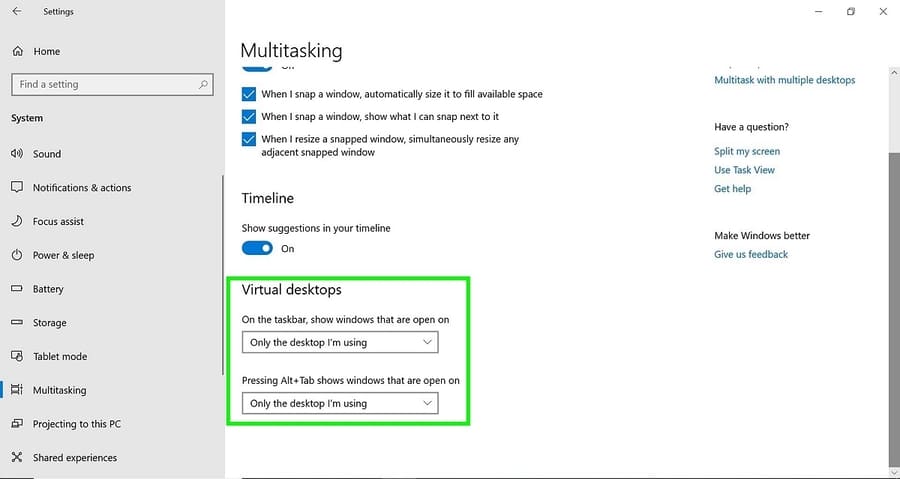
Default is Only the desktop I’m using, but depending on your preference you can set it to All Desktops.
Now you can create multiple Desktops, each Desktop will contain its own work window. For example Virtual Desktop 1 will contain programming windows, Virtual Desktop 2 contains entertainment windows. That way you won’t be distracted at work.