The difference between a photo and a great photo can be the few minutes you spend editing it before sharing. These tips below can quickly enhance the quality & make your photos stand out.
| Join the channel Telegram of the AnonyViet 👉 Link 👈 |
You can do all these edits on your smartphone using built-in tools such as apps Apple’s photo or Google Photos. Of course, there are more in-depth applications for both hobbyists and professionals.
Restore details from shadows and highlights
Highlights are the lightest areas of your image, while shadows are the darkest. If either of these colors is pure white or jet black, these areas are overexposed or underexposed. You can fix it by maybe trying and swiping back some details from these areas using the “Shadows” and “Hightlights” swipe bars.
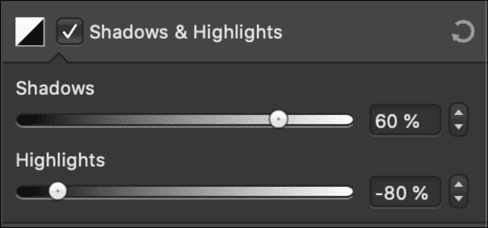
The format you used to take the picture will affect how much detail you can recover. If you shoot photos in RAW on a digital SLR or regular camera, or you have a smartphone app that can capture RAW images, you’ll have a lot more to do next.
However, if you are using a compressed image format, like JPEG, much of the detail in highlights and shadows will be removed during the compression. A RAW file is much larger because it retains all the data captured when you press the shutter button, including the parts that are invisible to the human eye without any editing.
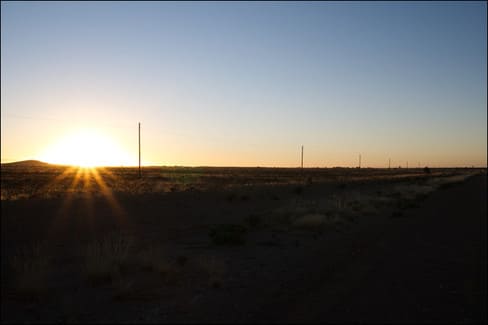
Even if you are shooting in JPEG format on your smartphone, you will be able to recover overexposure & over-darkness. The goal here is to create a smoother image, where there are no overexposed or underexposed areas. This way the image will lose contrast, but that’s okay because you can add it back later.
First, lower the “Hightlights” slider until you see some detail falling back into the brightest areas of the image. Then increase the “Shadows” slider to restore some detail in the darkest areas.
The extent to which you can restore a photo that is too bright or too dark with either setting depends on your image, its format, and the look and feel of the app that supports it.
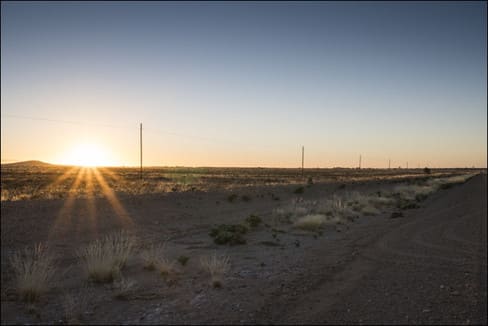
You now have a flat image with more color gamut. Now you can gradually add some contrast to the image using the contrast slider. However, go slowly if you don’t want to lose any of the details you just recovered above. The key is to find the right balance between color range and contrast.
You can use this trick to correct overexposed or underexposed photos by focusing mainly on highlights or shadows respectively.
Straighten your photo
If after taking the photo, you notice that the photo is tilted and looks uncomfortable, you can completely straighten it.
If it’s a landscape photo, find the horizon line and adjust the tilt, rotate it to match the horizon

Or you can choose the objects in the photo as a fulcrum to rotate the photo straighter depending on your needs!
Cut redundant details if any
Cut out excess details to bring out the subject of the photo more
Eg. There is an extra mirror in the corner of the photo, if you remove this mirror, the train will stand out more

After removal:

Precise white balance for better colors
Most cameras and smartphones do a good job of white balance on the first shot. Of course, no device is perfect. It’s easy to use manual white balance but Sometimes the lighting conditions change quickly or there are too many light sources causing the white balance to be lost.
Different light sources produce different light temperatures and this is reflected in white balance. A golden sunset creates a warm glow, while a shot of an overcast snowy mountain can appear cold and blue. Tubular fluorescent lamps give off a cool white light, while incandescent lamps in table lamps are generally warmer.
Let’s white balance focus on getting as close to neutral white as possible.
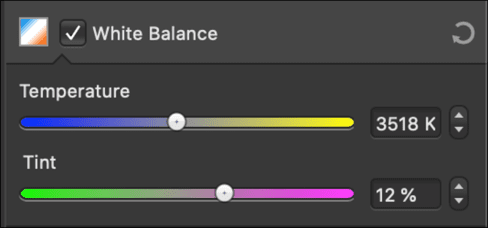
Try to balance cold (blue) and warm (yellow) by adjusting the “Temperature” slider
Once you have a balance between yellow and blue, add more green and magenta (pink). Most image editors also have a “Tint” slider that you can use to create the right balance between green and magenta.
Once you have achieved a good white balance, your image will look neutral & harmonious. Human skin color will also become as natural as possible.
Enhance colors with “Vibrance” & maintain image tones
The “Vibrance” slider targets the saddest, palest colors in your images without overdoing the saturated tones. You can use the “Saturation” slider to increase the overall amount of color, but this will affect the entire image.
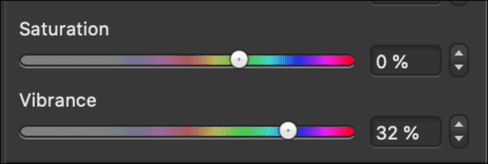
Do not abuse the saturation adjustment too large (Saturation). Oversaturated skin tones can cause the subject to become jaundiced. Dark spots like freckles or moles can become too prominent.
Or you can edit photos with Photoshop in more detail.


