Instructions to reduce RAM when using Chrome browser
| Join the channel Telegram belong to AnonyViet ???? Link ???? |
Google Chrome is one of the most popular browsers in the world. However, one of the quite serious diseases of Chrome is that it consumes RAM. If you often open many tabs on Google Chrome, your computer will start to slow down and gradually slow down.
Chrome will generate a “process” new with each Tab you open. The latest version of Internet Explorer works the same way. And the reason why it works like that is pretty much the same.”ear buds“: each Tab will own a “process“, many tabs will have many”process“. Then if a Tab is “crash” then only that Tab is “crash“Okay, the browser is still working normally. That means you won’t lose all the remaining Tabs if you have 13 Tabs open for example.
However, the disadvantage of this way of working is that each “process” will require a certain amount of RAM. If that Tab has a Flash Player or content that contains a lot of information, then “process” will eat up quite a bit of RAM. Fortunately, you can force Chrome to behave differently by adding the command “process-per-site“. At that time, Chrome will only use a “process” for each web page loaded. Of course, this change will affect Chrome’s performance.
You can check how many”process” that Chrome is using by opening Windows Task Manager (Ctrl+Alt+Del). Skip to item Processes. How much chrome.exe is how many Tabs you have open.
Here’s how to do it
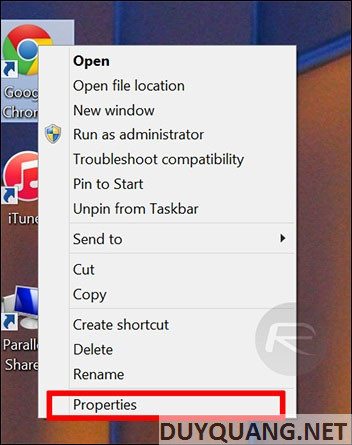
Step 1: Find the shortcut you use to start Chrome, it’s usually located on the desktop.
Step 2: Right-click the shortcut, then select “Properties“.

Step 3: After the Properties panel appears, select the Shortcut tab. In the Target box, scroll down to the endpoint and add –process-per-site.

Step 4: Turn off Chrome and open it again.
Step 5: Enjoy the results!


![[Lập Trình Game] Lesson 7: Move between levels when completing tasks [Lập Trình Game] Lesson 7: Move between levels when completing tasks](https://anonyviet.com/wp-content/uploads/2020/03/image015xx.jpg)


