Stable Diffusion is a new and potential tool in the field of artificial intelligence. It allows users to create unique and high-quality images just by entering simple text sentences. In this article, AnonyViet will show you how to use Stable Diffusion in the simplest way!
| Join the channel Telegram belong to AnonyViet ???? Link ???? |
What is Stable Diffusion?
Stable Diffusion is a tool capable of creating images from text, developed by Stability AI. Many people have used it to create beautiful photos in seconds. In addition, it also has functions such as transforming images into other images, modifying images with inpainting and outpainting, support for Photoshop, Blender and other software.
What is Stable Diffusion WebUI?
WebUI is a web interface version of AUTO1111, running on a free virtual machine provided by Google Colab. The elements and data have been reprogrammed to optimize and facilitate the best user experience.
How to use Stable Diffusion to create impressive images
Instructions for accessing Web UI
Step 1: You visit the homepage of Stable Diffusion Vietnam
Step 2: Click on “Stable Diffusion WebUI”

Step 3: Sign in with your Google account
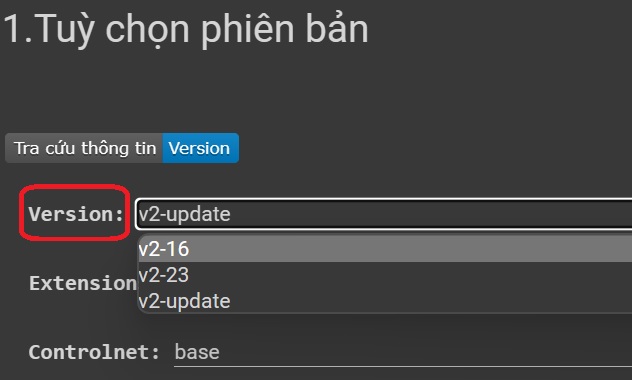
Step 4: Select the version you want to use in the “Version” section
Step 5: Select Model in the available library, you can click “lookup model information” to have a better view of the characteristics of each model.
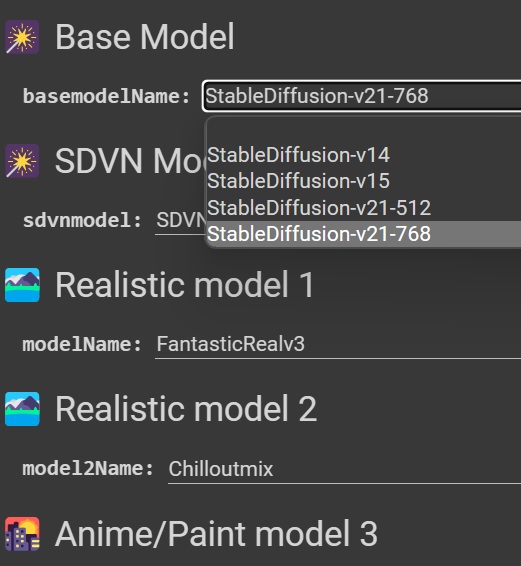
Note: You should only choose a few, do not choose full because it will report a capacity error at runtime.
Step 6: Press Ctrl + F9, now you will see a message appear, select “Run anyway” (Still running)

Step 7: Next, select “Connect to Google Drive” > Select an account > Click “Allow” to confirm permission for the system.
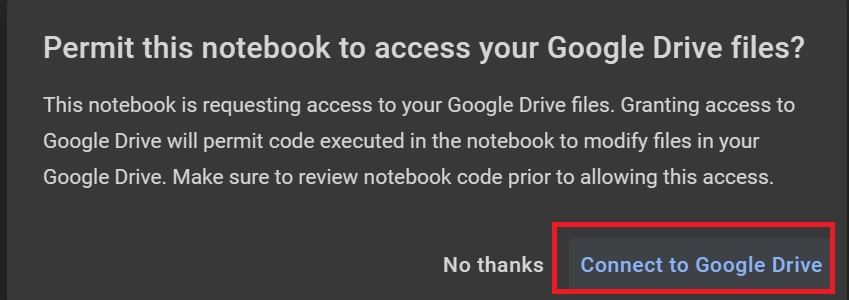
Step 8: Wait about 5-7 minutes for the website to output the links, you should prefer to click on the first link (remote.moe extension)

Important Notes
- You should always keep the google colab tab active while using the webUI, this tab helps you receive notifications and monitor the working of the UI.
- The link to access the UI can be used on any device that can access the web, but can only run 1 command at a time, the commands in other browsers will have to wait.
- Do not copy the google colab save to your computer, because this will not update new patches in the future and can be hacked if you do not use the official link on the website.
- After each use, you should disconnect the session at google colab to save resources, by going to “Runtime” => “Disconnect and delete runtime”
- If there is a notification about the capacity, click skip and continue
- If there is a stop message due to running out of hard drive memory colab (Usually happens with free colab account running full option ) try again with less model in library or change controlnet base version to reduce space
Instructions for uploading data to Drive using the tool
After running the webUI installation for the first time, an SD-Data folder will appear in your Drive, which you can load data into the respective folders in Drive.
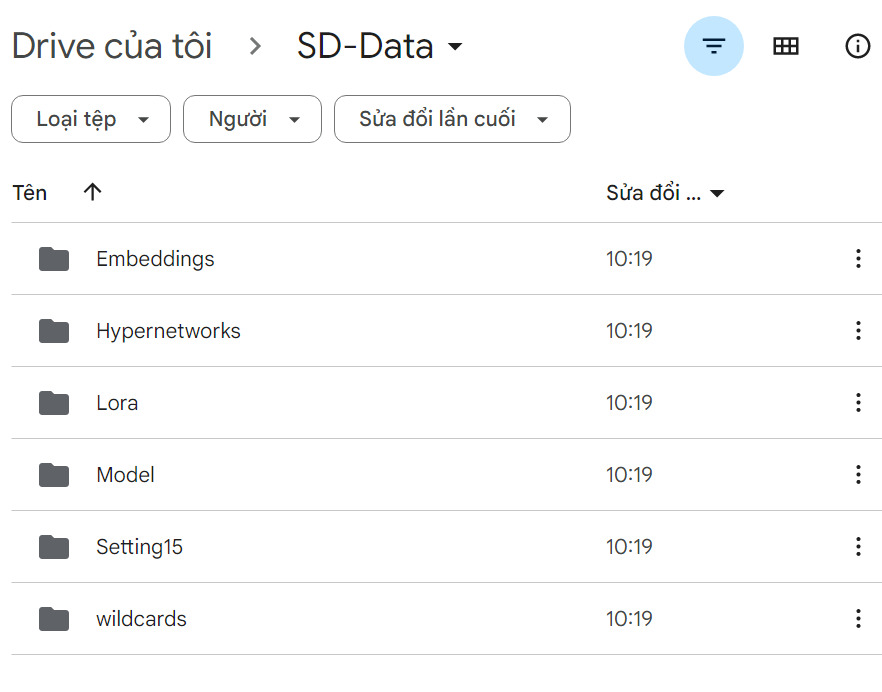
To download and upload data to Drive conveniently and quickly, follow these steps:
Step 1: Click on “Tools Downloads”

Step 2: Visit page Civitai and choose the model you like
Step 3: Right-click the Download box > Select “Copy link” (Copy link)
Step 4: Paste the link into the corresponding section on the Tools Download page (For example: If the Type is LORA, paste it in the LORA section)
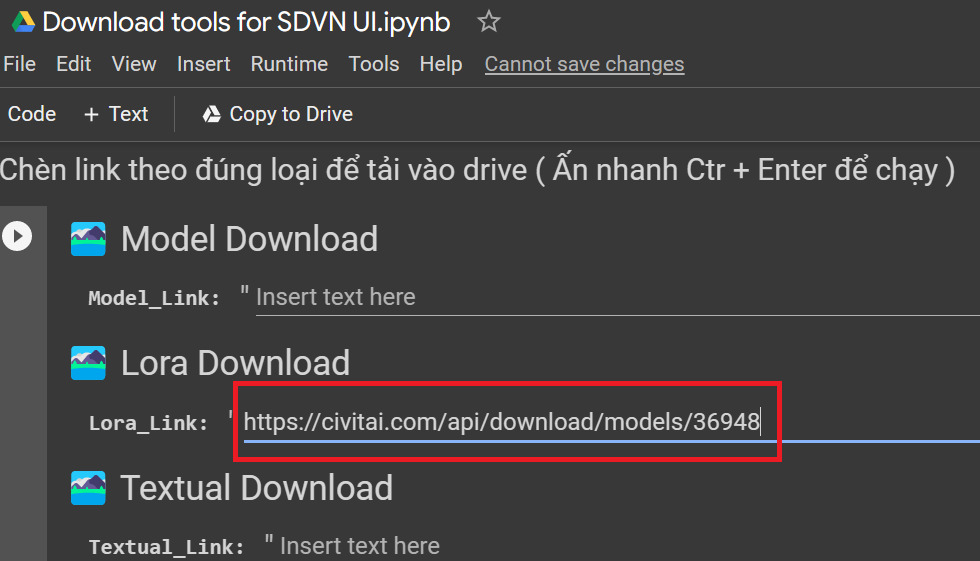
Step 5: Press “Ctrl + Enter” to run, select “Run anyway” > Select “Connect to Google Drive”
This tool will help you directly download data to the corresponding folder on Drive easily.
Step 6: After the download is complete, please click “Refresh” to reload the WebUI page
How to create an image with Stable Diffusion
At the WebUI interface, first, click on the icon as shown below to display the models you have.
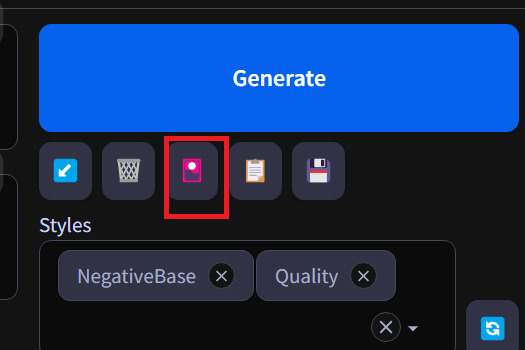
Similar to other image creation tools, you just need to fill in the prompt in the blank box, fill in the unwanted details in the “Negative Prompt” box (or leave it blank). Then click “Generate”
You can practice through the following example prompts:
- a close up of a person in a body of water, gorgeous chinese model, 4 k glamour photography, wet surface, boiling, swamp thing, feminine beautiful face, very famous photo, alluring eyes, photorealistic, stunning woman, ai, sweaty wet skin , in deep forest jungle


- a woman dressed as an angel holding a sword, 5 0 0 px models, trending on zbrush central, alone gorgeous latin woman, photo 3d, diamond plated superhero, hyper real, looks like gal gadot, mechanized Valkyrie, winged, she – ra, brian pulido

- beautiful woman, hazel eyes, rose lips, light brown hair, pearl jewelries, traditional chinese red hanfu attire, masterpiece

- a woman in a wedding dress posing for a picture, better known as amaranth, trending on Pinterest, brilliant pink ball gown, ornate long blond hair, by Carla Wygal, Dilruba dilaurate, 5 0 s, very pretty model, unreal maya

- a woman riding on the back of a black dragon, ulzzang, as a medieval fantasy character, promotional images, inspired by Wang Yuanqi, Victorian blue dress, popular isekai anime, argonium, nostalgic photography

- a woman in a sexy lingerie posing for a picture, hyperdetailed fantasy character, Asian human, fantasy character, human figures, kai’sa, royal woman, anorexic figure, female outfit

- a woman with a sword in a dark room, epic fantasy card game art, vogue render, by Pu Hua, sylveon, character design : : gothic, fuchsia skin below the armor, tinkerer, characters merged, by Gu Kaizhi, enchantress, she, Gemini

Wait a few minutes for the image to be created. Once done, click Save > Download to download the image to your computer!
Related questions
Where should I find the image source + prompt available?
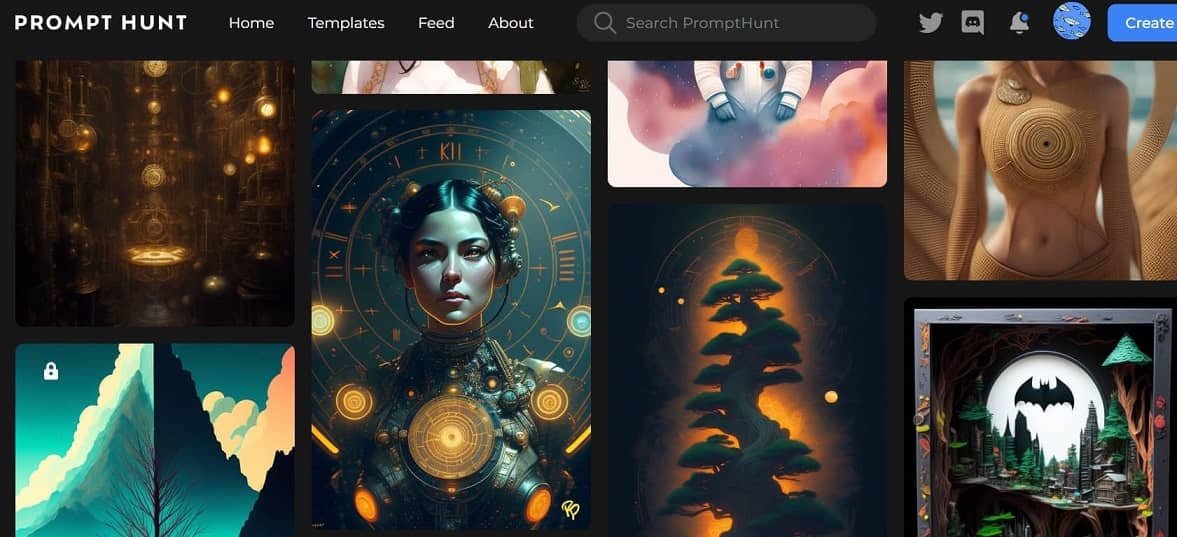
You can visit the page Prompt Huntin which there will be many different image styles, you can search for the theme you want in the search bar, then click on the image you like and copy prompt is done.
Can I find a prompt from any picture?
Okay! When you see a picture you like but don’t know how to implement the prompt, you can go to the page Hugging Face
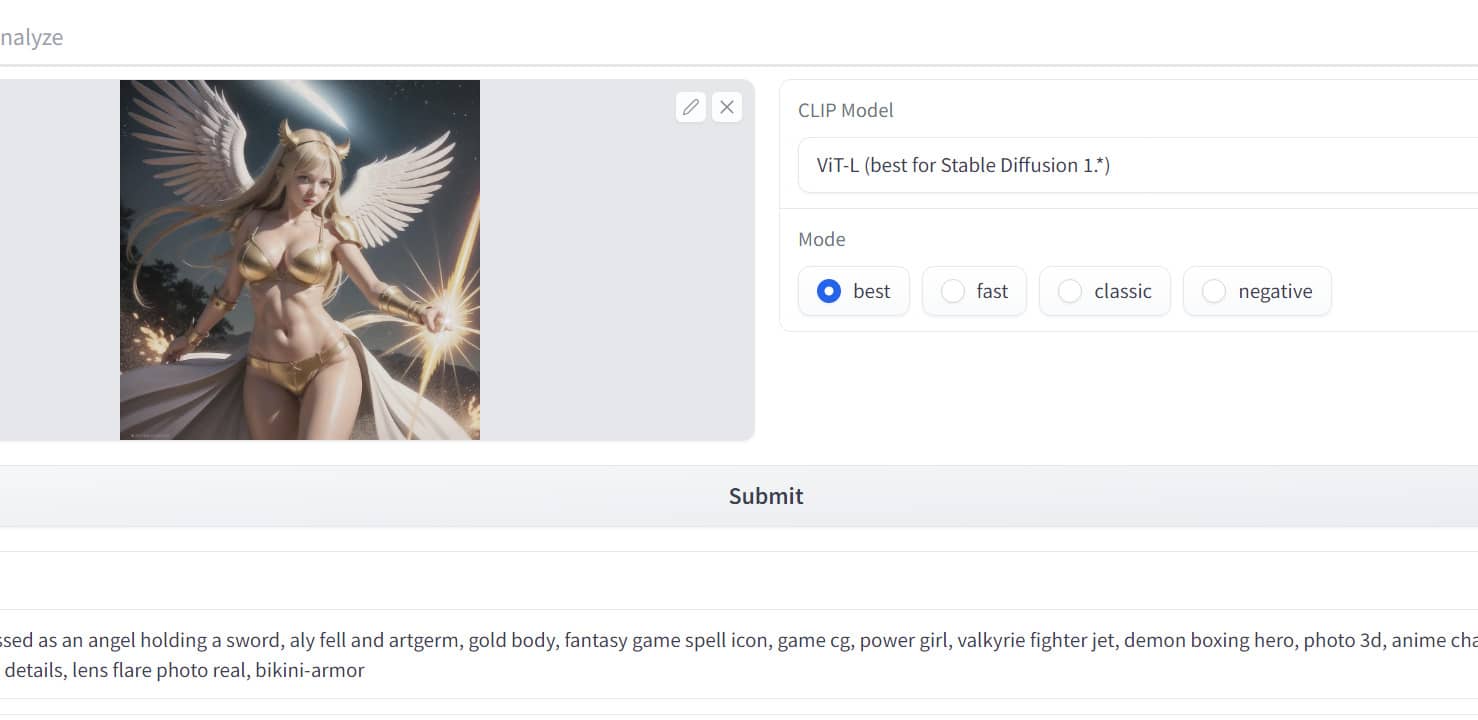
Next, you upload the image from your computer > Click “Submit”
Wait a moment, the system will output a prompt that describes the image right below, you just need to copy and use it.
Epilogue
So I just showed you how to use Stable Diffusion extremely simple. You can use this tool to create countless beautiful and impressive images. Good luck with your application!


