You are looking How to see more time zones on Mac The most convenient way? Whether it is to arrange a meeting with an international partner, keep in touch with relatives abroad, or simply satisfy the curiosity of the time in a place in the world, the simultaneous monitoring of many time zones is a very practical need. Fortunately, there is a neat and completely free solution called Multitimeinmenubar.
|
Join the channel Telegram belong to Anonyviet 👉 Link 👈 |
Why is it not good to see many default time zones on Mac?
Before going into the solution, let’s look back on the limitations of the above tools macOS:
- Watch application (Clock): You must actively open the application whenever you want to check the hour. This interrupts the workflow and spends extra unnecessary operation.
- Widget on desktop: Although more convenient, widget occupies a part of the screen space. When you are opening many windows, widgets may be obscured, losing its “quick viewing” usefulness.
Both of these methods do not meet the needs of instant time to see, even in sight without any redundant operation.
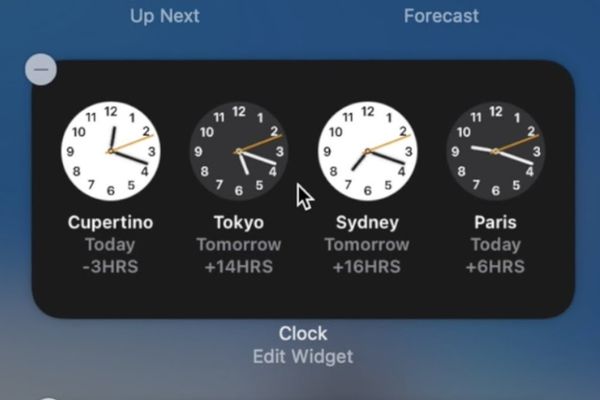
Multitimeinmenubar As a compact open source utility, created to do a single task and do it extremely well: display the clock of many different time zones right on the menu bar (Menu bar) of the Mac.
Instead of having to open the application or look at the widget, now you just need to glance at the top right corner of the screen. Time in New York, London, or Tokyo will always be there, neatly next to the system clock. This is the most visual and time -saving time zone. The application integrates seamlessly with the system interface, creating a feeling as an original feature that Apple has “forgotten”.
System requirements: You need Macs running Apple Silicon chip (M1, M2, M3 …) and MacOS 15.4 and above. The application may not launch on an Intel chip.
Step 1: Visit the official release page on GitHub’s Multitimeinmenubar And download the latest .dmg file.
- Open the .dmg file you just downloaded.
- Pull the Multitimeinmenubar application icon to the Applications folder.
- Run the application from the Applications directory or via Launchpad.
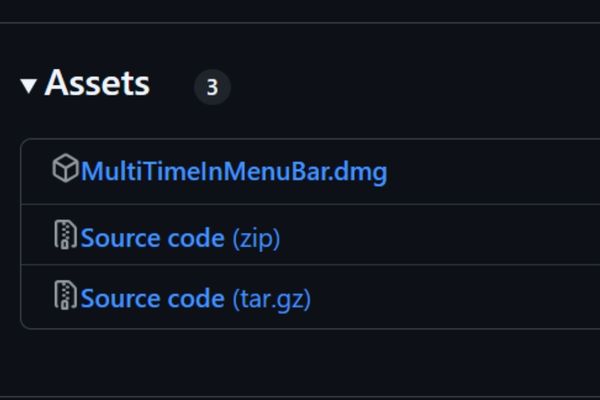
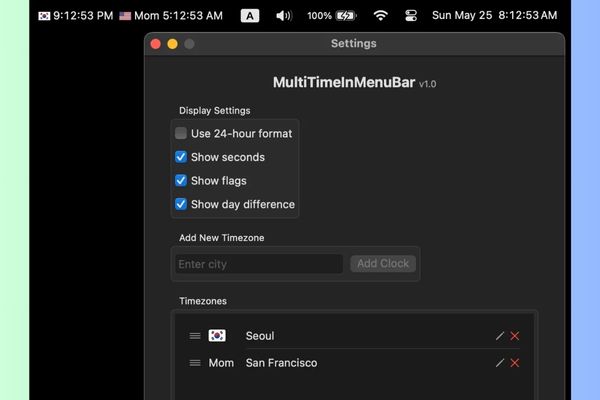
Step 2: After running, a small icon will appear on the menu bar. Click on it and select “Settings”(Settings) to start setup.
In the installation window, you can easily add the time zones you want to follow:
- Add the city: Enter the city name in the search box. The application will automatically suggest the appropriate locations.
- Showing national flags: Accumulate the “show flag” to have a small flag next to the watch, helping to identify faster.
- Add the prefix (prefix): Name an abbreviation (for example, “NY” for New York) to distinguish it clearly if you follow many cities.
- Time format: Choose between 12 hours or 24 hours.
- Advanced options: You can turn on the seconds (show seconds) or date offset, very useful when working with the time zones that have entered the next day.
After adding, the watches will immediately appear on the menu bar. You can add how many clocks as you like.
Advantages and some limitations to know
1. Outstanding advantages
- This is the fastest way to view the time zone on Mac, no need for excess operation.
- The interface is homogeneous with the system, bringing a natural feeling.
- Allows custom format, adding flags, preferences to suit personal needs.
- Is an open, free source project and is authenticated by Apple.
2. A small limitation
- Some cities may not be updated. The solution is to choose a nearby city with the same time zone.
- If you add too many watches, they may be hidden due to MacOS limitations.

Conclusion
How to see more time zones on Mac The most effective is to integrate them right on the menu bar. Hopefully through this article, you have found the perfect tool to master the global time without any other complex operations!


