
Protecting your privacy when surfing the web is becoming increasingly important. One of the simple ways to increase privacy is to enable the “Do Not Track” (DNT) feature available on most popular browsers such as Microsoft Edge and Google Chrome. This article will show you how to enable the feature Do not track on the browser to limit tracking and data collection when you visit websites.
| Join the channel Telegram belong to AnonyViet 👉 Link 👈 |
How is Do Not Track (DNT) a feature?
Do Not Track (DNT) is a setting in your web browser that sends a signal to the websites you visit that you do not want your online activities tracked for advertising or data analysis purposes. .

See more: How Check for cold penalties Online cars and motorbikes are extremely useful
The effectiveness of the do not track feature on browsers
While the DNT feature is a positive step forward in protecting privacy, not all websites comply with this requirement. Many websites continue to track users to serve ads and collect data, regardless of your DNT settings.
However, turning on the DNT feature is still a useful measure because it demonstrates your desire to protect your privacy and can partially limit tracking by some websites. This is an extra layer of protection for your privacy, helping to reduce the amount of targeted advertising.

How to enable the do not track feature on your browser
Below are detailed instructions on how to enable the do not track feature on Microsoft Edge and Google Chrome browsers on Windows 11 and 10.
On Microsoft Edge
Step 1: Open Microsoft Edge browser > Click the three-dot icon in the upper right corner to open the “Settings and more” menu.
Step 2: Select “Settings”.
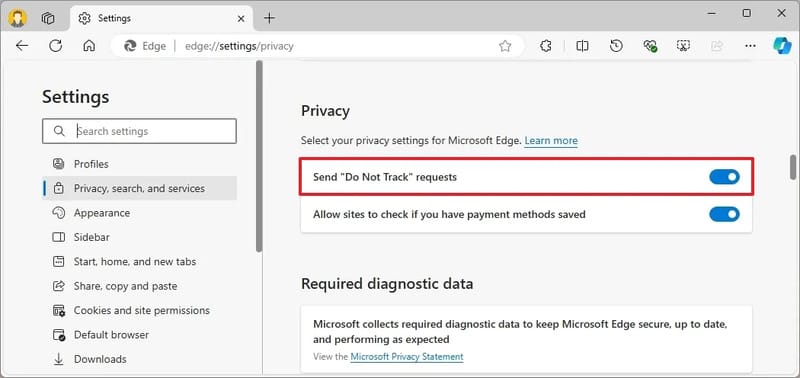
Step 3: Click “Privacy, search, and services”.
Step 4: Turn on the “Send “Do Not Track” requests” option in the “Privacy” section.
After completing the above steps, Microsoft Edge will send a “Do Not Track” request every time you visit a new website.
On Google Chrome
Step 1: Open browser Google Chrome > Click the three-dot icon in the upper right corner to open the “Customize and control Google Chrome” menu.
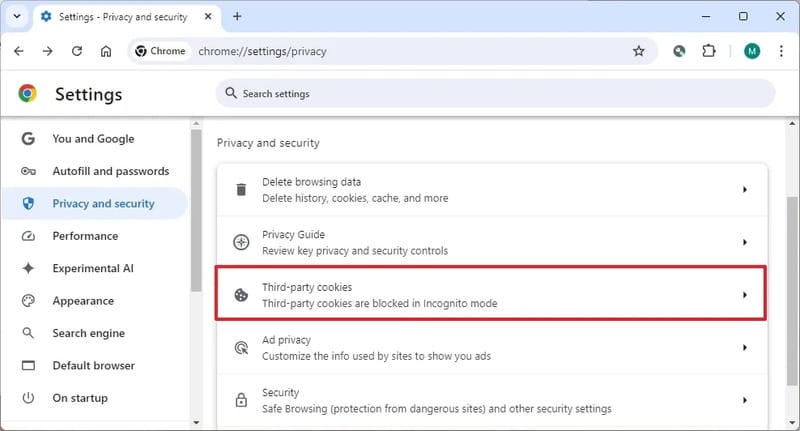
Step 2: Select Settings > Click “Privacy and security”.
Step 3: Click 'Third-party cookies'
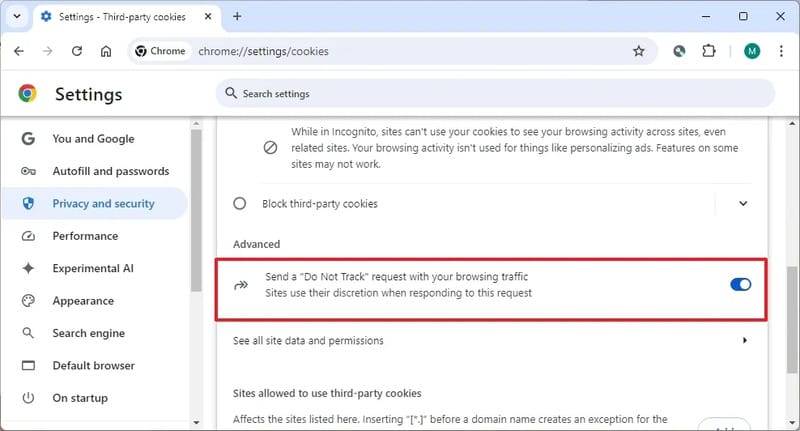
Step 4: Turn on “Do Not Track requests with your browsing traffic”
Step 5: Click the “Confirm” button.
From now on, Chrome will send DNT requests to the websites you visit.
Tips to protect your privacy when surfing the web
In addition to enabling DNT, you should also consider using other privacy protections such as:
- Use a privacy-focused web browser like Brave or Tor.
- Use ad and tracking blocking extensions.
- Regularly remove cookies and browsing data.
- Be cautious when providing personal information online.
By combining these measures, you can more effectively protect your privacy while surfing the web.

See more: Puma Browser: Smart web browser integrated with AI
Conclusion
Enabling the feature Do not track on the browser is a simple but important step to protect your privacy while surfing the web. Although not all websites comply with this requirement, it is still a useful additional layer of protection. Take the simple steps above to increase your privacy today!


