How to delete the text System requirements not met is a problem that many computer users often encounter. This is quite an unpleasant and annoying experience for users. So how to handle this error? AnonyViet will guide you through the steps to quickly and effectively delete the words System requirements not met.
| Join the channel Telegram belong to AnonyViet 👉 Link 👈 |
Cause of the error “System requirements not met”
The words “System requirements not met” are a system notification that your computer does not meet the hardware requirements of Windows 11. This may stem from the following reasons:
- Corrupt system files: If there are corrupt system files on your computer, it can cause many problems with the way it functions, including “System requirements not met” errors.
- Windows update problems: If you update Windows 11 from an unstable or incorrect update, or from an untrusted version of Windows, you may have problems with the new operating system. You can check this by entering safe mode and seeing if the error appears.
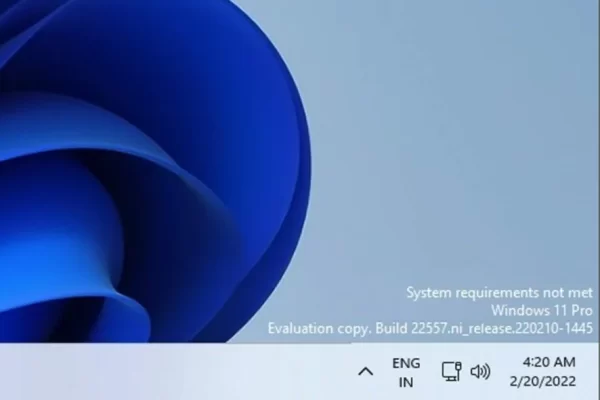
Instructions on how to delete the words System requirements not met
If you want to remove the text “System requirements not met” from the system tray, you can try one of the following two ways:
Method 1: Use Registry Editor
Registry Editor is a tool that allows you to edit system settings. You can use it to remove the text “System requirements not met” by following these steps:
Step 1: Open Search > enter regedit > click Registry Editor.
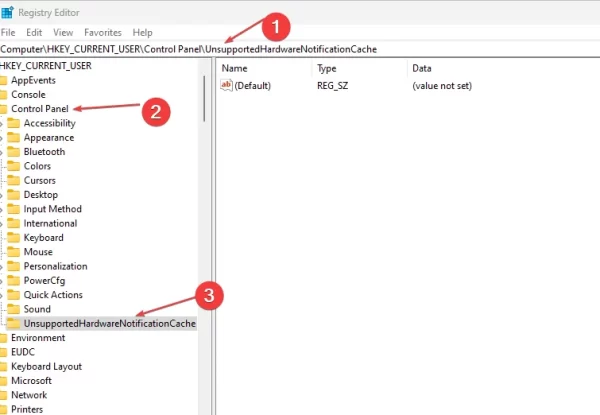
Step 2: In the Registry Editor window, navigate to HKEY_CURRENT_USER > Control Panel >
UnsupportedHardwareNotificationCache
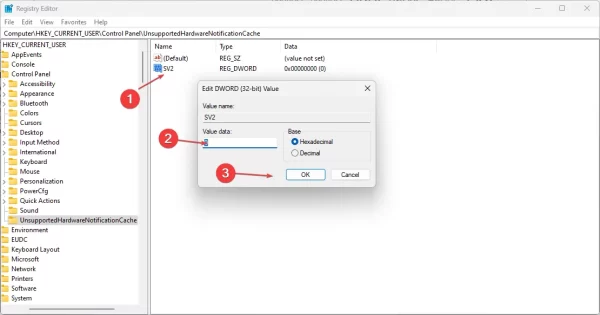
Step 3: From the right pane, double-click SV2 and change the number 1 to 0 in Value data > click OK.
Step 4: Close Registry Editor and restart your computer.
Note: You should create a system restore point before modifying the registry in case something goes wrong. If you cannot find UnsupportedHardwareNotificationCache, you can create this key by right-clicking on Control Panel > selecting New > Key.
Then, you create SV2 by right-clicking on the empty area to the right of UnsupportedHardwareNotificationCache > selecting New > DWORD (32-bit) Value .
Method 2: Return to Windows 10
When you switch to Windows 11 from Windows 10 using a vulnerability (requires TPM), and encounter problems with the new operating system, you should return to the Windows 10 version. You will no longer see the text “ System requirements not met” anymore and you can upgrade your computer configuration to use Windows 11 later. To return to Windows 10, follow these steps:
Step 1: Open Settings > Windows Update > Advanced options.
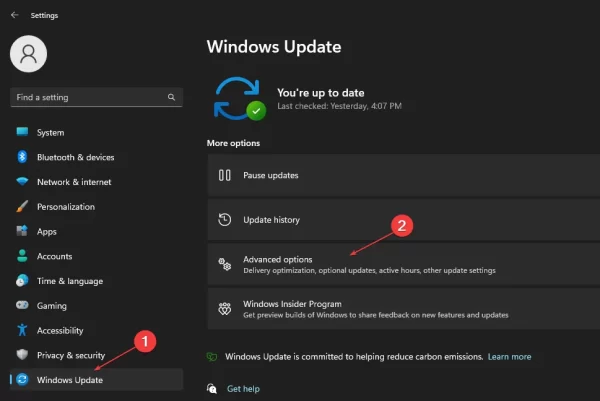
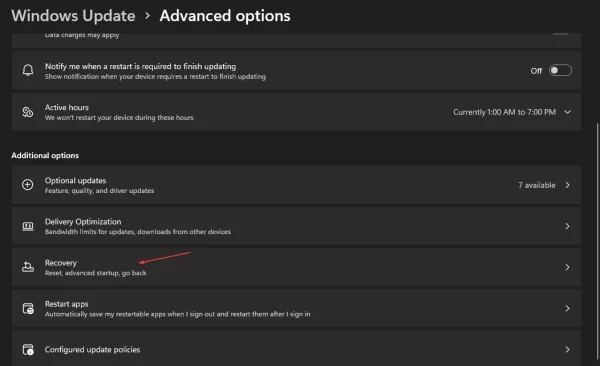
Step 2: Click Recovery.
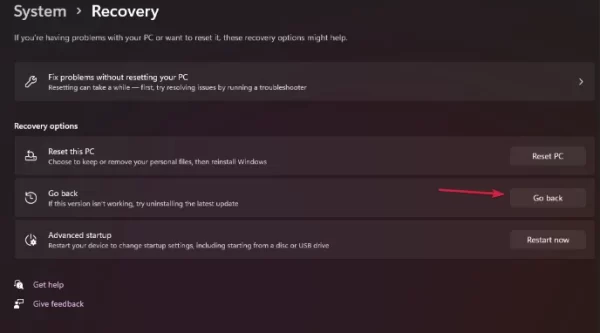
Step 3: At Recovery options, click the Go back button
Step 4: Microsoft will ask why you have to return to Windows 10. Choose an answer and then click Next > No, thanks > Next > Next
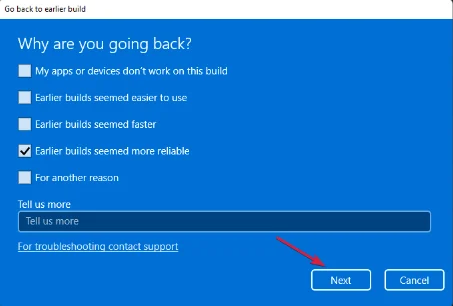
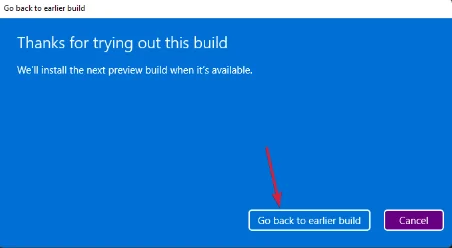
Step 5: Finally, click Go back to earlier build
Note: If you want to continue exploring Windows 11 and your computer is not eligible, you should stop Windows Update and activate the Windows firewall to protect your computer from viruses.
Epilogue
So I have guided you How to delete the text System requirements not met on Windows 11 in two ways: using Registry Editor or returning to Windows 10. Hopefully you have found the right way for yourself. Wishing you a successful application!

