How to create a professional email signature is an important skill that anyone working in an office or business environment needs to know. An email signature is not only a way to close an email message, but also a means to impress, increase credibility and build a relationship with the recipient. In today's article, AnonyViet will introduce you how to create an impressive and effective email signature.
| Join the channel Telegram belong to AnonyViet 👉 Link 👈 |
Benefits of having a professional email signature
Signature email is the personal or company information that you attach at the end of each sent email. Email signatures can include name, position, company, contact information, logo, slogan, social network links and other elements.
Knowing how to create a professional email signature has many benefits, such as:
Make a good impression on the recipient
Email signature shows that you are a serious, confident person and have a professional working style. It also sets you apart from people who send unsigned or haphazardly signed emails.
Share useful information for the recipient
Email signatures help recipients get to know you and your company better. It also makes it easier for them to contact you when the need arises. Additionally, if you include social media links or your website, you can also attract recipients to visit these channels to learn more about you and your company.
Introduce and market your personal or business brand
Email signatures are an effective way to introduce and promote your brand to recipients. You can use logos, slogans, colors and fonts that match your or your company's identity. You can also add promotional banners, videos or your latest content to the signature to attract the recipient's attention.
How to create a professional email signature
To create a professional email signature, follow these steps:
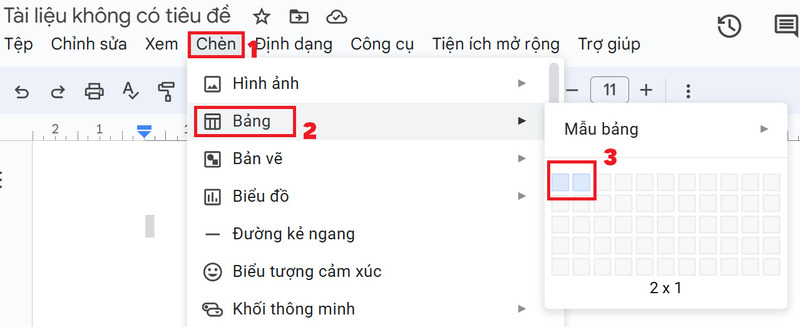
Step 1: Go to Google Docs > Click the “Insert” tab > Table > Choose to create 2 cells in 1 row as shown below.
Step 2: Adjust the 2 cells in a 1:2 ratio

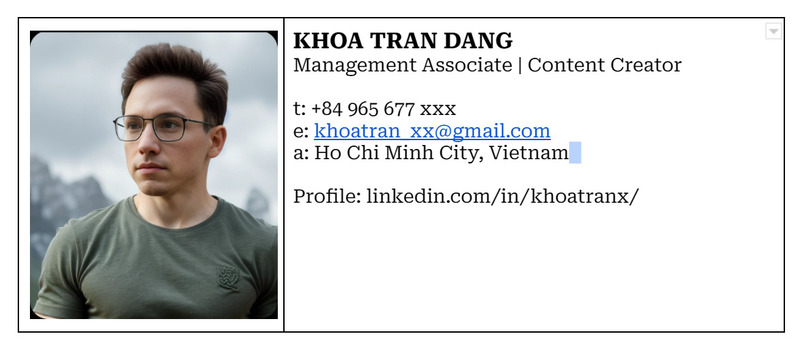
Step 3: In the first box, insert your avatar here

Step 4: In the second box, you fill in basic information such as name, position, phone number, email,…
Here I use the font: Roboto Serif
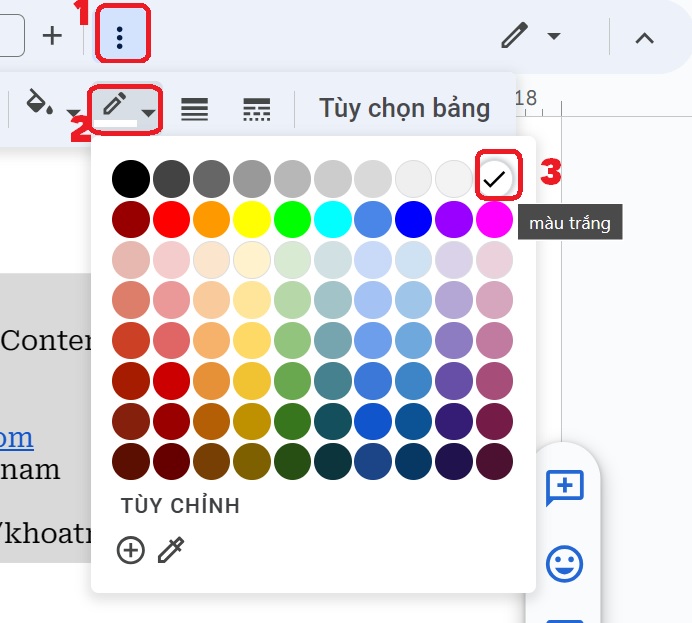
Step 5: Highlight the content in the 2 boxes > Click the 3-dot icon > Choose border color > Choose white

Step 6: Copy the entire signature
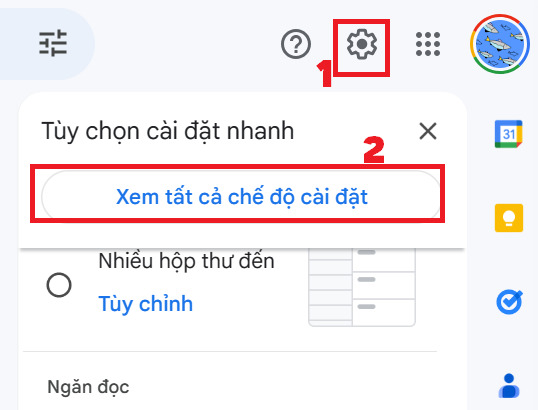
Step 7: Go to Gmail page > Click on the Settings icon > Select “See all settings”
Step 8: Scroll down to the signature section, click “Create new”
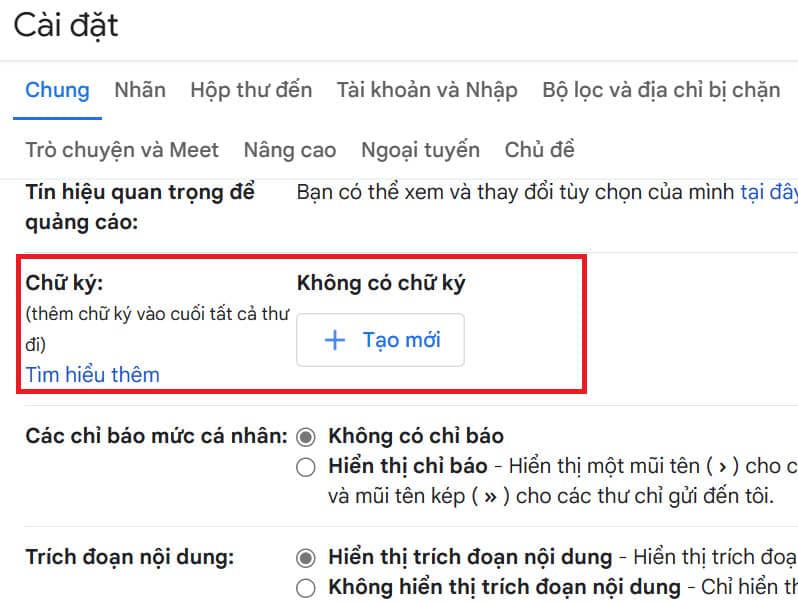
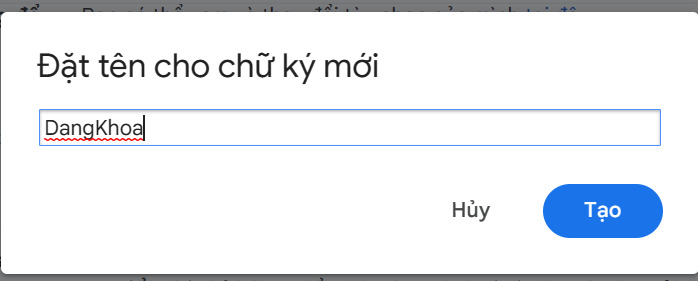
Step 9: Name the bad signature and click “Create”
Step 10: Paste the signature into the blank box

Remember to select the signature name in the Default Signature section and check it as shown so that when you send an email or reply to an email, your signature will be included below.

Step 11: Click “Save changes”
So from now on, every time you send an email, you will have a very professional and prestigious signature like this

Epilogue
Try applying How to create a professional email signature that we have guided to have an impressive signature, which can help you attract customers, increase sales and build good relationships with partners. Hope you are succesful.


