How to blur photo background with Photos app is a fun and useful technique for creating unique and professional photos. By blurring the background, you can focus attention on the main part of the photo, or create special effects for your photo. AnonyViet will show you how to blur photo backgrounds with the Photos application, one of the popular and free photo editing applications on Windows.
| Join the channel Telegram belong to AnonyViet 👉 Link 👈 |
How to blur photo background with Photos app
To use the Background Blur feature, you need the latest version of the Photos app. This version has the model number 2023.11090.13001.0 or higher. You can check and update the Photos app via the Microsoft Store app by:
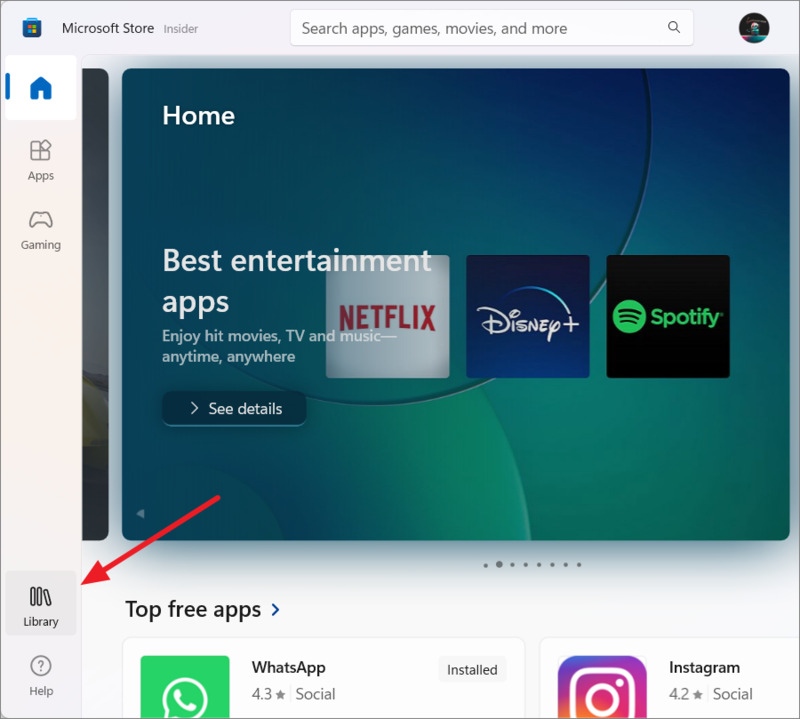
Step 1: Open the Microsoft Store app > Select 'Library'.
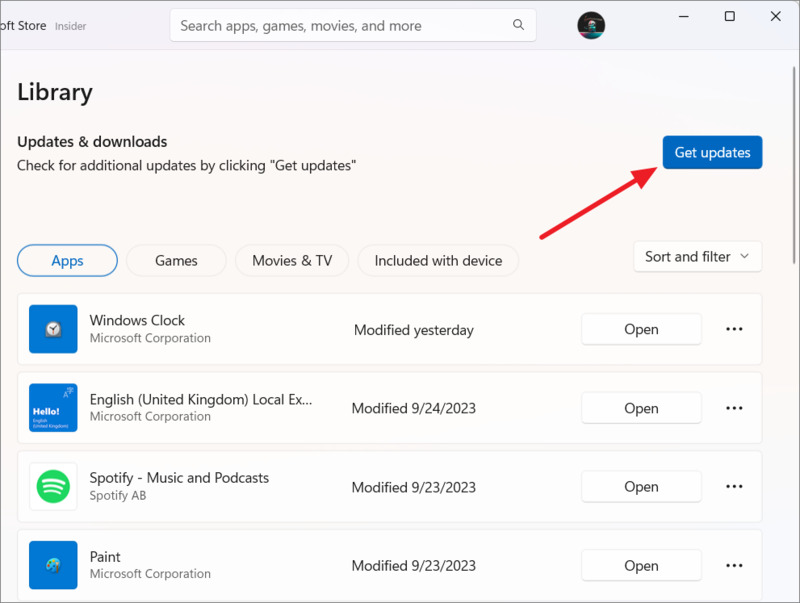
Step 2: Click 'Get updates' to let Microsoft Store check and update all Universal Windows Platform (UWP) apps.
Once you've updated to the latest version of the Photos app, you can use the Background Blur feature to blur the background of your photo. You follow these steps:
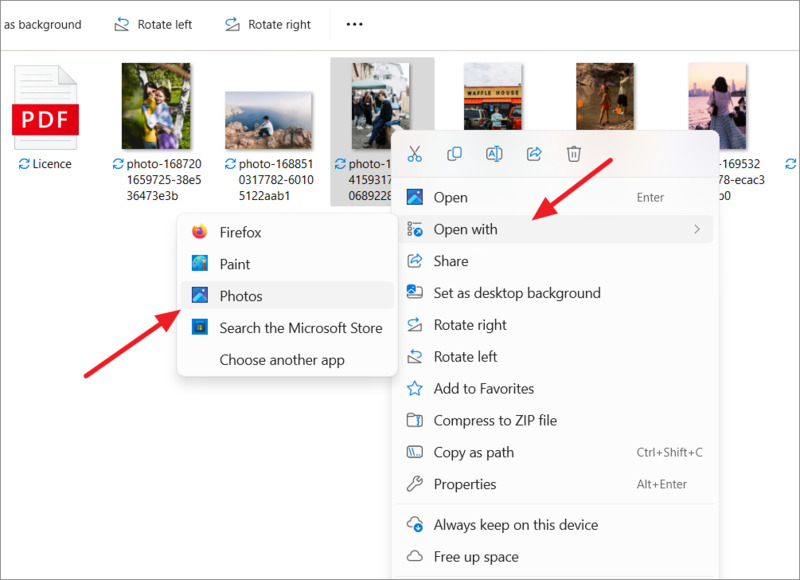
Step 1: Open the photo in the Photos app by double clicking on the photo or you can right-click on the photo > Select Open with > Photos
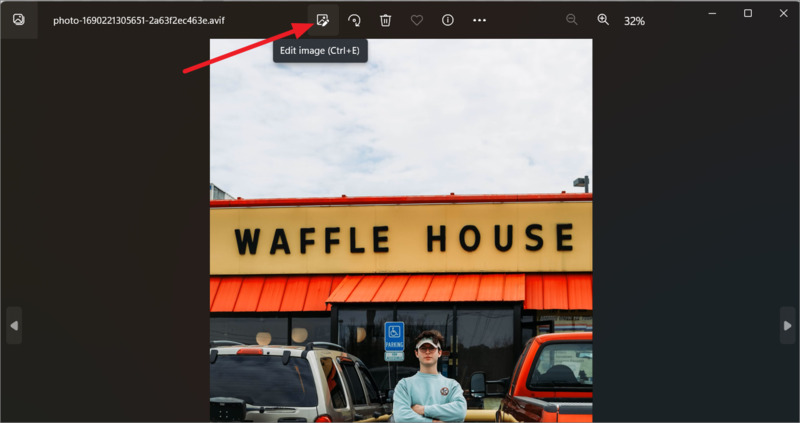
Step 2: Click the Edit image icon (or press the shortcut Ctrl + E) to enter photo editing mode.
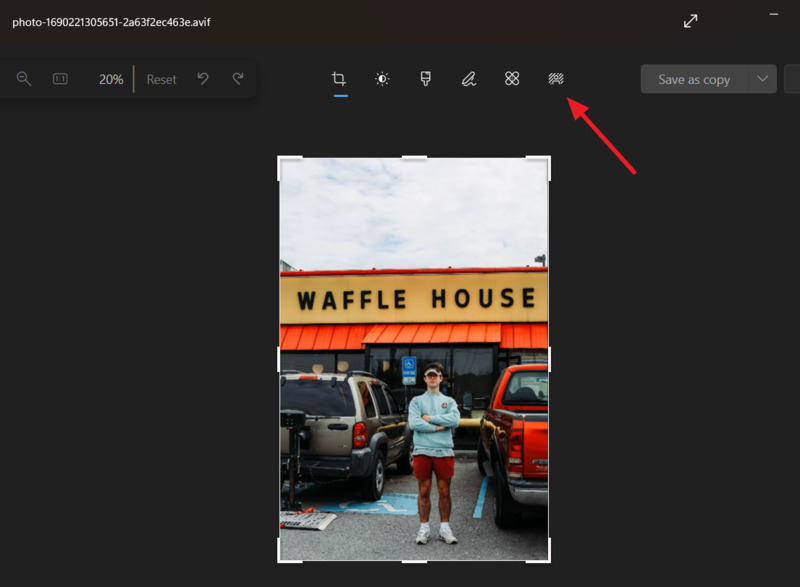
Step 3: Next, click the Background Blur icon (next to the Retouch icon) on the toolbar.
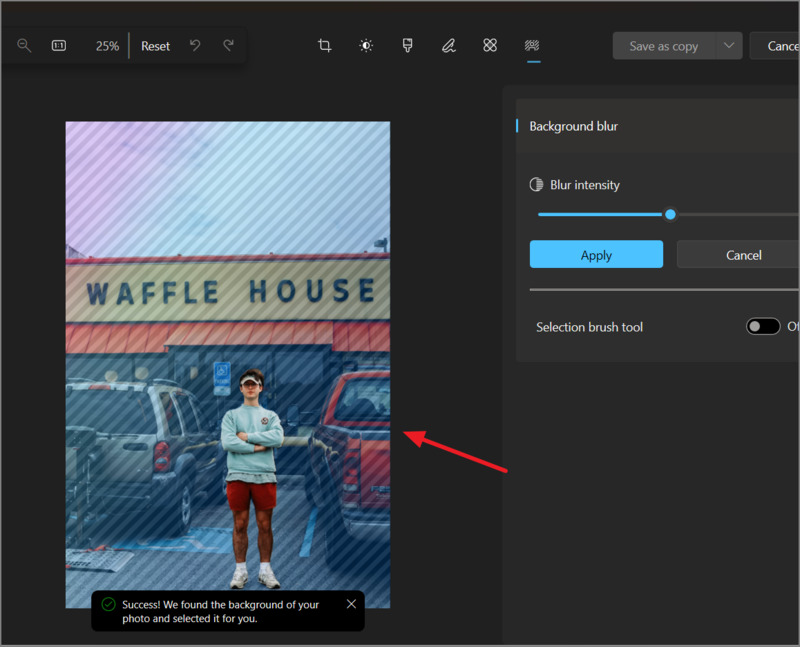
Step 4: The Photos app automatically analyzes the photo, finds the background, and blurs it, making your subject stand out more.
In some cases, you don't need to do anything more, just adjust the blur by dragging the 'Blur intensity' slider on the right, press 'Apply' and save the photo. The default opacity level is 50%.
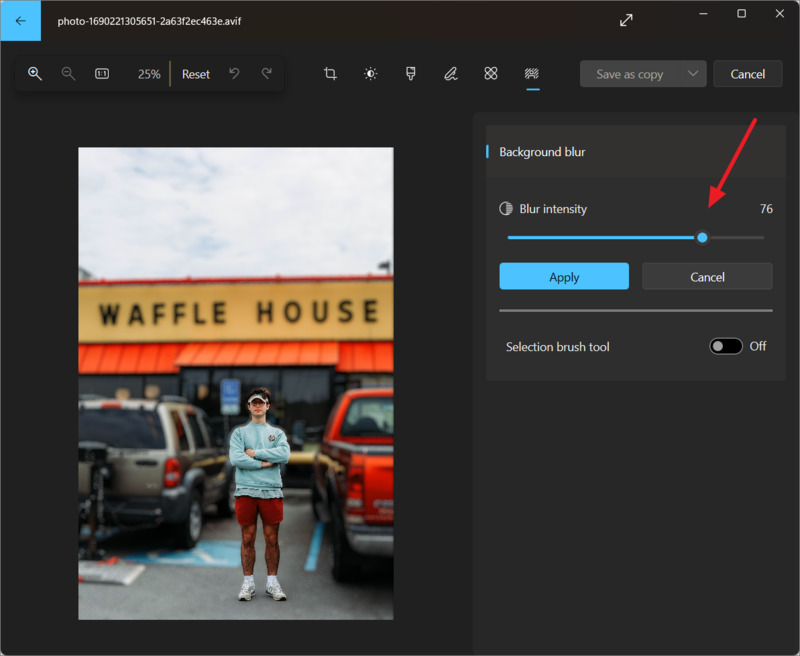
In other cases, you may want to adjust the blurred area further. You can enable 'Selection brush tool' mode on the right to use the brush to select or deselect the area you want.
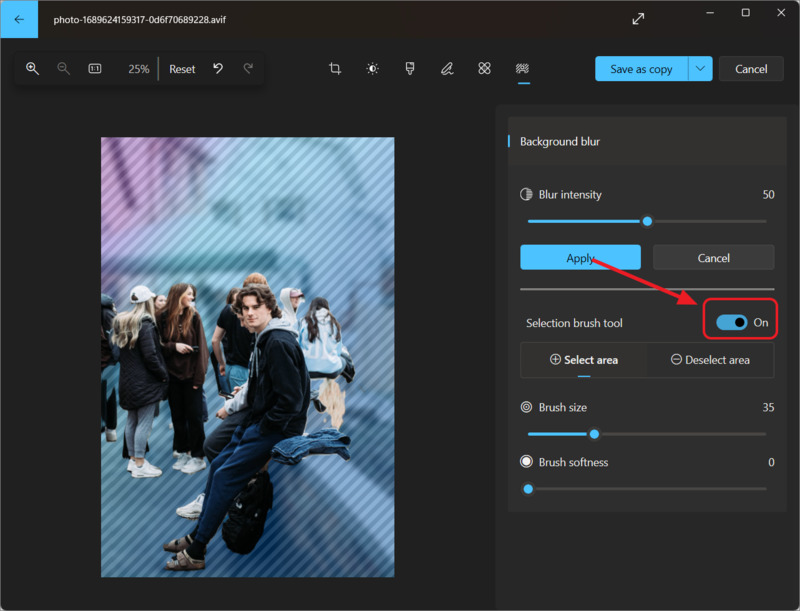
When you turn on the Selection brush tool mode, you will have a few more options:
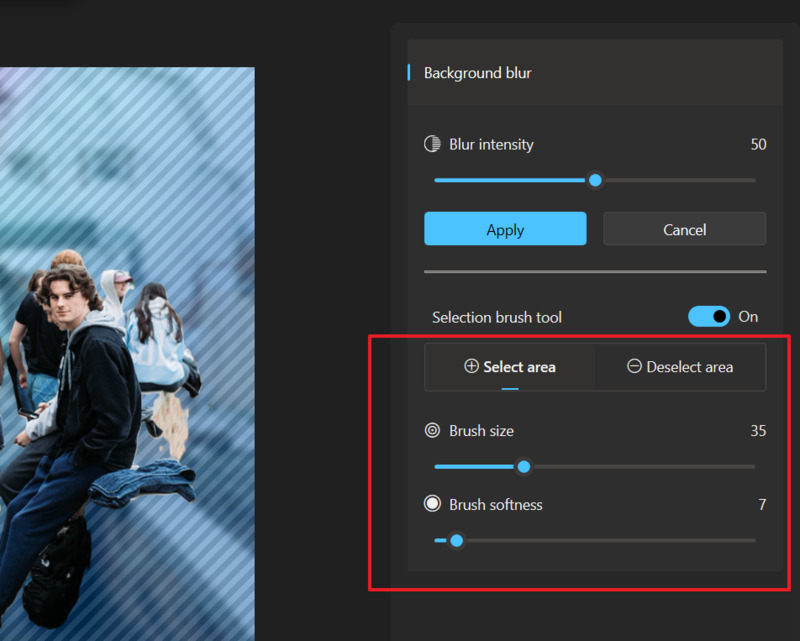
- Select area: Select the background area you want to blur.
- Deselect area: Select the subject area you want to stand out.
You can adjust the size and softness of the brush by dragging the sliders. Large brushes will cover more area, while soft brushes will create a smoother transition between subject and background.
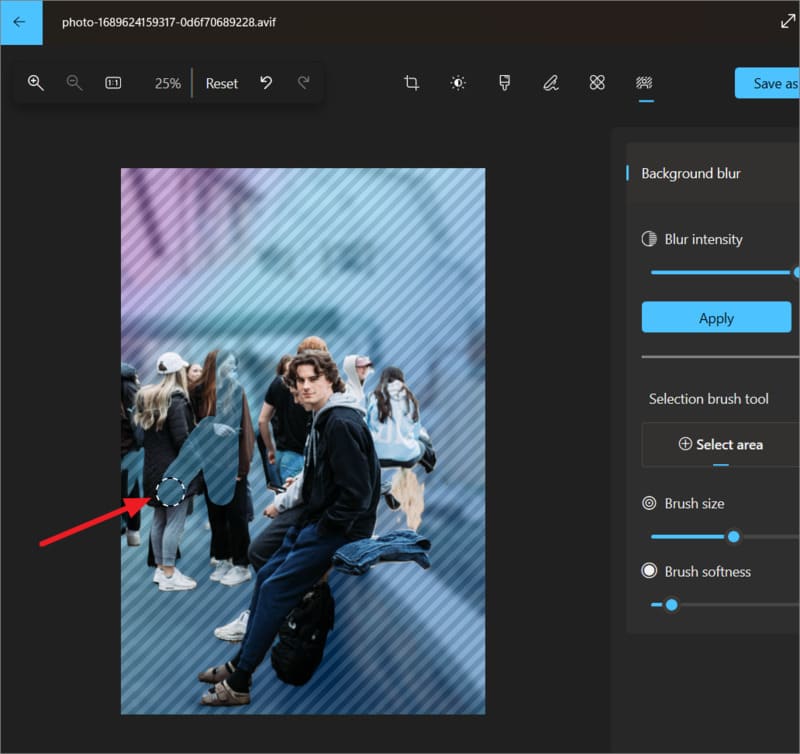
You use the brush to select or deselect the area you want on the photo.
After you are satisfied with the result, click Apply to apply the effect.
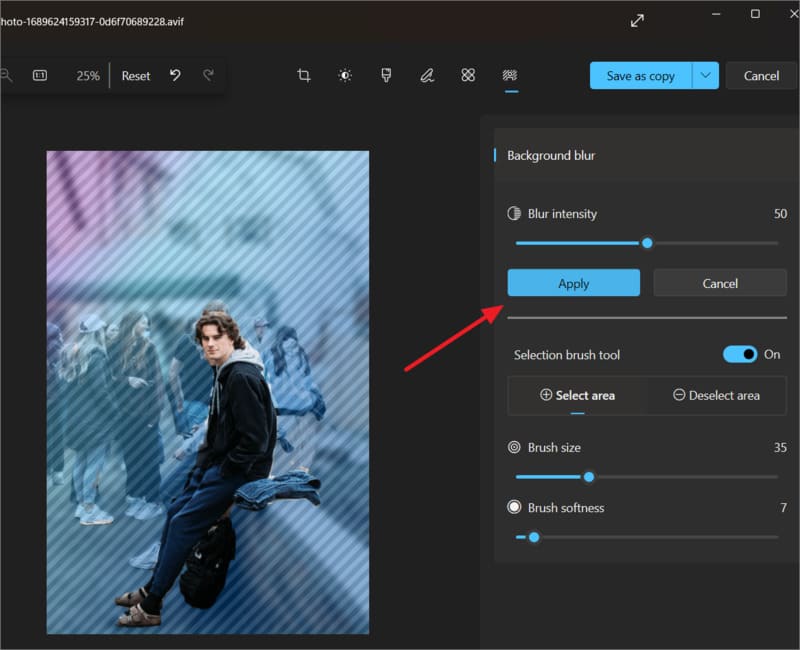
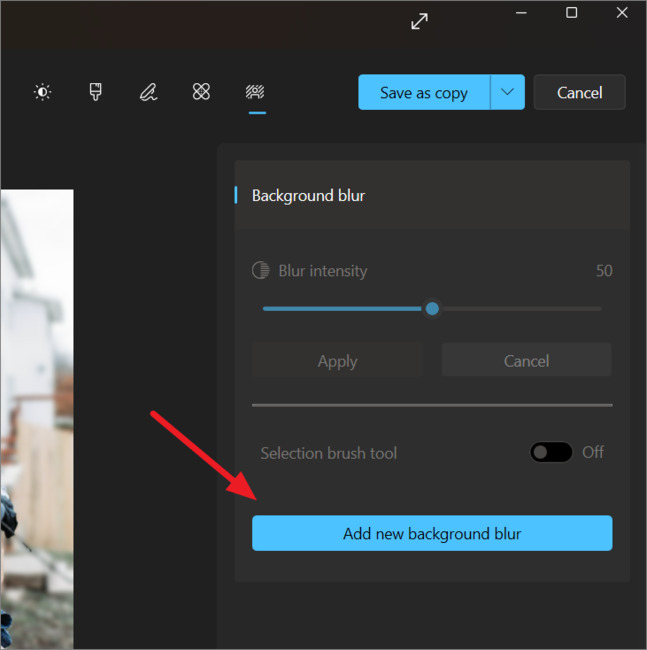
If you want to add another blur effect, click 'Add new background blur'.
After applying the effects, click 'Save as copy' to save the edited photo as a new photo.
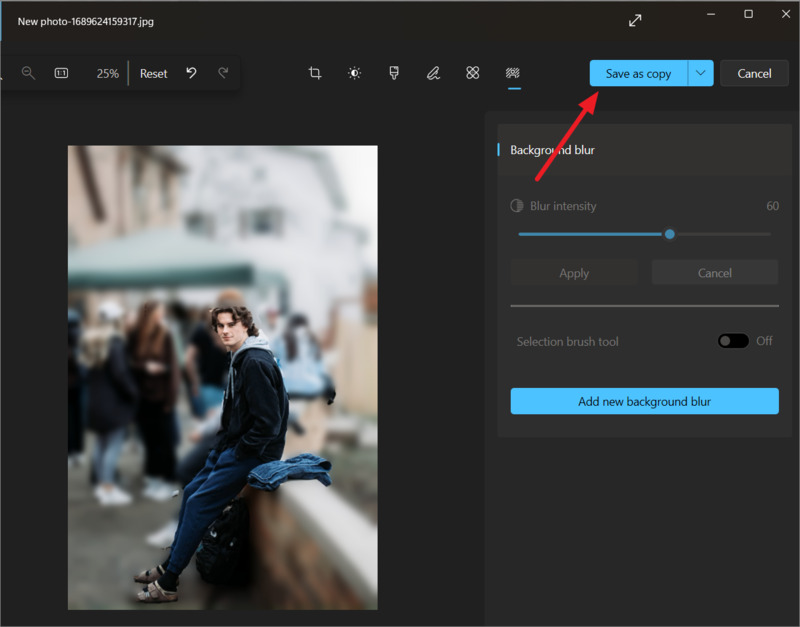
The Photos app will handle the changes and give you a great-looking photo with background blur, just like taking a portrait mode photo on a smartphone.
Epilogue
So I have guided you How to blur photo background with Photos app by Microsoft. You also know how to adjust the area and opacity as desired. Wishing you a successful application!


