
If you are a person working with many screens, you must have encountered the loss of the mouse pointer or accidentally moving to another screen. Whether you are working or playing games, this problem can quickly cause discomfort and interrupt the work. Fortunately, there was a simple solution: Cursorkeepper. In this article, we will learn about how Cursorkeeper helps you control the mouse cursor and keep it always in the right place you need.
|
Join the channel Telegram belong to Anonyviet 👉 Link 👈 |
What is cursorkeeper?
Cursorkeepper As a free and open source application, operating on Windows operating system, specially designed to solve the problem of “crossing” mouse pointer when using multi -screen.
This application works by creating “virtual boundaries” at the edge of the screen, preventing the mouse cursor from moving to another screen accidentally. This feature is especially useful for professional, gamers, or anyone who has the habit of opening multiple application windows simultaneously on different screens.

Imagine this familiar situation: You are focusing on drafting an important report on the main screen, and in an careless moment, the mouse pointer “jumps” to the second screen. This not only distracts you but also can cause unwanted operations on that screen.
With cursorkeepper, you absolutely can avoid similar situations, making sure the mouse pointer is always under control on the screen you are using. This helps maintain a significant focus and improve performance.
See also: Secret Sharer: Private message sharing tool, can cancel itself
Advantages of cursorkeepper
A big plus of cursorkeepper is the calculation “Compact” its. You do not need to undergo complex installation, just download and use immediately. After starting, the application will “hide” discreetly in the System Tray area on the Taskbar, near the system clock, ensuring not to cause any troubles for your workspace.
Activating or disabling cursorkeepper is also extremely simple. You just right click on the application icon and select the corresponding option. There is no cumbersome menu or complex installation, all operations are fast and intuitive. This is especially useful when you want to temporarily allow the mouse pointer to move freely between screens.
In addition, Cursorkeeper focuses entirely on its core function without “hugging” any unnecessary features. Application Consumption very little resources The system (only about 9.4 MB of memory), which makes it an ideal choice even for modest computer configurations.
Instructions for downloading and using cursorkeepper
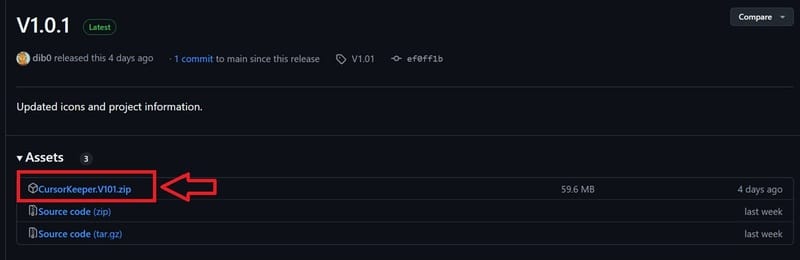
Step 1: Visit the official github page of the project to download the latest version of the application HERE.
Step 2: After downloading, you just need Double click on the .exe file To launch the application. No need to install complicated.
Step 3: To turn on or off cursorkeepper depending on the needs, you just need Right -click Go to the application icon in the notification area on the Taskbar bar and select the corresponding option.

Cursorkeepper points need to be improved
Although Cursorkeeper has done a very good task, some small improvements can make the experience more convenient and interesting. One of them is the ability to configure shortcut To activate or disable application quickly without using mice. This will be especially useful in situations you need to manipulate quickly.
Similarly, one Visual indicator To know if the application is active or not is also a valuable addition. For example, the symbol of the application in the notification area can change the color or style depending on the operating state of cursorkeepper, making it easier for users to identify.
See also: How to upgrade to Perplexity Pro for free 1 month
Conclusion
Although there are some small shortcomings such as lack of shortcuts and status indicators, but Cursorkeepper Still successfully completed his main task. If you are a multi -screen user and want to avoid controlled mouse cursor, then cursorkeeper is definitely an application you should try.


 of Chrome")

