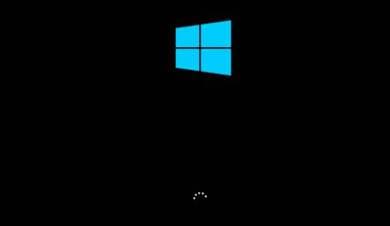
When you press the Power button to start the machine, you will see a Windows logo logo appear a few seconds after the Load is complete, it will go to the Desktop.. However, if you are bored with the default Windows logo on the boot screen, you can add your own custom logo to the start screen. In this article, AnonyViet will guide you to change the Windows 10 boot logo to another image as you like.
| Join the channel Telegram of the AnonyViet 👉 Link 👈 |
The implementation is quite easy, you just need to prepare an image to make the boot logo for Windows. Please follow the steps below change boot logo in Windows 10 .
Some notes when changing the Boot Logo:
Before making any changes, make sure you know and follow the list below.
- Important: Windows backup should be backed up to avoid incorrect operations, leading to Windows failure and failure to start.
- Windows will run in UEFI mode.
- If Windows is running on UEFI, make sure the feature is disabled. Secure Boot. When Secure Boot is enabled in UEFI, you cannot change the boot logo.
- Can’t choose gif image (animated image) to make windows boot logo.
- Have the image you want to set as the boot logo. Image can’t be bigger 300px x 300px.
- Should run as Administrator to proceed to change the Windows Boot Logo
- This guide only applies to Windows 10.
- Use page https://www.iloveimg.com/resize-image to resize images online for standard.
Once you’re sure of everything on the list above, stay tuned for the next section.
Instructions to change the Windows Boot Logo
Since Windows does not have the feature to change the Boot Logo, we will use a free and open source third-party tool called HackBGRT.
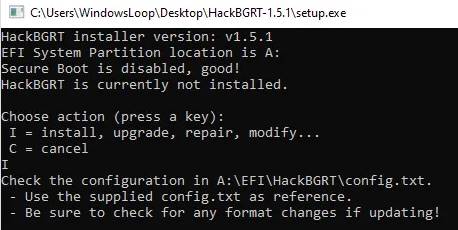
1. Now, open the extracted folder, click right mouse to file “setup.exe”and select the option” Run as administrator“.
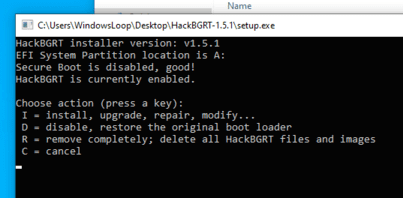
The above action will launch the application’s command line tool. Here, press the . key i.
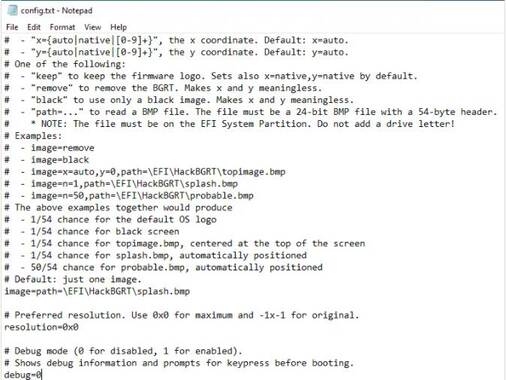
2. As soon as you press the key, the program’s configuration file will be opened in Notepad. You just turn off Notepad by clicking on the icon ” X” in the upper right corner.
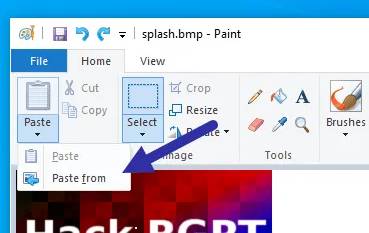
3. When you close Notepad, HackBGRT will open the Paint application with its own default startup logo. Here, click on “Paste“drop-down and select button”Paste from“.
3. Now find the image you want to set as the new Windows boot logo, select it and click the “button”Open“.
Quick tip: Since the Boot Logo does not support transparent images, change the background color of your transparent image to black before adding it to the Paint application.
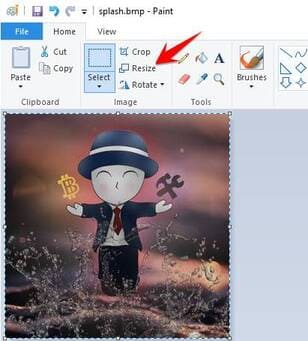
4. The boot logo will be added to Paint. If necessary, resize the image by clicking the “Resize” button.
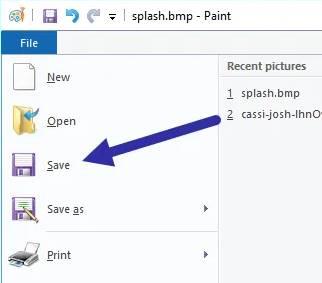
5. Once done, select the option “File → Save” to save the file. After saving, close the Paint application.
6. As soon as you close the application, you are done with the installation of HackBGRT. Now press any key to close this window.
7. Now that you boot into Windows, you should see your new custom boot logo instead of the default Windows logo.
Restore Default Windows Boot Logo
If you want to restore the default Windows 10 logo, open the HackBGRT app again.
1. First, open the HackBGRT folder, right click on the “setup.exe” file and select the “Run as administrator” option.
2. Since the application is already installed in your system, you will see additional options.
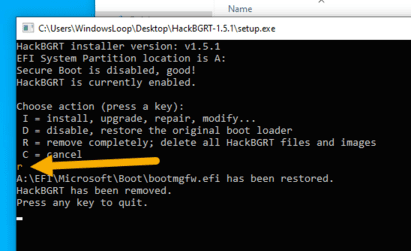
3. To completely remove HackBGRT and restore the original boot logo, press r. If you want to close the application and restore the original boot logo, press d. In my case I wanted to remove it completely. So I pressed r.
4. As soon as you press the key, HackBGRT will restore the original boot logo.
5. Just reboot the system and you will see the initial Windows boot logo.
It’s simple to change the Windows boot logo or add a custom boot logo. If you are stuck or need some help, comment below, we will assist you.





![[Lập Trình Game] Instructions for using AutoTile when designing games with Godot [Lập Trình Game] Instructions for using AutoTile when designing games with Godot](https://anonyviet.com/wp-content/uploads/2020/04/image005.png)


