
You are looking for a solution to disable Hyper-V and improve your computer's performance? Let's see 4 ways to turn off Hyper-V on Windows 11/10 through the article below!
| Join the channel Telegram belong to AnonyViet 👉 Link 👈 |
Overview of Hyper-V
Hyper-V is a level one hypervisor available in Windows Pro, Education, and Enterprise editions. It allows you to create virtual machines and install any Windows operating system in them.
Hyper-V also supports Linux and FreeBSD, helping you experiment and learn how to use both old and new operating systems as well as install discontinued software.
In spite of Hyper-V There are many great applications, users often do not need a hypervisor for daily use. In addition, it can also cause conflicts with third-party applications if you are using another virtualization tool, causing you to encounter errors while using the computer.
4 ways to turn off Hyper-V on Windows 11/10
Method 1: Use Control Panel
This is the simplest method to disable Hyper-V.
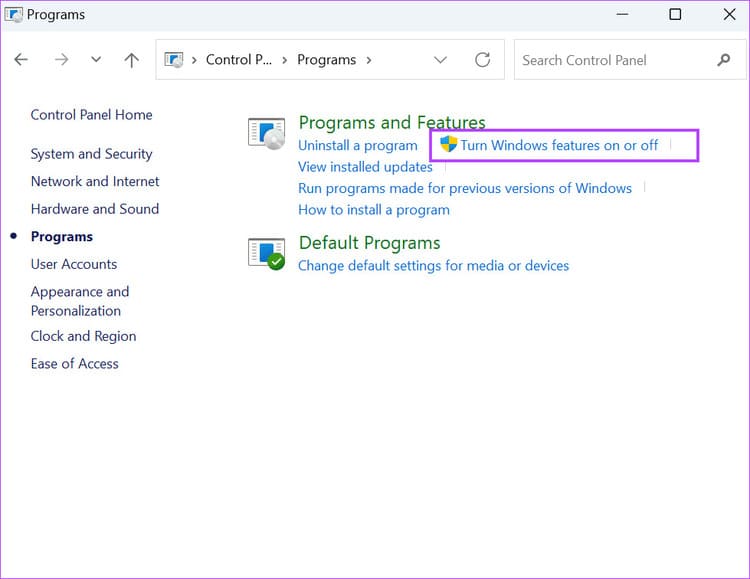
Step 1: Just open Control Panel > Select 'Programs' > Go to Programs and Features and select 'Turn Windows features on or off'.
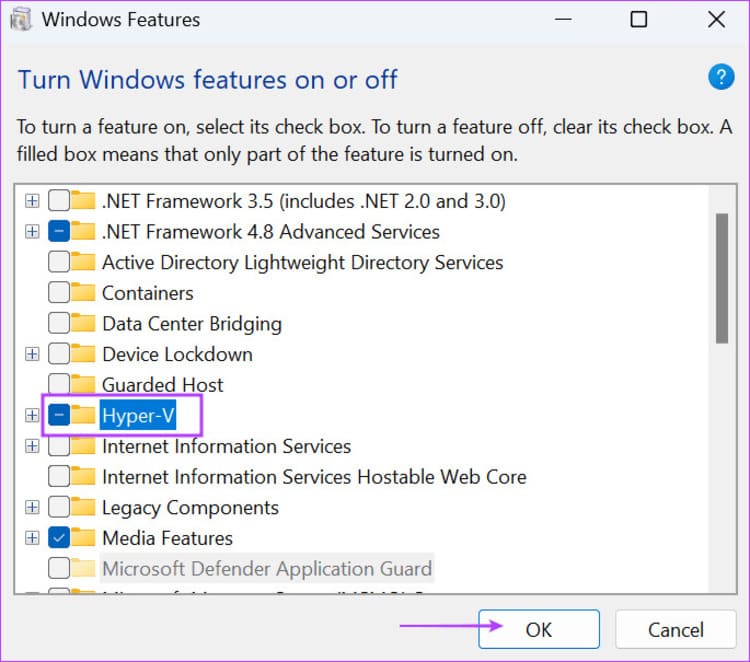
Step 2: Find Hyper-V and uncheck it.
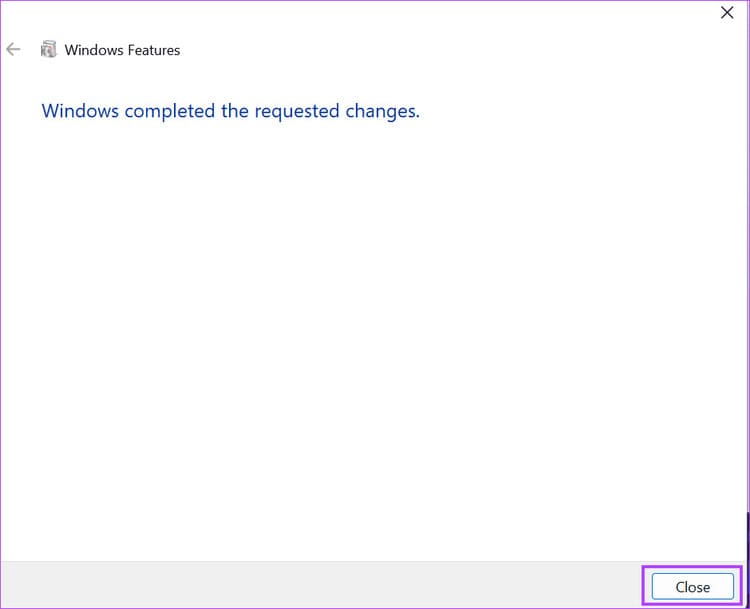
Step 3: Wait for Windows to remove Hyper-V from your PC. Then click the 'Close' button.
Step 4: Restart your PC.
Method 2: Use BCDEdit command
In addition to the above, you can use the BCDEdit command line tool to manage the hypervisor launch mode.
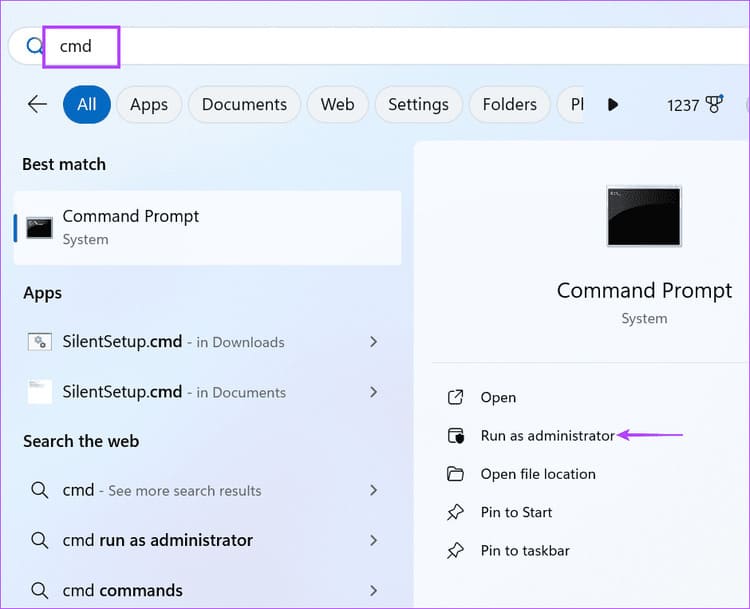
Step 1: Press the Windows key to open the Menu > Enter 'cmd' in the search box > Select 'Run as administrator' > Click 'Yes'
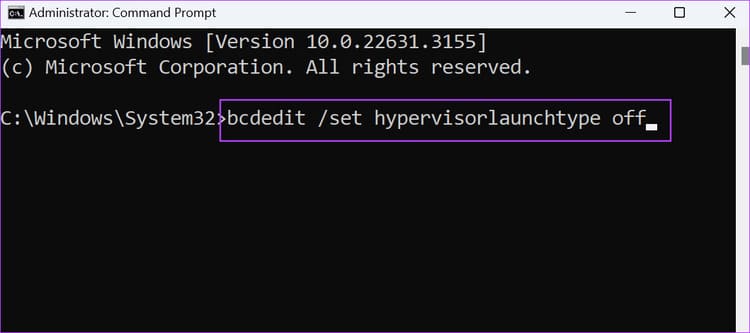
Step 2: Paste the following command line into the Command Prompt window > Press Enter:
bcdedit /set hypervisorlaunchtype off
Step 3: Close the Command Prompt window > Restart your PC to apply the changes.
Method 3: Use DISM command
DISM is a command line tool that helps repair component repositories Windows, but can also be used to manage Hyper-V. Remember that you must be connected to the Internet to use the DISM tool. Here's how:
Step 1: Type 'cmd' in the search box > Select 'Run as administrator' > Select 'Yes'

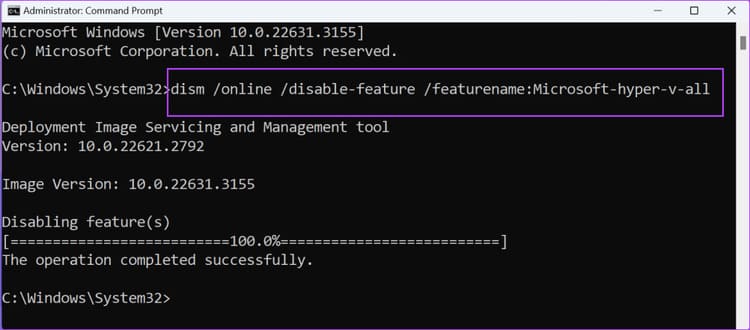
Step 2: Enter the following command and press Enter to execute it:
dism /online /disable-feature /featurename:Microsoft-hyper-v-all
Step 3: Close the window and restart your computer.
Method 4: Use PowerShell
If Command Prompt doesn't work, you can use a cmdlet in PowerShell to disable Hyper-V. Proceed as follows:
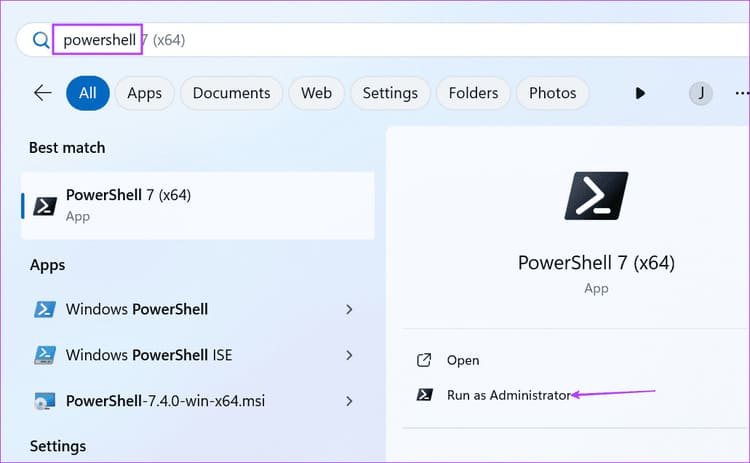
Step 1: Press the Windows key to open the Start Menu > Type 'PowerShell' in the search box and click on the 'Run as administrator' option > Press 'Yes'
Step 2: Enter the following command in the PowerShell window > Enter:
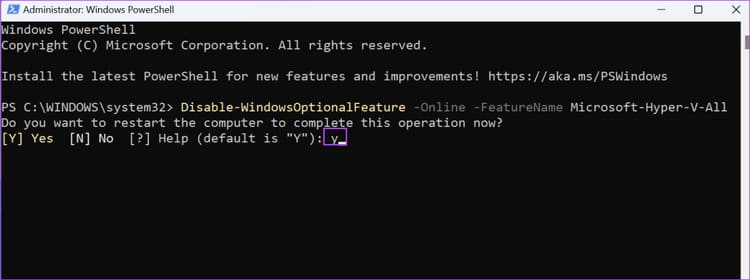
Disable-WindowsOptionalFeature -Online -FeatureName Microsoft-Hyper-V-All
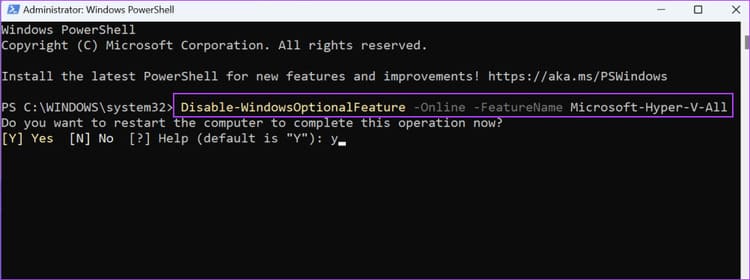
Step 3: Type Y and press Enter to restart your PC
Frequently asked questions
Is it okay if Hyper-V is disabled?
No problem! You can turn off Hyper-V if you no longer need it. This is also useful if you want to use other virtualization software like VirtualBox.
What happens if I delete Hyper-V?
Since this is an optional feature, nothing will happen after you remove it from your Windows PC. Don't worry because you can reinstall it later.
Epilogue
Hyper-V is a native virtualization feature that works very well. However, it can become an obstacle if you want to use VirtualBox or another virtualization application. Now you know 4 ways to disable Hyper-V in Windows. Please share your favorite method in the comments!


