
Windows 11, with its beautiful interface and many new features, has quickly won the hearts of users. However, like any operating system, Windows 11 can sometimes encounter problems such as software conflicts, update errors or virus attacks. To prevent the situation of “losing a cow to build a barn”, work create a restore point (restore point) is extremely necessary, helping you restore the system to its previous stable operating state quickly and easily.
| Join the channel Telegram belong to AnonyViet 👉 Link 👈 |
What is System Restore and why do you need to use it?
The Windows operating system has an extremely useful feature of creating a restore point, a “safe” backup of the system at a certain time. If your computer crashes, you can use a restore point to “go back in time,” restoring the system to a previous, well-functioning state.

Restore points include:
- Windows system files
- Installed program
- Registry settings
- System driver
Note: Restore points do not back up personal data such as photos, videos, documents. You need a separate backup plan for those important data.
Windows automatically creates restore points weekly and when there are major changes to the system, for example installing updates. But you can also create a restore point yourself at any time.
See more: How to create videos from super realistic images with Luma Dream Machine
Advantages of using System Restore
Troubleshoot system problems
If the driver fails or the update causes a conflict, you can restore the system to a time before the problem occurred.
Uninstall the program
System Restore helps completely remove changes that the program has made on the system.
Test the new installation safely
You can create a restore point before testing a new installation, making it easier to roll back to a stable state if something goes wrong.
Note: System Restore does not affect personal data but will remove applications, drivers, and updates installed after the restore point.
How to enable restore points on Windows 11
By default, System Restore is not enabled automatically. The steps you need to take to activate are as follows:
Step 1: Press the Windows + S key combination to open Windows search.
Step 2: Enter 'restore point' and select the corresponding result.

Step 3: In the System Properties window, select the System Protection tab.
Step 4: If Protection Settings is in the Off state, press the Configure button.
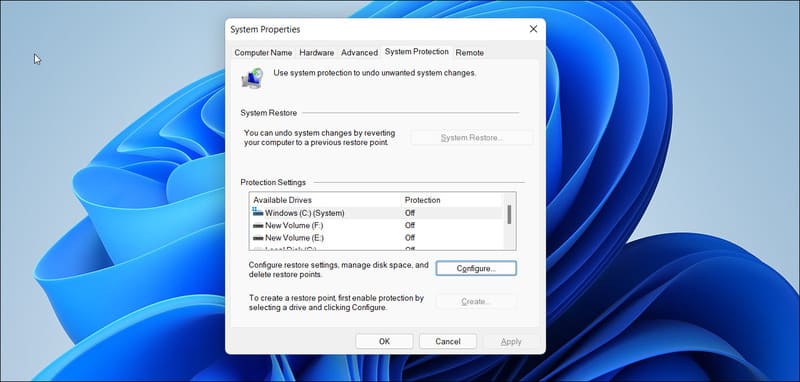
Step 5: Select Turn on system protection in the Restore Settings section.
Step 6: Drag the slider in the Disk Space Usage section to allocate hard drive space to the restore point (high setting is recommended).
Step 7: Select Apply and OK to save the settings.
Repeat the above steps for other drives (if necessary). If you install the application on a drive other than the C: drive, you should enable System Restore for that drive.
Instructions for creating restore points on Windows 11
Step 1: Press the Windows + S key combination.
Step 2: Enter 'System Restore' and select 'Create a Restore Point'
Step 3: Click the Create button.
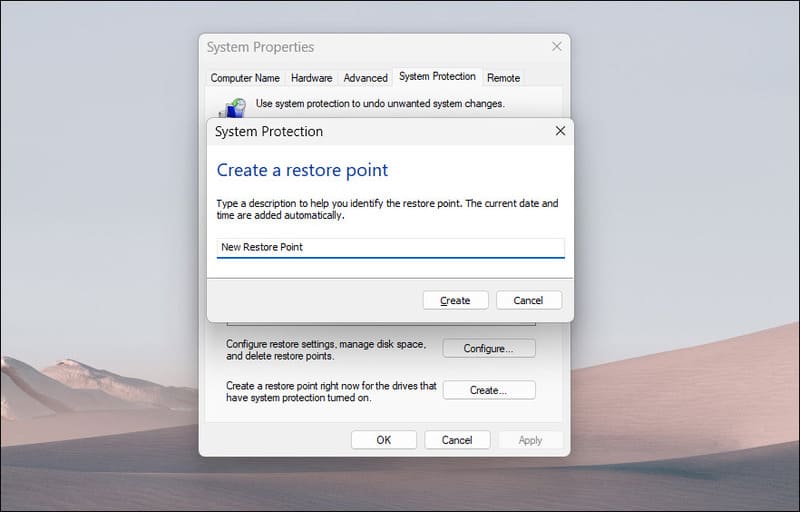
Step 4: You can give the restore point a name or short description (to make it easier to identify later).
Step 5: Creating a restore point may take a few minutes. Once completed, you will see a success message > Click Close to close the window.

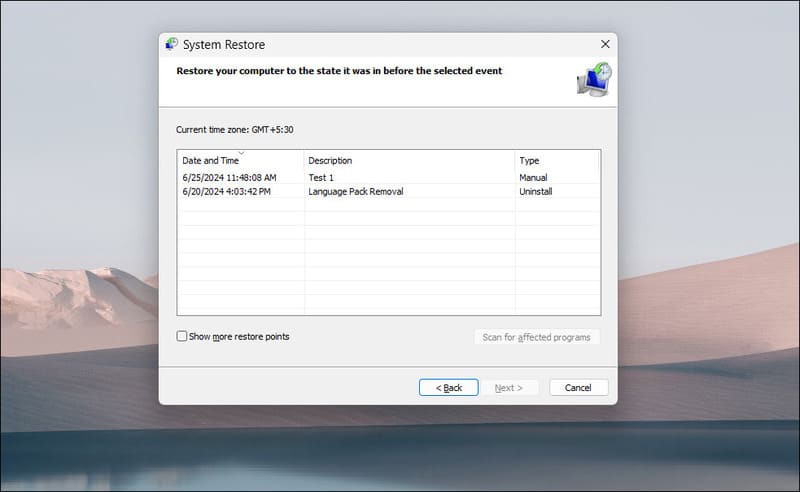
How to use System Restore to restore Windows 11
Step 1: Open Windows Search by pressing Windows + S.
Step 2: Search for 'System Restore' and select the corresponding result.
Step 3: In the System Restore window, select the restore point you want to use.
Step 4: Click Next, read the information carefully and confirm. The computer will reboot and proceed with the recovery process.
See more: Tips to help iPhone automatically bypasses CAPTCHA validation
Conclusion
Create a restore point is a good habit, helping you protect your data and Windows 11 system comprehensively. Don't wait until a problem occurs to frantically try to fix it. Take a few minutes to set up and create a restore point today to use your computer with peace of mind.
 of Chrome")


