Continuing the series, today admin will continue part 7 which is moving between levels. It can be understood as moving back and forth to edit the sences. To learn about sence, please review Lesson 0 of Game programming series using Godot. As for the level, you guys play the game mmorp I understand it as a level, but in here it is a level. For example, if you play arngry bird after level 1, you will see that level 2 is the Level I mentioned here. Without further ado, let's get started.
| Join the channel Telegram belong to AnonyViet 👉 Link 👈 |
Create New Sence
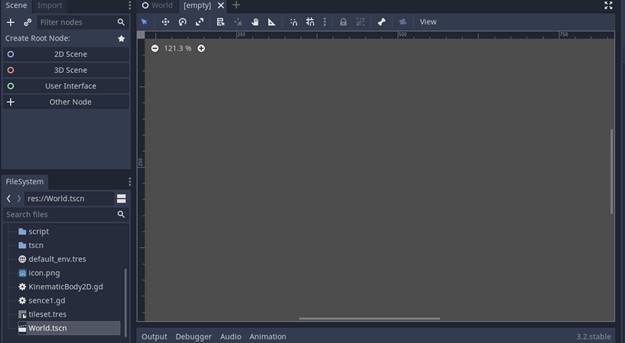
The first step is to create a new sent for yourself with the button “+” next to the sense tab World
Okay like this:
Choose for yourself Other Nodes then press enter.Note select other node then press enter. enter Don't press anything else. It will give you a black button
And we'll need to save Node Player and Node Tilemap about in form .tscn to be able to put it into another sence without redoing it. And the same Node other like enemy.enemy good trap. trap
In the following way:
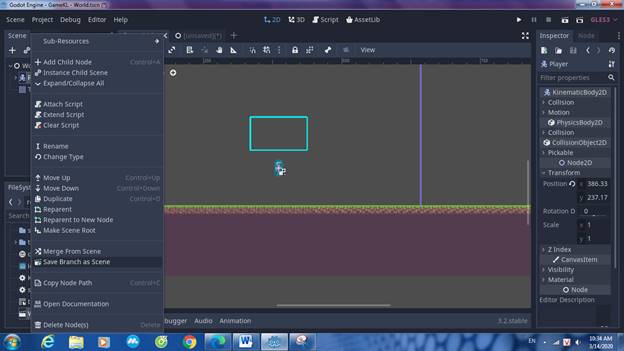
You right click Node Player And Node Tilemap Choose for yourself Save Branch As Sence
That means it will save the node you just selected as tscn and in this tscn format you can put your node in any sence without having to make another one.
You can leave it anywhere. But remember to create a folder containing files like this for compactness.
Here I will save it in a folder tscn
In the folder you will see it 2 tscn Just saved it Tilemap and Player
And next is Import Tscn enter sence
Choose the one in the photo:
==>
And here you will see there are 2-4 node It depends on your preferences. Mine has 3:
- 1 is Player.
- 2 is TileMap.
- 3 is Level 1 is World
You Instance 2 are Player and TileMap come in
And you'll see it's like old sences
Note: In the tilemap, you don't need to save it as tscn anymore, just create a tilemap node, then put the tileset in and design a new level, if you want this sence to be different.
Well, if you save this sence 2, let me call it level 2 and save it in a certain folder, mine is saved in the sence folder and Click Ctrl + S to save
And below is my level 2. Next we will create an object that moves between levels
Create Object Move Sence
To move between levels you will need to create a Sence Movement Object. First, you create your own node area2D live sence 1 Please
Add me 2 in Area 2D
In the Sprite section, put your image in and you can find the image online
And here is my photo:
After running the game
Next, create yourself a new script in Area2D
Then code as follows
Below:
Part export(String,FILE,"*.tscn") var next_world is the part that will take this out of the node settings and you can put tscn in there so it points to
get_overlapping_boides is a function that helps you check internal bodies collsion bodies enter collsion then it will do something.
for body in boides: for body in boides (just declared above) means if a body is inside the boides it will execute the if statement below. This body is a command of this node, the body here is kinematicbody and staticbody. staticbody
if body.name == player: body.name means body and then get its name if equal to Player it will execute the command below. Well, “Player” is the name of your Player node. If your Node player is called any other name, you must replace it with “Player” for it to work.
get_tree.change_sence This is an order from Godot helps you move from sence This is luxury sence other also (next_world) is the function we declared above export. export.to make it easier to understand in section Export it will allow you to give 1 sen in then below if player. player touch the Object Move Sence then it will move Player arrive sence in section Export
Next, you can save it and go back to the view to see it Next World live Node Area2D right Place Script Variables.
Next, click on the folder next to next world and select the second scene
And it will be
Oh and we have to set collsion area2D Only then can the Player move to another level
I have set it up and it can be moved to another level
And if you want better, you can do the following:
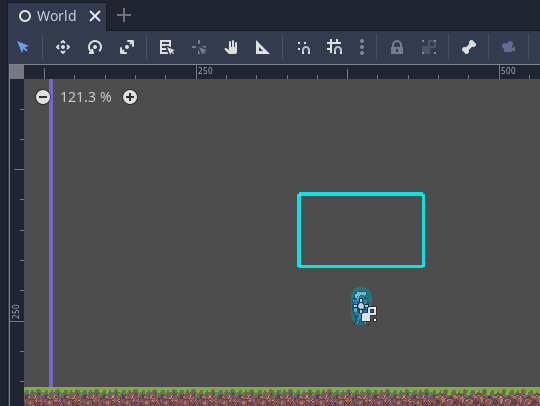
Set camera limit The right side is that amount and then adjust it collsion of the sprite area2d behind the camera limit. When the camera reaches the number you set it will no longer move and after you move back the camera player limit will be moved.

![[Lập Trình Game] Lesson 7: Move between levels when completing tasks [Lập Trình Game] Lesson 7: Move between levels when completing tasks](https://anonyviet.com/wp-content/uploads/2020/03/image003xx.png)
![[Lập Trình Game] Lesson 7: Move between levels when completing tasks [Lập Trình Game] Lesson 7: Move between levels when completing tasks](https://anonyviet.com/wp-content/uploads/2020/03/image005xx.jpg)
![[Lập Trình Game] Lesson 7: Move between levels when completing tasks [Lập Trình Game] Lesson 7: Move between levels when completing tasks](https://anonyviet.com/wp-content/uploads/2020/03/image006xx.png)
![[Lập Trình Game] Lesson 7: Move between levels when completing tasks [Lập Trình Game] Lesson 7: Move between levels when completing tasks](https://anonyviet.com/wp-content/uploads/2020/03/image007xx.png)
![[Lập Trình Game] Lesson 7: Move between levels when completing tasks [Lập Trình Game] Lesson 7: Move between levels when completing tasks](https://anonyviet.com/wp-content/uploads/2020/03/image008xx.png)
![[Lập Trình Game] Lesson 7: Move between levels when completing tasks [Lập Trình Game] Lesson 7: Move between levels when completing tasks](https://anonyviet.com/wp-content/uploads/2020/03/image009xx.jpg)
![[Lập Trình Game] Lesson 7: Move between levels when completing tasks [Lập Trình Game] Lesson 7: Move between levels when completing tasks](https://anonyviet.com/wp-content/uploads/2020/03/image010xx.jpg)
![[Lập Trình Game] Lesson 7: Move between levels when completing tasks [Lập Trình Game] Lesson 7: Move between levels when completing tasks](https://anonyviet.com/wp-content/uploads/2020/03/image011xx.jpg)
![[Lập Trình Game] Lesson 7: Move between levels when completing tasks [Lập Trình Game] Lesson 7: Move between levels when completing tasks](https://anonyviet.com/wp-content/uploads/2020/03/image012xx.png)
![[Lập Trình Game] Lesson 7: Move between levels when completing tasks [Lập Trình Game] Lesson 7: Move between levels when completing tasks](https://anonyviet.com/wp-content/uploads/2020/03/image013xx.png)
![[Lập Trình Game] Lesson 7: Move between levels when completing tasks [Lập Trình Game] Lesson 7: Move between levels when completing tasks](https://anonyviet.com/wp-content/uploads/2020/03/image014xx.jpg)
![[Lập Trình Game] Lesson 7: Move between levels when completing tasks [Lập Trình Game] Lesson 7: Move between levels when completing tasks](https://anonyviet.com/wp-content/uploads/2020/03/image015xx.jpg)
![[Lập Trình Game] Lesson 7: Move between levels when completing tasks [Lập Trình Game] Lesson 7: Move between levels when completing tasks](https://anonyviet.com/wp-content/uploads/2020/03/image016xx.png)
![[Lập Trình Game] Lesson 7: Move between levels when completing tasks [Lập Trình Game] Lesson 7: Move between levels when completing tasks](https://anonyviet.com/wp-content/uploads/2020/03/image017xx.png)
![[Lập Trình Game] Lesson 7: Move between levels when completing tasks [Lập Trình Game] Lesson 7: Move between levels when completing tasks](https://anonyviet.com/wp-content/uploads/2020/03/image018xx.jpg)
![[Lập Trình Game] Lesson 7: Move between levels when completing tasks [Lập Trình Game] Lesson 7: Move between levels when completing tasks](https://anonyviet.com/wp-content/uploads/2020/03/image019xx.png)
![[Lập Trình Game] Lesson 7: Move between levels when completing tasks [Lập Trình Game] Lesson 7: Move between levels when completing tasks](https://anonyviet.com/wp-content/uploads/2020/03/image020xx.png)
![[Lập Trình Game] Lesson 7: Move between levels when completing tasks [Lập Trình Game] Lesson 7: Move between levels when completing tasks](https://anonyviet.com/wp-content/uploads/2020/03/image021xx.png)
![[Lập Trình Game] Lesson 7: Move between levels when completing tasks [Lập Trình Game] Lesson 7: Move between levels when completing tasks](https://anonyviet.com/wp-content/uploads/2020/03/image022xx.jpg)

