AutoGPT recently launched has left many impressions for users about the capabilities it can do. So what is AutoGPT and what is different from ChatGPT?, please find out through the article below.
| Join the channel Telegram belong to AnonyViet ???? Link ???? |
What is AutoGPT?
AutoGPT is an AI application that can automatically generate text based on various data sources, such as articles, scientific research articles and social media posts.
It uses an advanced language model called GPT-4, developed by the company OpenAI. It’s a deep learning language model that can learn from billions of words and sentences on the internet, and can generate new text according to the user’s request.
AutoGPT is an improved version of ChatGPTan AI chatbot application that can talk to the user and generate different types of documents such as essays, programming codes, etc.
Compare AutoGPT with ChatGPT
The same point
AutoGPT and ChatGPT both:
- Using the GPT-4 language model to extract text
- Own chat interface to communicate with users
- Able to generate various types of documents such as essays, codes, poems, etc.
Differences
- AutoGPT You just need to enter the goal, it will automatically deploy, perform the necessary prompts to achieve that goal, and ChatGPT only responds around the prompt that the user gives.
- AutoGPT can use many data sources to create text, while ChatGPT only uses data from the internet. This makes it possible for AutoGPT to produce more accurate text and stay up to date with the latest trends and developments in the user’s field.
- AutoGPT can automatically improve the quality of your text by checking for typos, sentence structure, and synonyms. This makes it possible for AutoGPT to produce smoother and more natural text
- AutoGPT can create documents in many different languages, while ChatGPT supports mainly English. This helps AutoGPT to serve a wider range of users.
Instructions for installing AutoGPT on your computer
1. Install Python and Pip
First, download the latest version of Python HERE and start installing it.
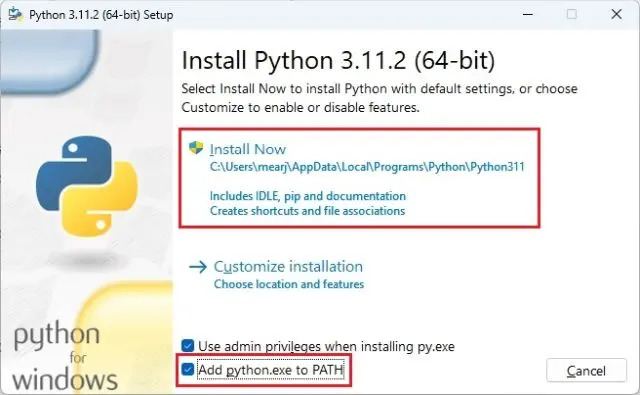
When installing Python on Windows, be sure to check the “Add python.exe to PATH” box. Then click on “Install Now”.
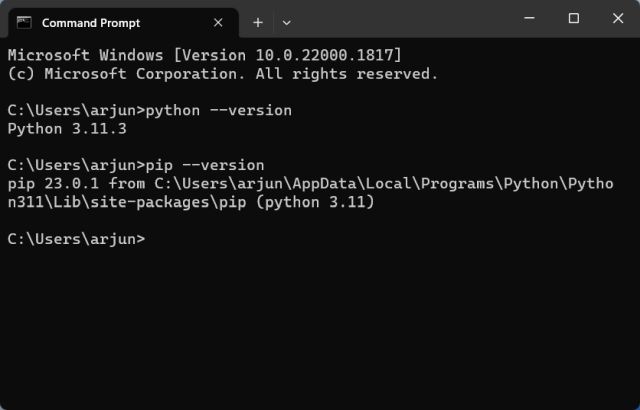
To check the installation of Python, open Windows Terminal and execute the following commands. Both commands will display the version number. If you are using Linux or macOS, you should use python3 and pip3 in these commands.
python–version pip–version
2. Add API Key to use Auto-GPT
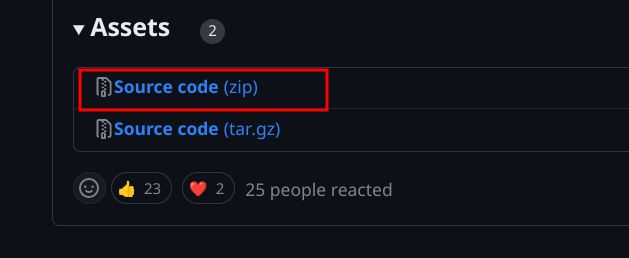
Step 1: Visit Auto-GPT’s latest GitHub release page HEREyou click on “Source code (zip)” to proceed to download the ZIP file.
Step 2: Extract the ZIP file by double-clicking it and copying the “Auto-GPT” folder. Then paste the folder where you want it.
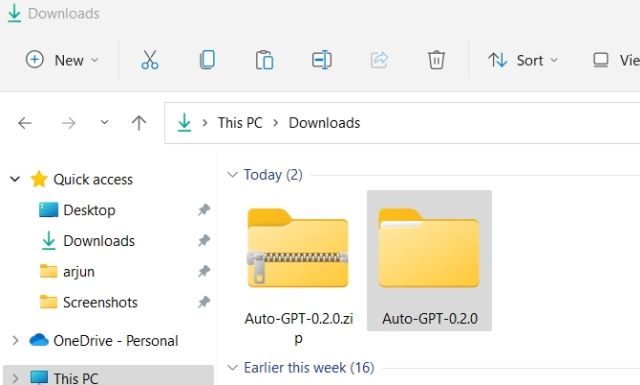
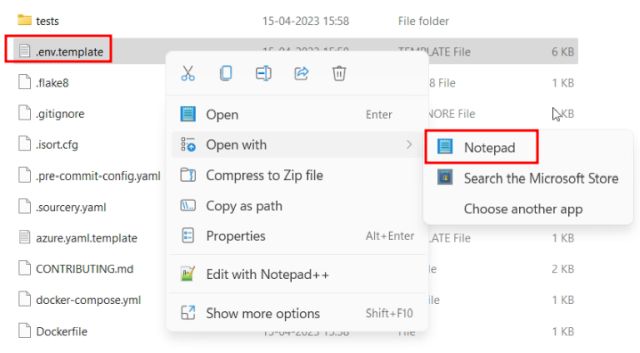
Step 3: Go to the folder and find the file “.env.template”, then open it up with Notepad or any text editor.
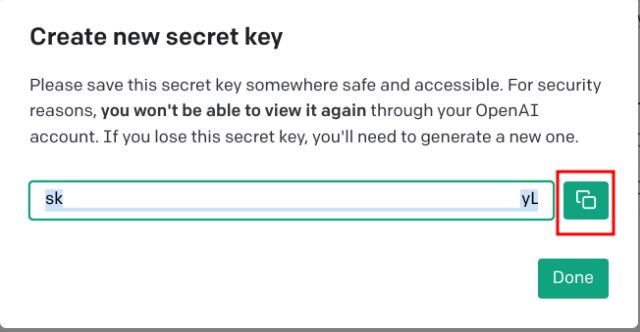
Step 4: Go to OpenAI’s website HERE and get the API key. If you don’t have an account, sign up for a free account and click “Generate New Secret Key” and copy the API Key
Step 5: Open a text editor and paste the API into the “OPENAI_API_KEY” section.

Step 6: Access pinecone.io and sign up for a free account. It will help LLM get relevant data from memory for AI applications.

Here, select “API Key” in the left sidebar and select “Generate API Key” in the right pane.
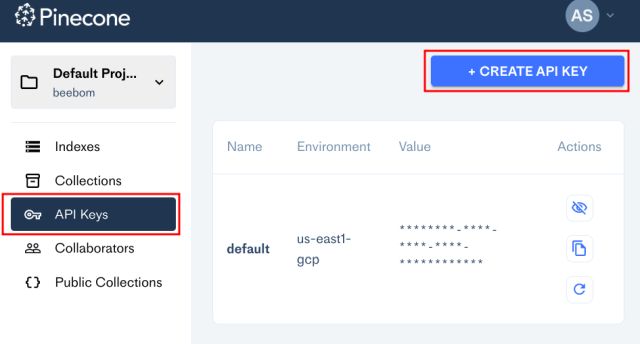
Step 7: Name it “autogpt” and select “Generate Key“.
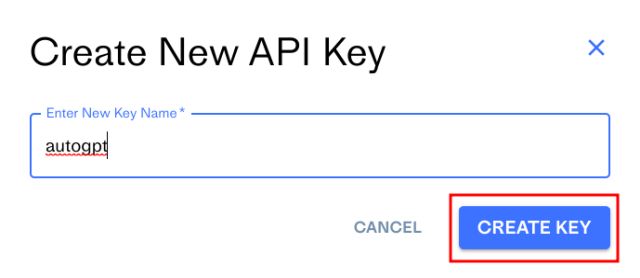
Step 8: Copy “Key Value”

Step 9: Go to the text editor and paste it next to PINECONE_API_KEY.

Step 10: Copy the value in “Environment” and paste it next to PINECONE_ENV.


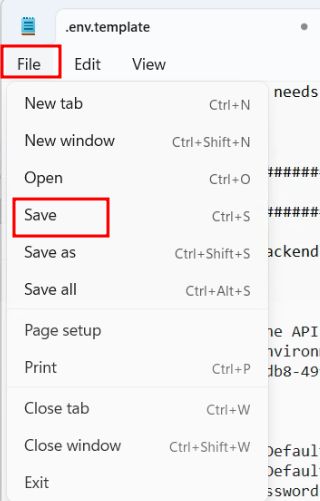
Step 11: Save the file “.env.template”.
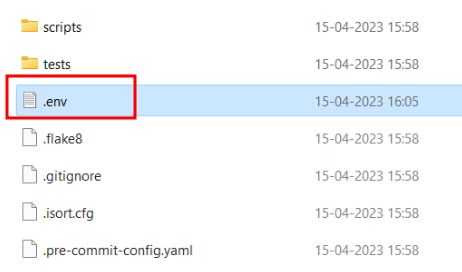
Step 12: Rename .env.template to .env.
3. Install Auto-GPT on Windows, macOS and Linux computers
Step 1: After adding the API keys, you can start running Auto-GPT. First, right-click on the “Auto-GPT” folder and select “Copy as Path”.
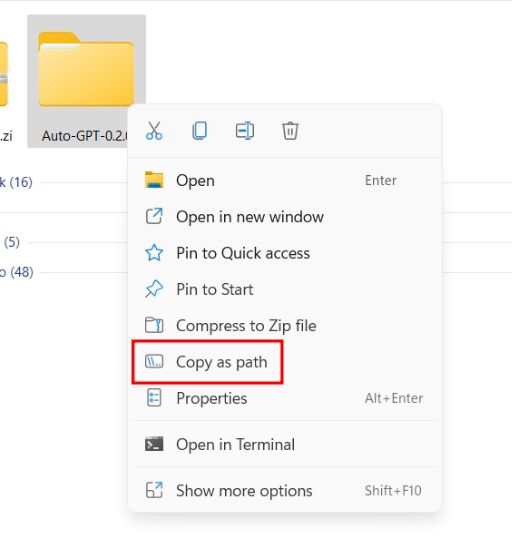
Step 2: Open Terminal and type cd, add a space, then paste the path you copied above. Next, press Enter and you will go to the Auto-GPT folder.
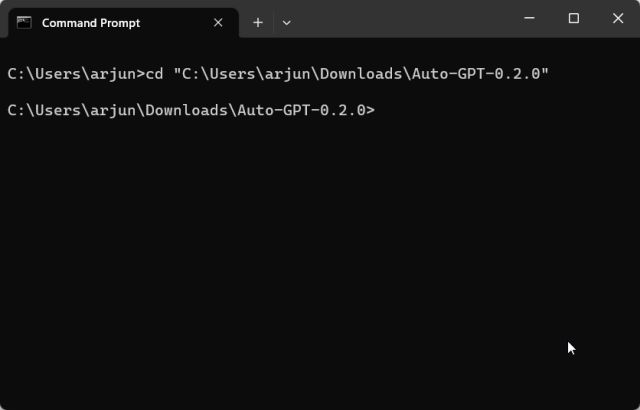
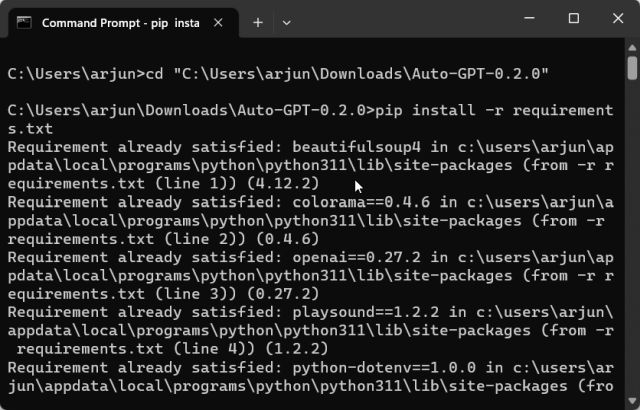
Step 3: Run the command below, it will automatically install all the libraries needed to run Auto-GPT.
pip install-r tests.txt
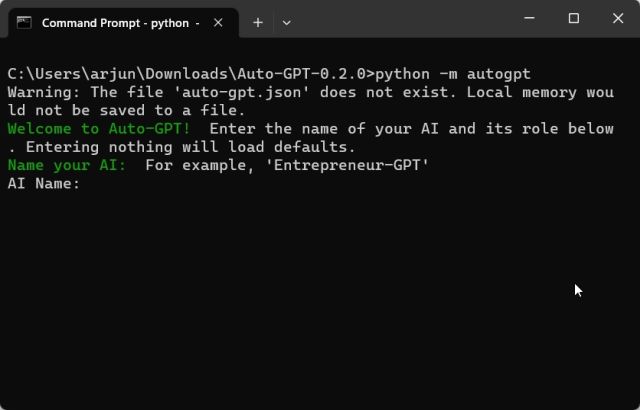
Step 4: Next, run the following command and it will start Auto-GPT on your system.
python-m autogpt
4. How to Use AutoGPT on Your PC
Step 1: On the first run, AutoGPT will ask you to name the AI. You can give it any name or leave it blank
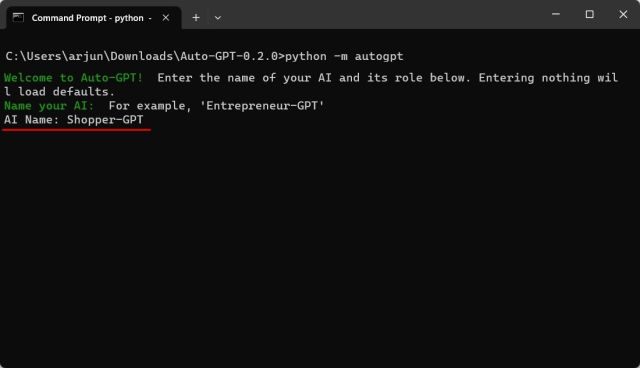
Step 2: Define the role of the AI, e.g. “An AI assistant who can browse Amazon and find products”
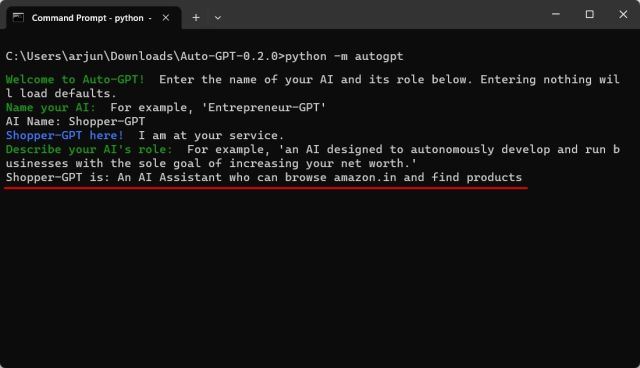
Step 3: Then set goals for autonomous AI one by one. This is where you tell the AI what you want to do.
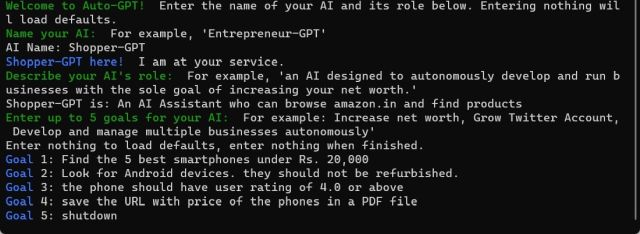
Alternatively, you can ask it to save the information as text or as a PDF file.
Step 4: Now, Auto-GPT will start thinking. During execution, it will ask you for permission for the action. Press “y” and press Enter to agree. It can connect to websites and collect information.
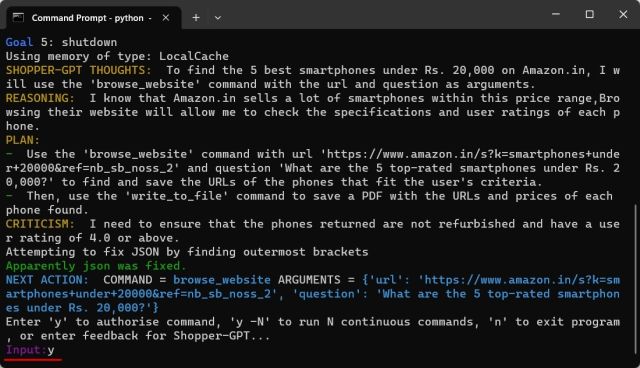
You can keep track of what the AI is thinking, reasoning and planning.
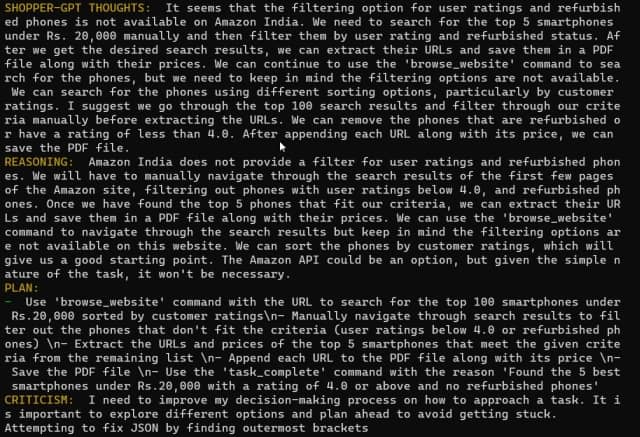
Step 5: If you want to run the AI continuously without asking for user permission, you can press yn and press Enter, where “n” is a number. If you enter y-5, that means it won’t ask you for the next 5 actions.
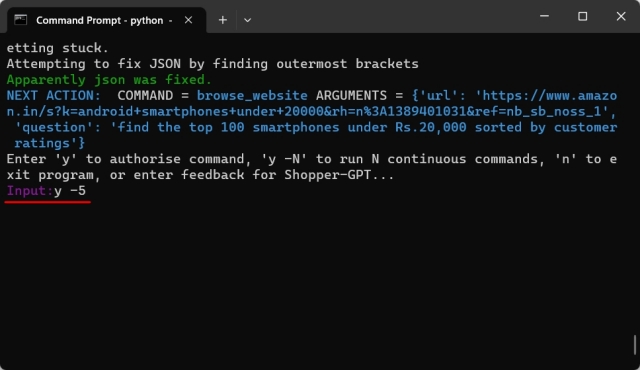
Note: You can use the keyboard shortcut “Ctrl + C” to command to stop any continuous action. In addition, Auto-GPT can automatically open Chrome browser to collect information from the internet.

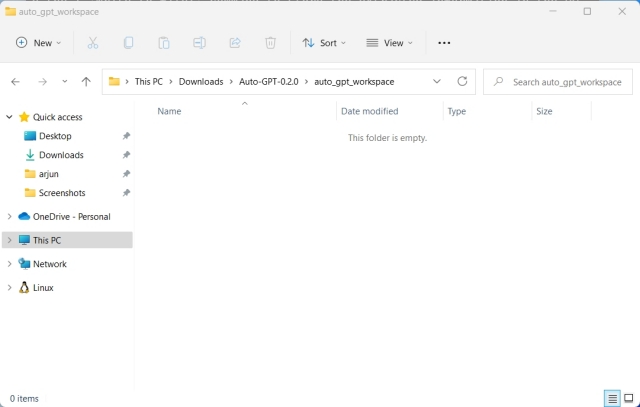
Step 6: After completing the task, you will find the final information in the folder Auto-GPT > auto_gpt_workspace
How to use AutoGPT without installation
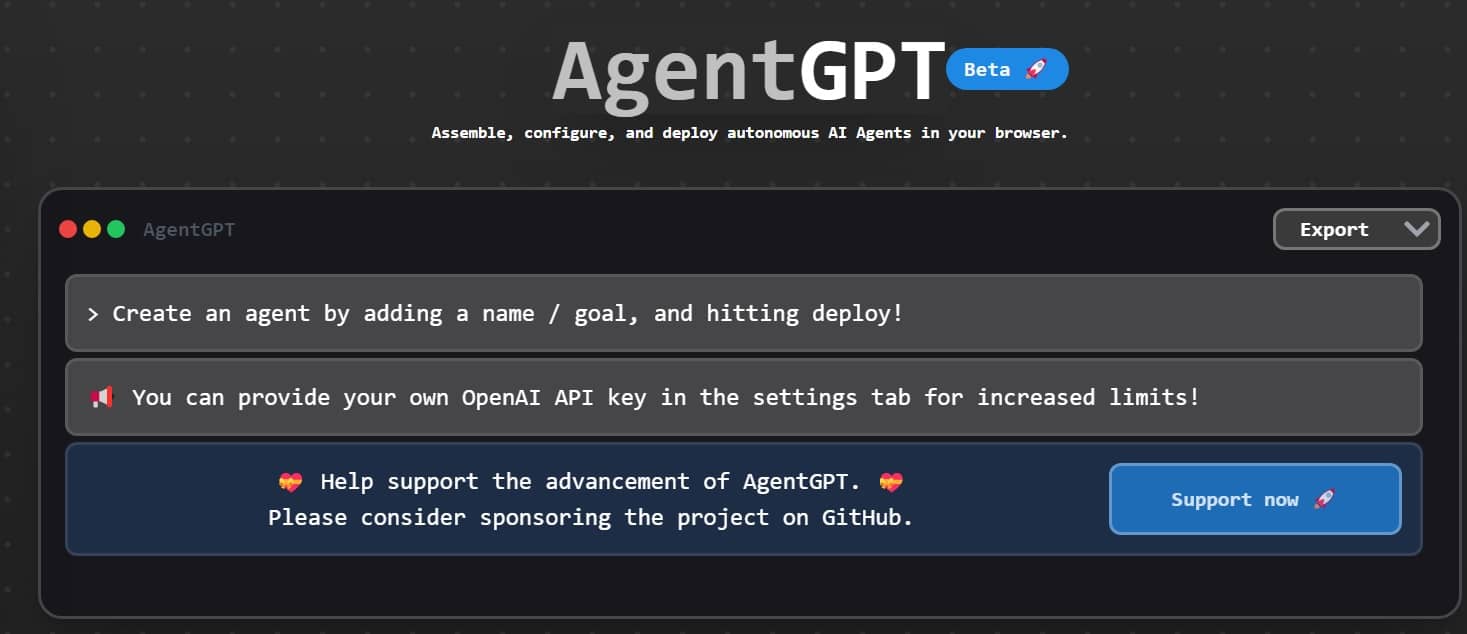
In addition to the above steps to install AutoGPT, if you are not familiar with programming, you can use the beta version of AgentGPT via the link HERE
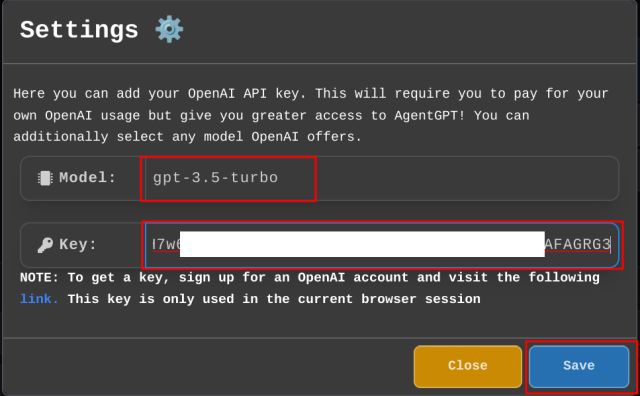
Accessing the “Settings” section, you proceed to add the OpenAI API key. You can get the API key HERE. If you do not have access to the GPT-4 API, you can use “gpt-3.5-turbo” as the model and select “Save”.
Here you can use AutoGPT for free without installation. Usage is extremely simple, you just need to enter the Name and Question (Purpose) you want the system to solve for you.
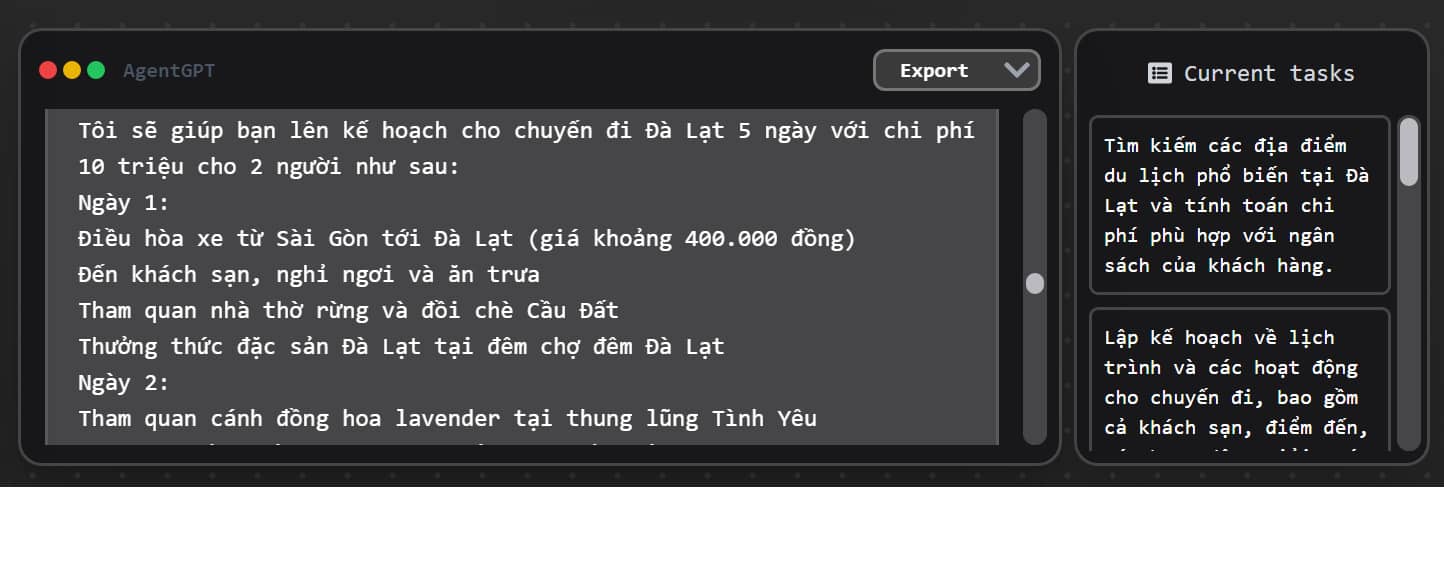
For example, you can ask “Plan a 5-day trip to Dalat for 2 people at a cost of 10 million”.
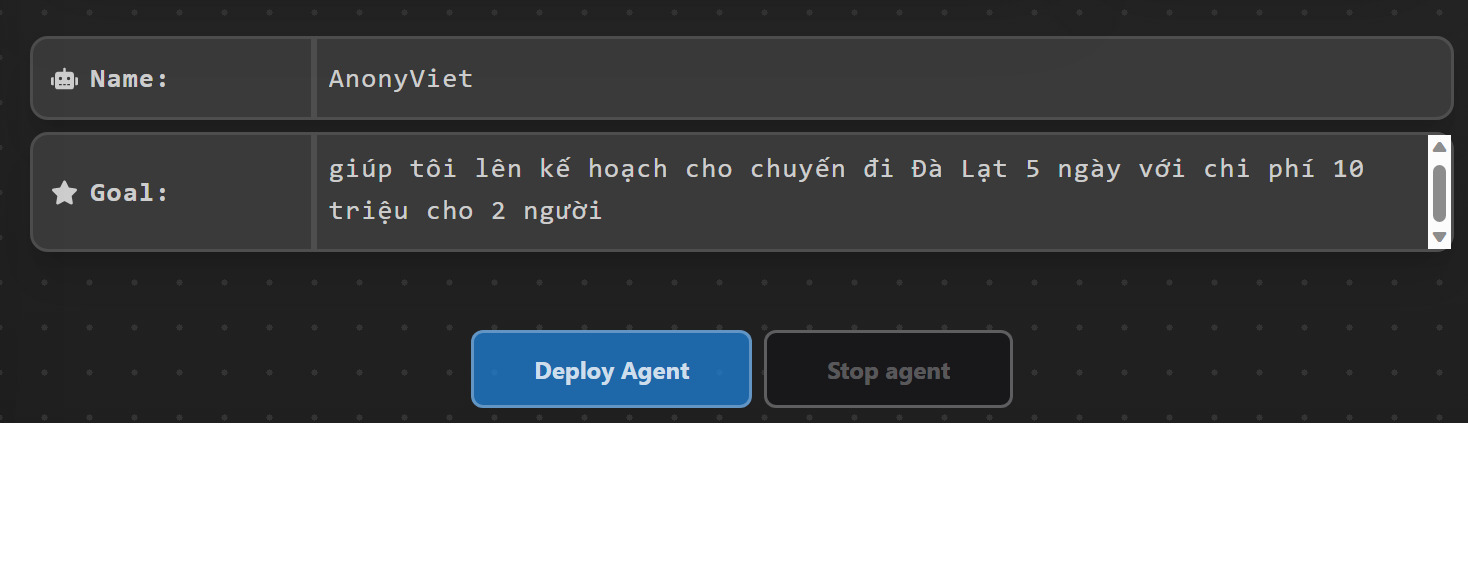
And AutoGPT will automatically set up tasks and answer those tasks.
Limitations of AutoGPT
In spite of AutoGPT has many advantages and potential, but it also has some limitations and challenges that need to be overcome:
- Still depends on GPT-4 to generate text, so it also has limitations of GPT-4, such as limit on the amount of training data, false information, etc.
- A powerful computer is required to run Python applications and handle complex tasks.
- AutoGPT may generate text that contains outdated, inaccurate, or unscientific information.
Epilogue
So I just showed you how to install AutoGPT as well as how to use this useful AI tool. Although lead has not been released for a long time, it still needs a lot of time to perfect, but it also shows the great potential of AutoGPT. And how do you feel about this new application, share it in the comments below!


![[FaceBook] Tut Check Password FB [FaceBook] Tut Check Password FB](https://anonyviet.com/wp-content/uploads/2022/08/anonyviet.jpg)
