OpenDNS not only provides public DNS servers for domain name resolution, but also comes with various web content filtering and security solutions. Instead of using expensive hardware and software tools to block content on the network, OpenDNS provides an easier solution for filtering unwanted traffic from your network. NextDNS is also a great tool with similar features, providing web content filtering and security solutions for home and SMB users.
So in this article, I will show you how to control your own content and security on your network using NextDNS.
Usually, the default DNS is provided by your Internet Service Provider (ISP – carrier). However, some people also tend to use publicly available DNS servers like Google’s or Cloudflare’s.
You may have seen DNS servers 8.8.8.8 or 8.8.4.4. These DNS servers belong to Google and are widely used on the Internet. However, it is not necessary to use Google DNS as your location can affect DNS performance.
Public and private DNS service
There are two types of DNS services around the world. Includes public DNS services and private DNS services.
The public DNS servers are Google’s, Cloudflare or Cisco OpenDNS. Anyone in the world can access them as long as they are connected to the internet. These servers will resolve the website’s name by its IP address and then route the traffic accordingly.
Private DNS is also widely used by people who want to customize internet traffic according to their own rules and policies. Businesses often deploy their own DNS servers to manage and monitor traffic in and out of their network.
By comparison, private DNS servers are considered better than others. Data moves through private DNS servers that cannot be accessed by unauthorized people, thus enhancing your privacy. However, you also need to consider the overhead and maintenance costs of using private DNS servers.
What is NextDNS?
NextDNS is a private (cloud-based) DNS service provider used to manage and customize security on the internet or provide parental controls. This is a free service at this time. However, it can also start charging users after a certain traffic threshold is reached.
With NextDNS, you have complete control over traffic going in and out of your computer and other devices connected to the internet. It has a server-client configuration; Cloud server hosted by NextDNS will communicate through a client application installed on your local device.
NextDNS can be configured on the following platforms:
- Windows
- iOS
- Android
- MacOS
- Linux
- Chrome OS
- Web browser
- Routers
Since browsers and routers cannot install clients, you can learn how to configure them to communicate with your own NextDNS server through the various instructions provided on NextDNS’ website
How to install and configure NextDNS
Create account NextDNS
Currently you may not need to create a NextDNS account to use their service. However, I recommend creating an account because when this private DNS service goes into beta, they will most likely be required to create an account to store your configuration and billing preferences.
To register and create an account on NextDNS, you need to visit the registration website here. Now all you need to do is enter a valid email address, create a secure password and press Signup.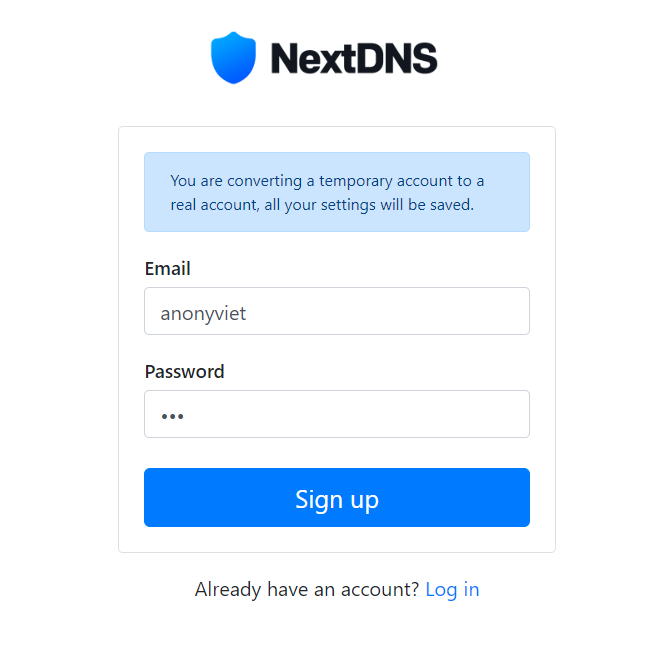
Install NextDNS on your computer
Once you’ve signed up for a NextDNS account, you’ll automatically be assigned a private DNS server just for you to use and configure.
A unique server ID will also be assigned to your machine. This ID will then be used to help your local devices communicate with the NextDNS server.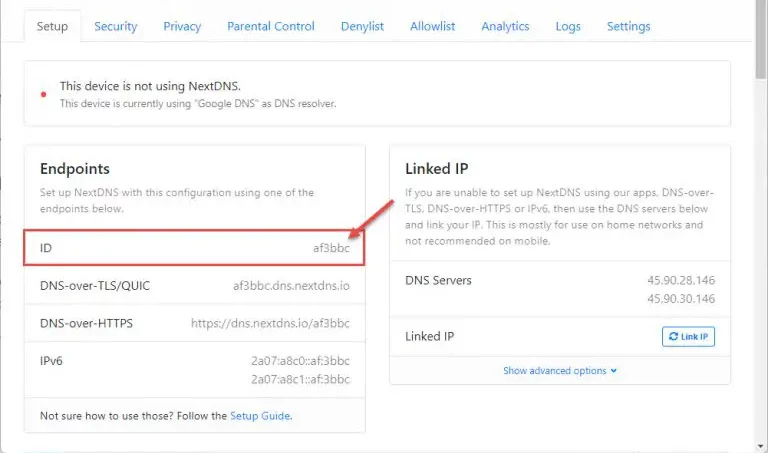
You must configure your computer to communicate with the server. If you scroll down the configuration page, you will find different tabs to help you configure the device. In case you use Windows, open the Windows tab and then click on the highlighted word to download the client software.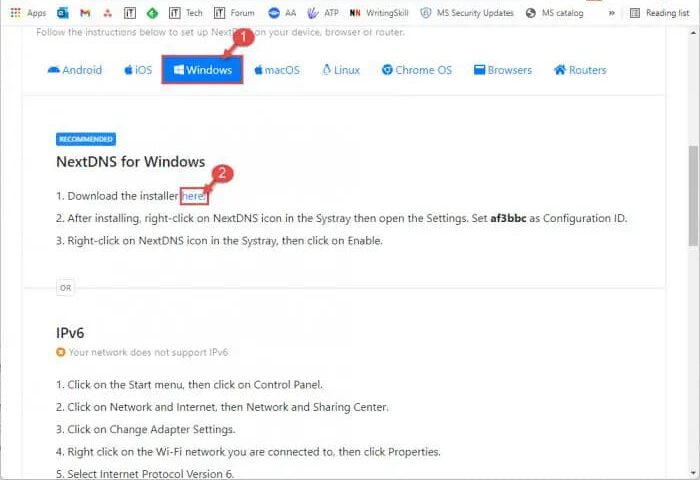
Once downloaded, click on the executable and follow the installation wizard. After installation is complete, open the NextDNS application on your computer and follow the steps as shown below. Note that the configuration ID will be different because each account has only one unique ID.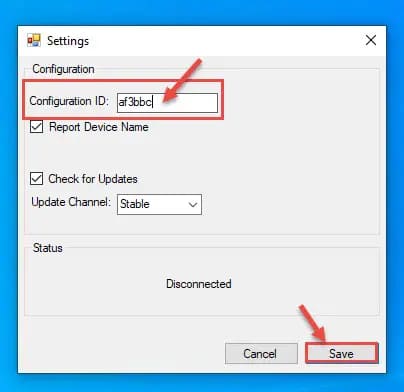
When the configuration is complete, your DNS priority will change and any default DNS IP addresses will be overwritten with a new IP address. The configured device will now use NextDNS as the DNS server.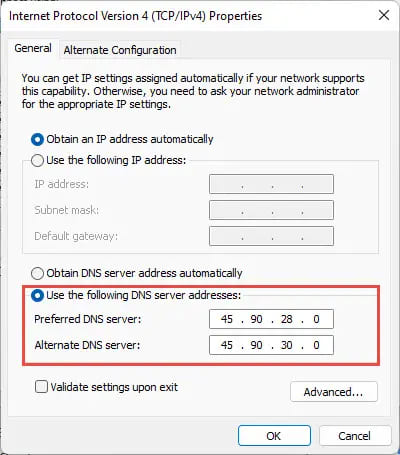
If for any reason you cannot install the client application, you can use the IP address of the DNS server provided in the right table and manually add it to your system as shown above.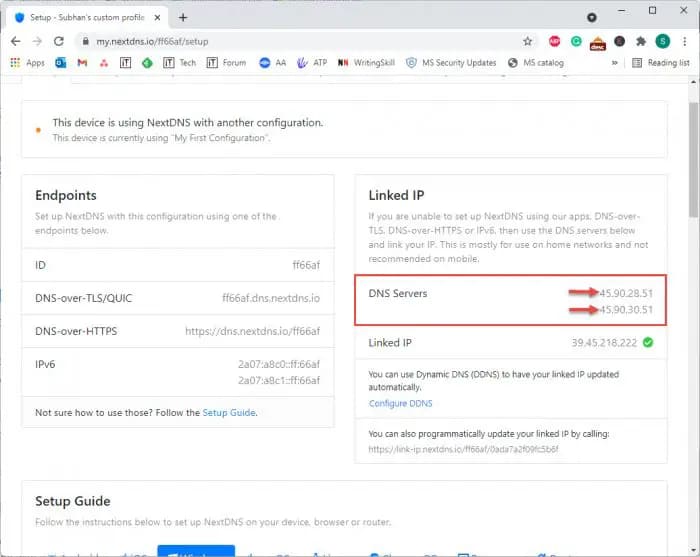
Configure NextDNS
Once installed, you can now configure the DNS server according to your own needs. Here’s what you can do.
Create a profile
You can create different profiles using NextDNS. These profiles allow you to instantly switch between predefined profiles and settings.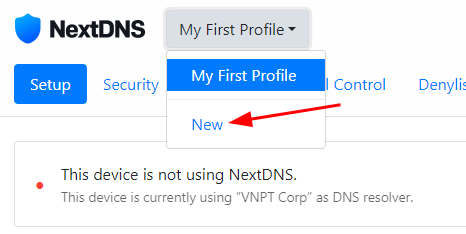
To create a new custom profile, click the drop-down menu at the top and select new. Then enter a name for the profile you want to create and configure it accordingly.
To switch between different profiles, simply select it from the drop-down menu.
Secure your browser
You can manage your security protocols by enabling or disabling them via the tab Security in NextDNS. Enhanced DNS security can prevent phishing attacks and online tracking. There are a lot of security options to use, such as preventing the device from being used for cryptocurrency mining, blocking obscene content and malicious domains, and more.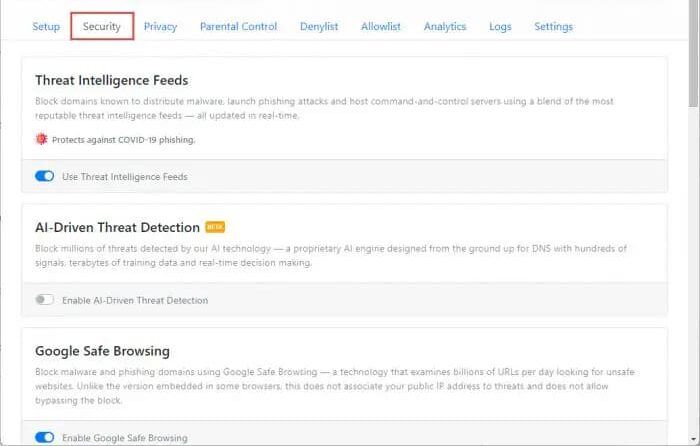
Parental Controls
NextDNS lets you manage what your kids can access on the internet. In addition to completely blocking certain content and domains, you can also restrict or limit access to certain websites. For example, a parent wants to block an entire category of adult content or bad websites. The DNS filtering service will automatically block all websites belonging to a specific category.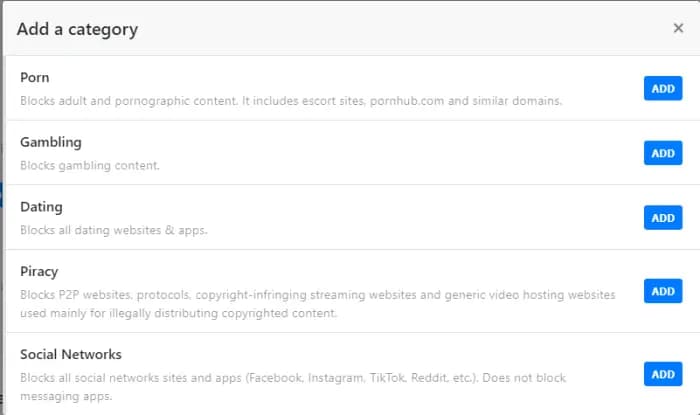
For example, you can create a category for websites and then set access time limits via the option Recreation Time.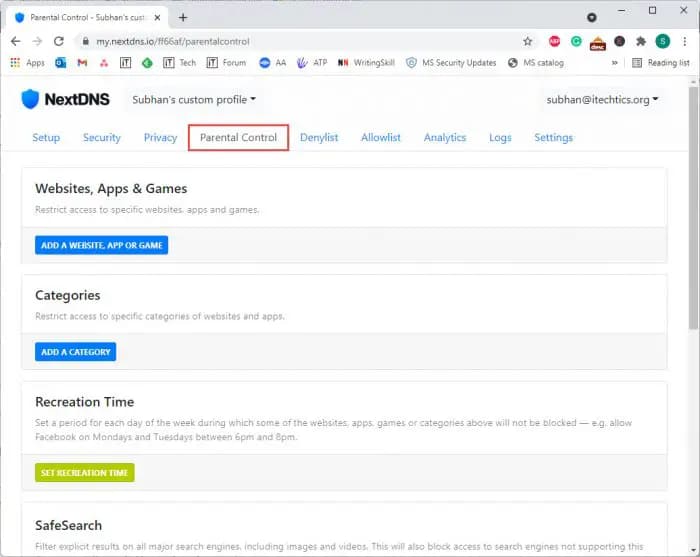
Allow and block websites
Using NextDNS, you can create your own personal firewall by allowing and blocking certain websites. This can be done through tabs Allowlist and Denylist.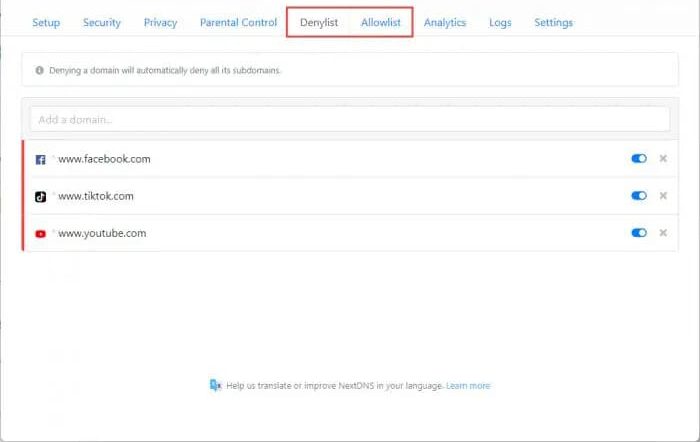
You can also permanently remove websites from the list by clicking the “X” or temporarily disable the filter by clicking the respective switch.
Traffic monitoring
Not only can you configure your DNS server, but you can also monitor the activity and traffic going through it. You can get basic stats from the tab Analyticssuch as information about blocked queries, device information generation queries, etc.
If you want more detailed information about the websites and domains being visited, you can get that information from the tab Logs.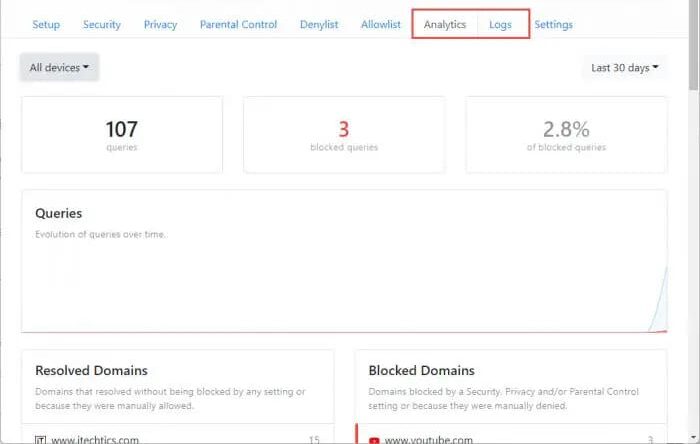
Changes made to the DNS server do not affect your devices immediately. Therefore, I recommend refreshing your DNS changes by typing ipconfig /flushdns followed by ipconfig /renew in the Command Prompt.
Conclude
Even though NextDNS is in beta, it’s still a great tool to use, especially since it’s free for everyone. It can get buggy at times, but it’s still a great use nonetheless.
With NextDNS, you don’t need a dedicated and expensive DNS server to use on a small scale. I recommend you to use this tool to monitor the online activity of devices connected to your network.


