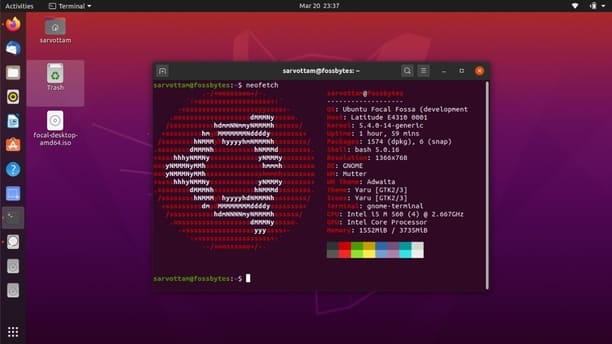
How to parallel install Ubuntu with Windows 10 is of interest to many of you. Especially if you want to install both operating systems on one computer. For the latest version of Ubuntu 20.04 to install in parallel with Windows 10, many people still do not know. In this article, AnonyViet will guide you to install Ubuntu 20.04 with Windows 10 by creating USB Boot. This is an in-depth article, so sit back and read step by step to install Ubuntu Linux alongside Windows.
| Join the channel Telegram of the AnonyViet 👉 Link 👈 |
One more thing AnonyViet would like to mention here is that the stable version of Ubuntu has not been released yet. Therefore, I am using Ubuntu 20.04 stable. This article will be updated until Ubuntu 20.04 Final is released. It is expected that the official version of Ubuntu 20.04 will be released on April 23, 2020.
Parallel installation of Ubuntu 20.04 with Windows 10
Please follow the steps below to Download the Ubuntu ISO and install it using USB Boot. Here is a summary of the steps to install the latest Windows and Ubuntu side-by-side
- Create a new partition to install Ubuntu in Windows
- Create USB Boot to install Ubuntu on Windows
- Install Ubuntu 20.04 with Windows 10
- Create a partition map for Ubuntu Linux
- Configure the installation process settings
Are you ready to play around with Linux Ubuntu?
Step 1: Create a new partition drive in Windows
This is a preliminary step to create a new empty partition in Windows 10 to install Ubuntu. We will use Windows 10’s built-in “disk management” tool to create partitions. However, you can use any third party tools is different.
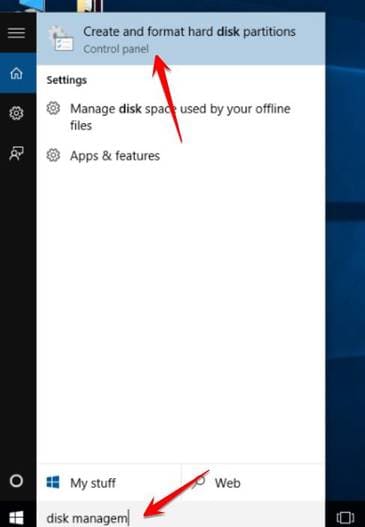
Click the button Start and type “Disk Management” find the tool named “Create and format hard disk partitions”.
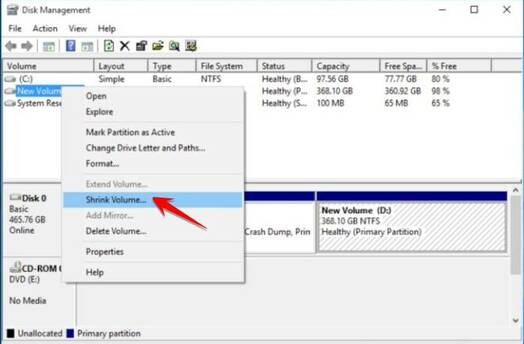
Now select the partition you want to split to create one more half partition. For example, your D drive has 200Gb, you can split drive D by 1 more drive, which is drive E, do the following:
Right-click on the partition to be split, select “Shrink Volume”. If you have no partition left, you can also split your C drive partition.
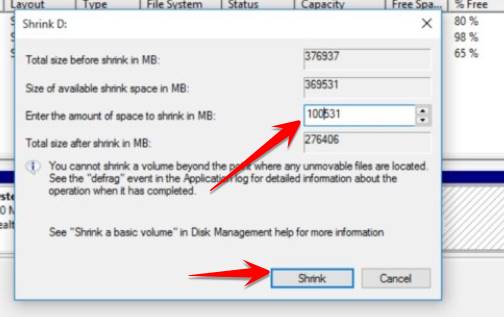
Now enter the space for the partition containing the Ubuntu operating system. Ubuntu always recommends at least 25GB of free space. Therefore, AnonyVIet also recommends you to leave more than 25GB. My laptop has a 500GB hard drive, so I will choose 100GB for extra space.
After entering the space for the new partition, click the “Shrink” button. You will see a new partition named unallocated newly created, we will install Ubuntu 20.04 to this partition.
Step 2: Create a bootable USB to install Ubuntu on Windows
Before proceeding to install Ubuntu, you need to Download the Ubuntu ISO file to create a USB Boot to install Ubuntu. Download Ubuntu 20.04 Daily Build from the official website here.
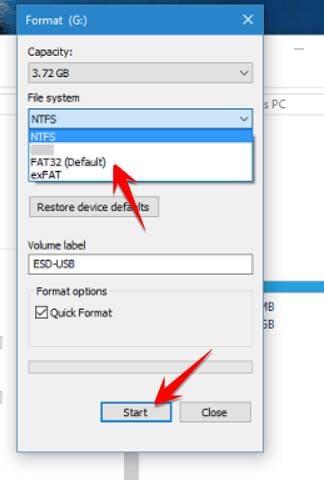
Next, plug the USB into the computer, in This PC Right click on the USB drive, select Format. In File System select FAT 32 then OK.
But to create USB Boot on Windows 10, you need software to burn Ubuntu ISO file to USB. AnonyViet is using the software Balena Etcher.
Etcher has the good thing that it writes ISOs to USB without having to worry about partitions or file system formats. Furthermore, Etcher is a cross-platform application available for Windows, macOS, and Linux.
Download finished, open the application and only three steps to create Ubuntu installation USB
Click on item Select image and point to the Ubuntu ISO file you downloaded.
If your USB is plugged in, Etcher will automatically detect your USB. If not, insert your USB into the system and make sure Etcher selects the correct device.
Maybe the software will ask you to Format USB, remember to select FAT32 and Quick Format Please.
Finally click “Flashing” and etcher will burn the ISO file to the USB.
Flashing the Ubuntu ISO may take a few minutes. So wait for a while until you get the notification Flash complete.
Step 3: Dual Boot Windows 10 and Ubuntu 20.04
Now we will set up the BIOS to boot using USB Boot to install Ubuntu. You need to access your computer’s BIOS.
List of shortcuts to access BIOS of computer manufacturers
[toggle title=”Click để xem”]
How to enter boot and bios for computer lines as follows. Here you just need to go to Boot.
- Acer : Enter Boot press F12 or enter BIOS press F2
- Asus: Enter Boot press Esc nut or enter BIOS press F2
- Dell: Enter Boot press F12 or enter BIOS press F2
- HP – Compaq: Enter Boot press F9 or enter Bios press F10
- SONY VAIO: Turn off the power and then start with the Assist button and press F2 to enter the Bios (To boot into the CD/DVD, you put the disc in the drive and then restart the machine, the machine will automatically boot into the drive (because of the current SONY defaults to booting the first CD/DVD drive.)
- Toshiba: Press F12 to select boot menu (HDD/CD/USB…) + Press F2 to enter BIOSIBM: Enter Bios and press F1 or F2 key (depending on computer model).
- IBM: Go to Bios and press F1 or F2 (depending on computer model)
- Lenovo Thinkpad: Enter the Bios press F1 + Select boot press F12 + Recovery press the green key ThinkVantage
[/toggle]
I am using a Dell laptop, so when I restart the computer, at the first screen press F12 continuously to enter the Boot interface.
Select USB storage device from Menu legacy mode.
If you hear a beep and see spinning wheels Have Ubuntu logo below is fine.
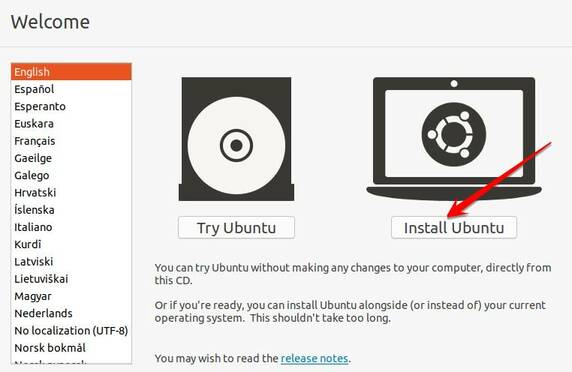
After a few seconds or a minute, the Ubuntu installer will start and show two options to continue.
“Try Ubuntu” mode is a Live USB mode, you will go straight to the Ubuntu desktop without installation. But this article is talking about parallel installation of Windows 10 and Ubuntu, so choose “Install Ubuntu”.
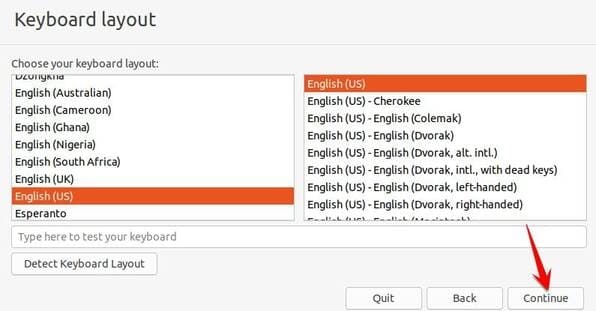
Select the keyboard interface – Layout Keyboard. It is best to leave the default English (US).
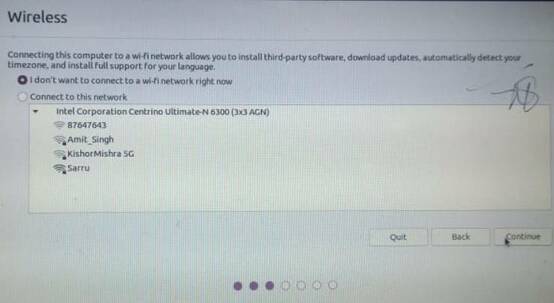
If you want to install third-party software in the upcoming step, connect to a Wi-Fi network or you can skip to continue.
If you want to be fast, choose I don’t want to connect to a wi-fi network right now
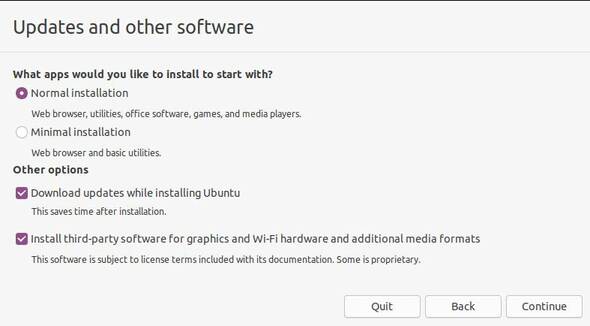
The next window provides options to choose the software installation method. If you have a hard drive and you have little space, you should choose “minimal installation” to install the necessary software first.
But if you want to preload different apps like games, office and browser, choose “normal installation”.
Also, make sure to check both other options to download updates and install third-party software during installation.
The above process may take several tens of minutes to load. As soon as this process is finished, the next steps you need to follow are the instructions to Dual Boot Ubuntu and Windows 10.
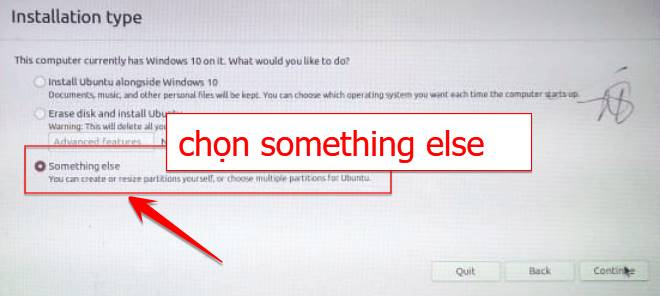
To be able to boot Ubuntu and Windows 10, select “something else” to create the partition table manually.
Although you can also choose “Install Ubuntu alongside Windows 10”but I don’t recommend doing so because “something else” can provide more control to manage space for each partition.
Step 4: Create a partition for Ubuntu
Partition manages disk space on Ubuntu unlike WINdows. In Windows there are drives C, D, E… but Ubuntu does not, usually it will be /dev/sda… So you need to set up the Ubuntu partition manually.
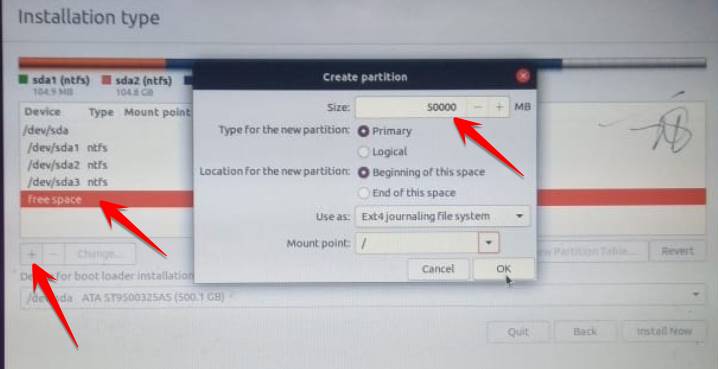
You will see Device Type NTFS is where your installed Windows operating system resides. If you want to keep Windows running with Ubuntu, don’t tick any lines that say NTFS until you know how partitioning works.
We will create three partitions for Ubuntu: /root, /home and /exchange. You can also create other partitions like /mnt. But the above three partitions are the most important to have to install Ubuntu.
Select option free space and click the sign + to add a new partition. Then fill the input field with the values as shown in the image below.
You are completely free to resize the partition based on the space you have allotted to Ubuntu.
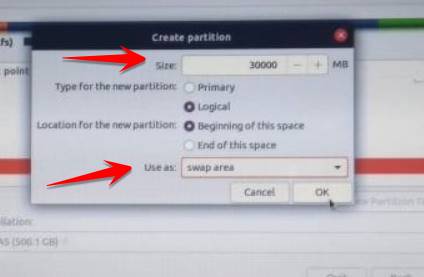
Continue to choose free space and press + to create partition swap, this is the partition creating virtual RAM. I gave 30GB of space to the swap area based on Ubuntu’s total of 100GB. The minimum amount of space you can allocate for swap should not be less than the size of your system RAM.
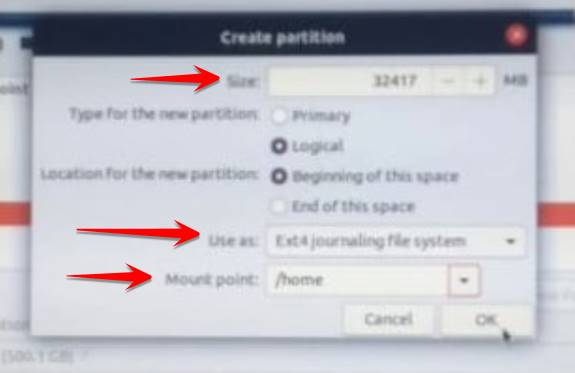
Finally, create a partition home will be your personal folder to store files and folders. The image can be blurry, so I’ll list the values:
- Size: 32417MB
- PartitionType: Logical
- Location: Beginning
- Use as: Ext4 journaling file system
- Mount Point: /home
Finally, we are done with the partition table. Wait, do you want to modify or resize the partition? If yes, click – to delete the partition, and the + to recreate another partition.
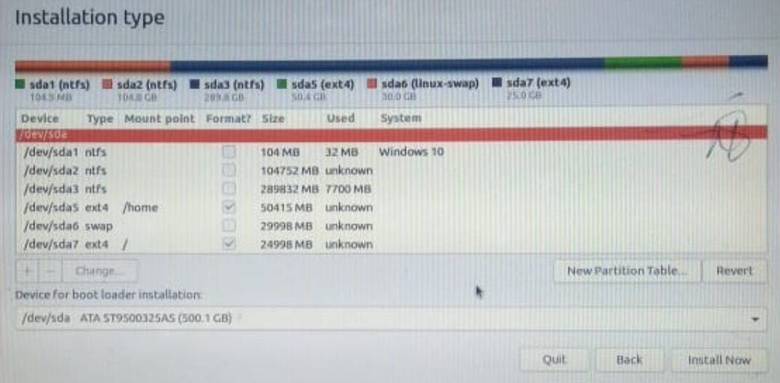
The complete partition table will look like this:
Now click on Install now to start writing data to the hard drive.
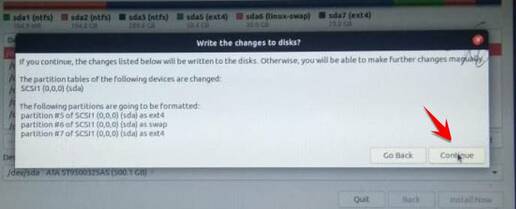
When the message appears, press tiếp tục
Step 5: Configure the settings and complete the installation
Now we have come to the final step of setting up the basic configuration of the Ubuntu operating system.
In the second final window, please locate yours using the map or drop-down field. If you are connected to the internet, the Ubuntu installer will automatically detect and set your location.
Finally, let’s set username and password that you will use to log into the system. Always choose a strong alphanumeric password.
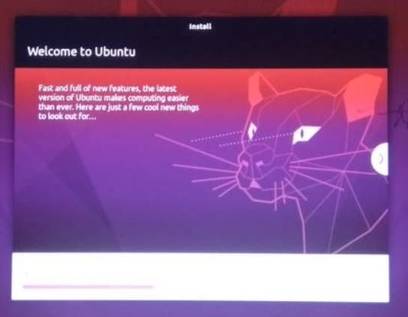
Click Continue and the installation process begins. It may take a few minutes until you can go through a slideshow showing all the software tools and applications.
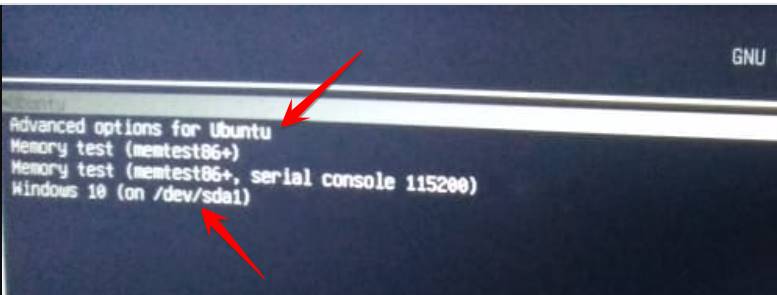
When the installation is finished, restart your computer. The moment your system reboots, you will be presented with a Bootloader Menu with many options to boot with the OS you installed.
Now we have 2 boot options Ubuntu 20.04 and Windows 10. The rest is just a test menu, you don’t need to care about it.
Now, select Ubuntu and log in with the credentials you set up in the last step.
So we complete the parallel installation of windows 10 and Ubuntu. You can use 2 operating systems on one computer, just restart and choose another operating system again.

