After a three-month beta and insider testing period, Windows 11 Now officially released for download by end users. For new friends Update your PC to Windows 11, there will be many surprises for you. But I will summarize the top 10 things to do on Windows 11 when you first update.
| Join the channel Telegram of the AnonyViet 👉 Link 👈 |

The first 10 things to do on Windows 11
Windows 11 brings a lot of new features and updates many old ones to improve their appearance and functionality. While most of them are image quality improvements, not all changes are welcome. So let’s take a look at all the things you might want to change on the new Windows 11.
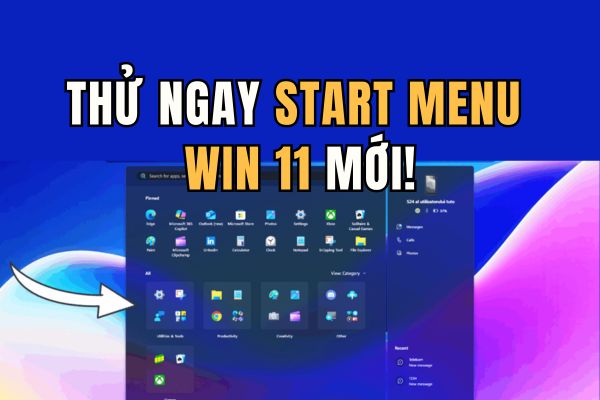
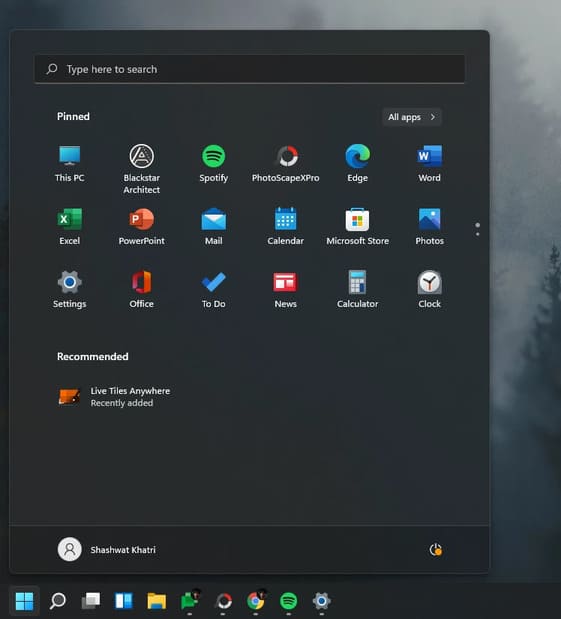
I still don’t know if centering the Start Menu is a good move by Microsoft. But, no matter what, users cannot deny that it is very bold and eye-catching. However, not everyone likes this, and if you want to put the Start Menu back where it was, here’s how:
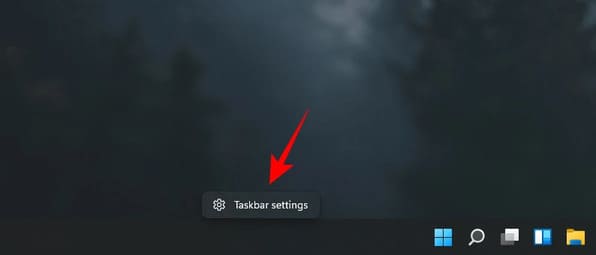
Right click on the taskbar and select Taskbar settings.
Select Taskbar behaviors.
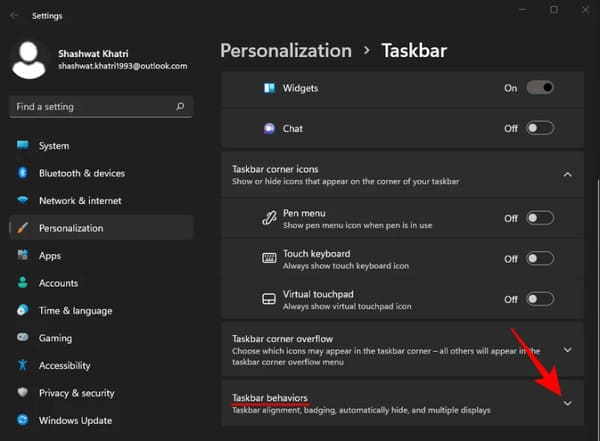
Then, next to “Taskbar alignment”, click “Center”.
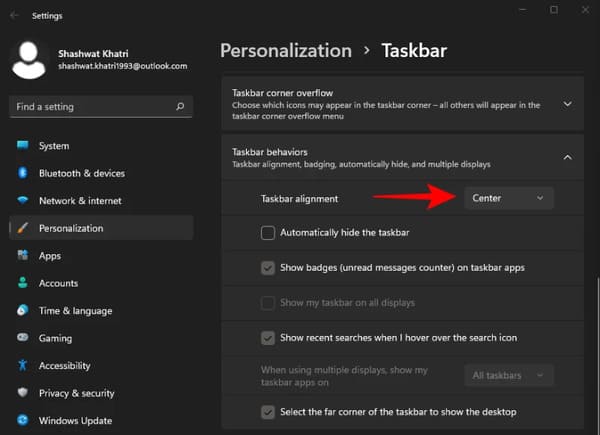
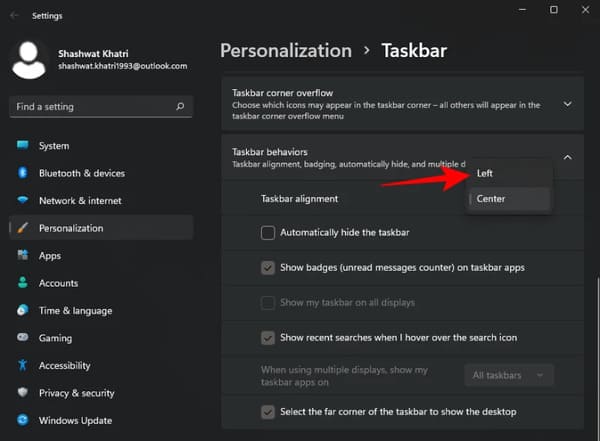
Select Left.
The Start menu will immediately return to the left.
2. Use Snap Layouts and Snap Groups
If you’ve ever used PowerToys’ FancyZones function, you know what Snap Layouts can do. When multiple windows or folders are open, you can hover your mouse over the ‘magnify’ button and choose the window’s position on the screen. Alternatively, you can also press Windows + Z to bring up this feature.
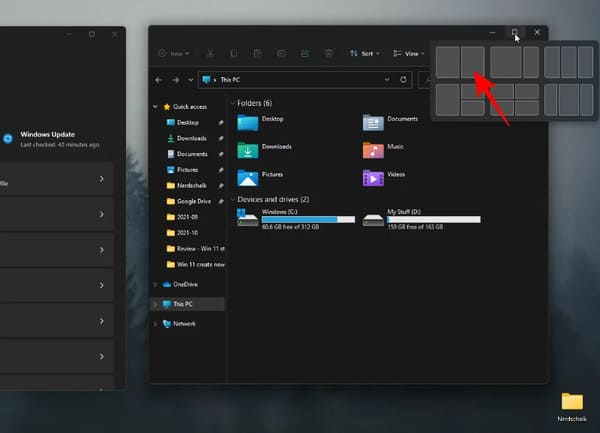
As soon as you select a layout, you will be asked to select the windows for the remaining layout on the screen.
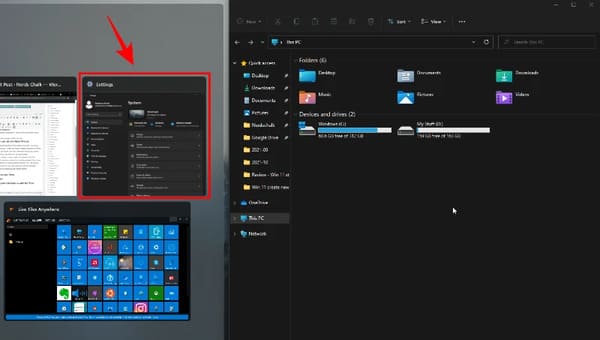
This will close windows that are not on the layout you selected.
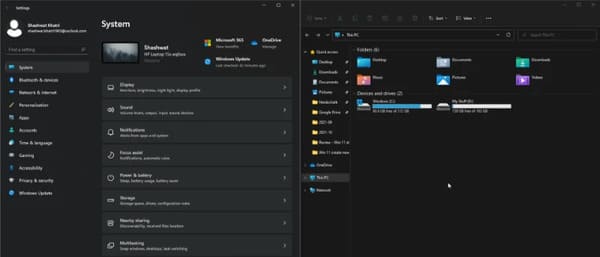
It is not required to select another window. You can simply click anywhere on the screen and work only with the selected window.
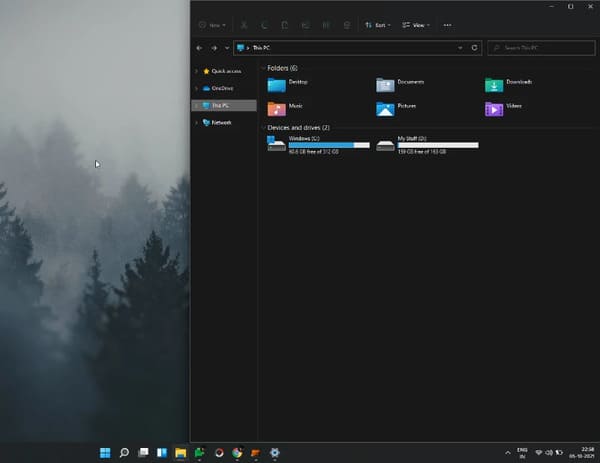
The layout you selected will be saved as ‘Group’. The group will show up on the taskbar when you hover over the opened windows on the taskbar.
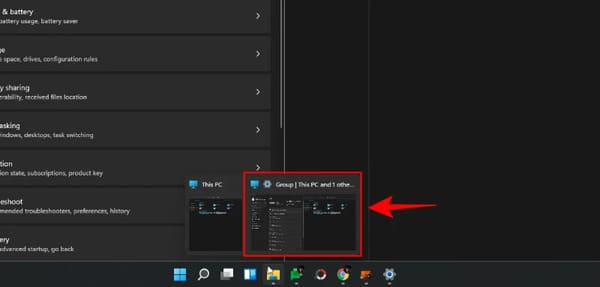
Snap Layouts and Snap Groups is a very convenient and efficient feature that allows you to align windows on the screen.
3. Enable compact view
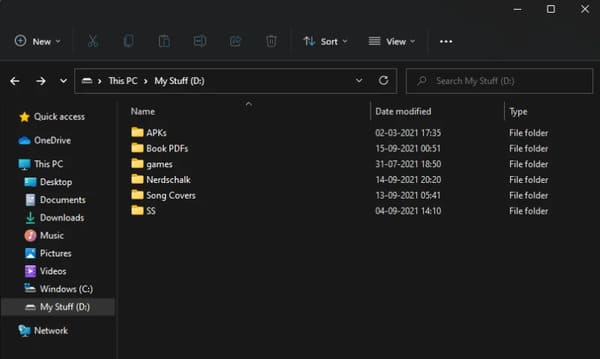
One thing that you will notice as soon as you open File Explorer is that the folders and files are a bit far apart.
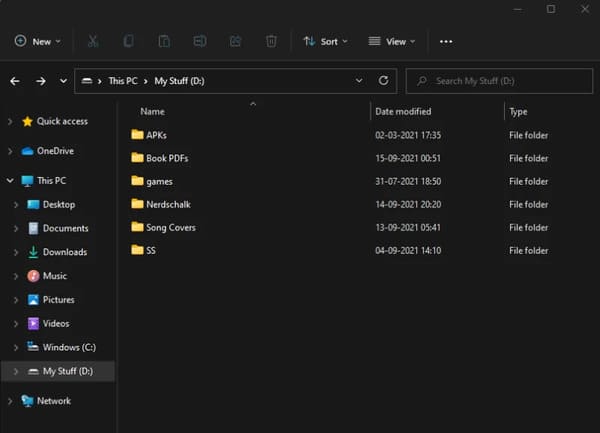
Windows 11 does this to make things a little more accessible and easy to see. But this also means that your desktop will display fewer files on the screen. If you don’t like spaced files, you can enable ‘Compact View’, which helps you to reduce the spacing between individual files and folders and make them appear more compact on the screen. your screen. Here’s how to do it:
Press Win + E to open File Explorer, then click View at the top.
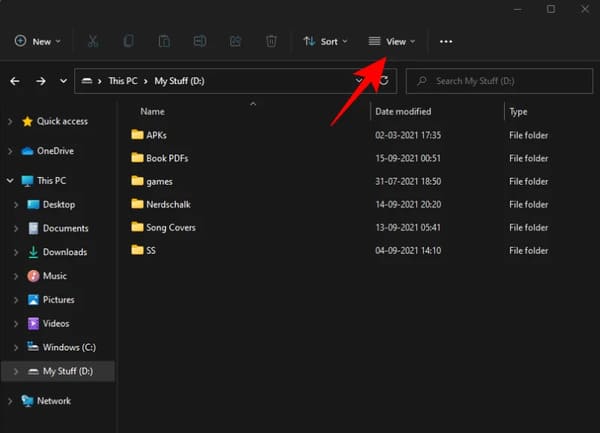
Select Compact View.
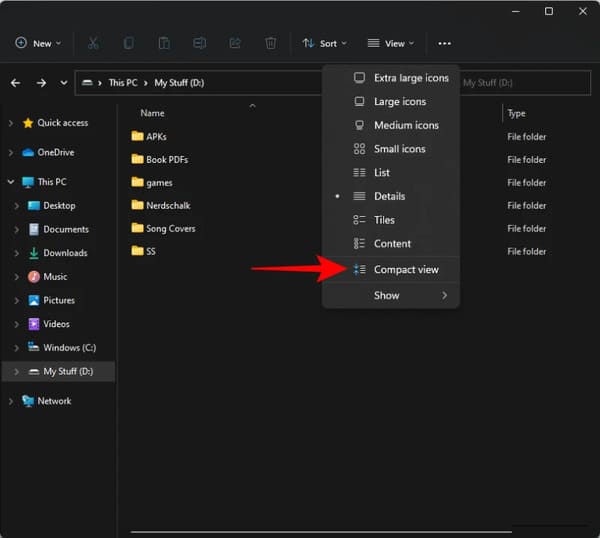
Your files and folders will be displayed in a more compact interface than before.
4. Try Widgets
Widgets are back on Windows and in a much nicer interface than previous appearances. By default, you can access Widgets right from the taskbar.
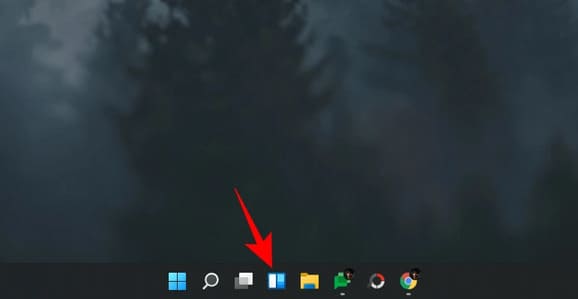
When you click on it, the Widgets panel will pop up, providing a variety of information such as Weather, News, Sports and more based on your location.
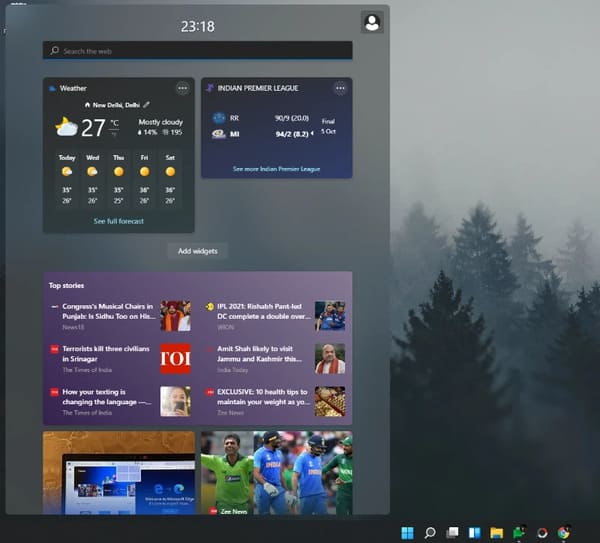
You can customize the widgets according to your needs. Each widget will have a 3-dot icon in the upper right where you can set the size of the widget, customize it for more information, or remove it.
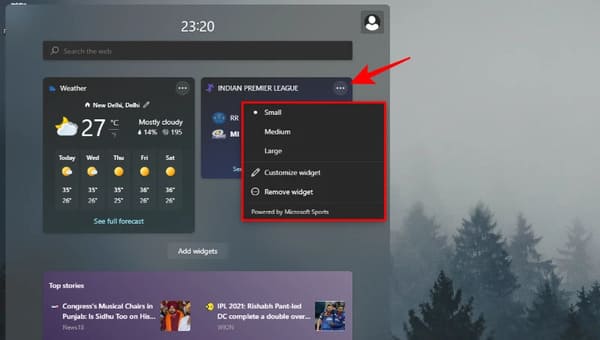
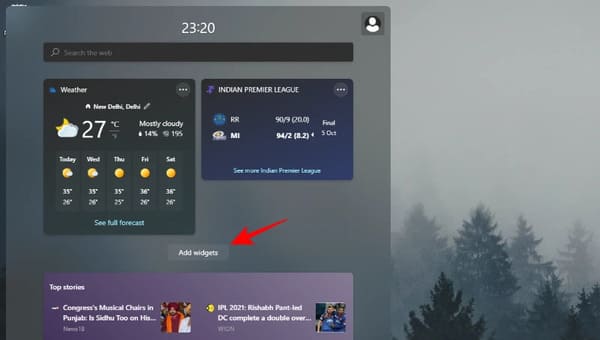
To add a widget, click Add Widgets.
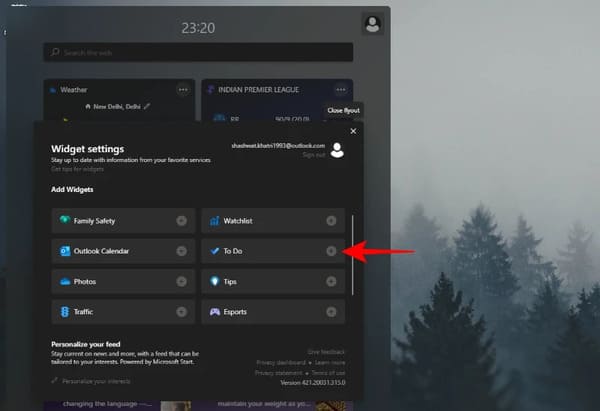
Select the available options.
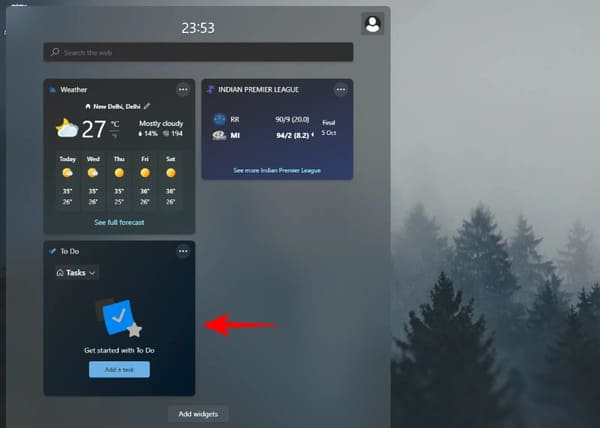
That widget will be added to the Widgets screen immediately.
5. Integrate your phone with the app’Your Phone’
The ‘Your Phone’ app has been out for a while. But with Windows 11, this integration has become more seamless, even more optimal with Samsung phones. On the Your Phone app, you can drag and drop files between your PC and phone, use the Windows context menu on your phone, check for incoming notifications on your Android phone, and join calls on your PC.
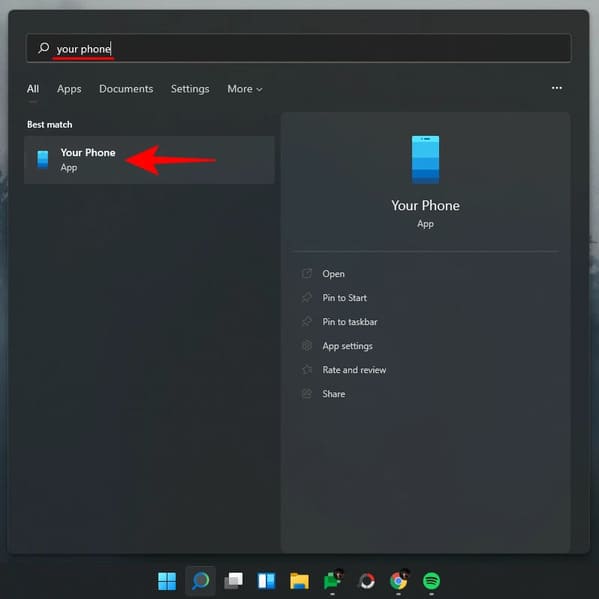
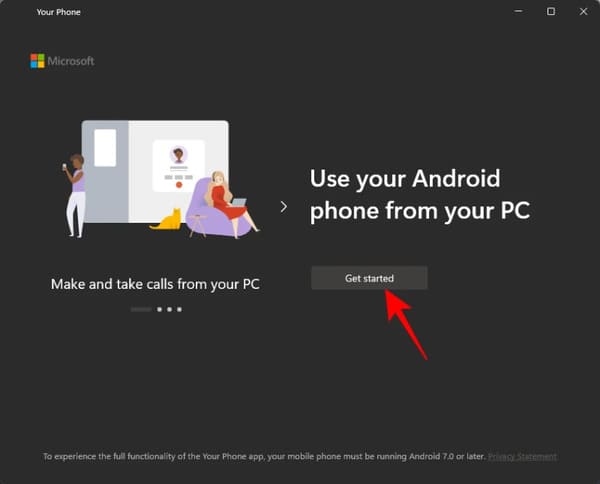
For those who don’t have a Samsung phone, the Your Phone app is still worth a try. With it, you can make and receive calls on your PC, check your messages, and manage notifications on your phone. To set it up, press the Start Menu, enter ‘Your Phone’ and select the Your Phone app.
See the Your Phone app introduction and click “Get started”.
6. Try Teams Chat (Or remove it from the taskbar)
Microsoft Teams has been further integrated on Windows 11, to the point where its ‘Chat’ feature has its own place on the taskbar by default.
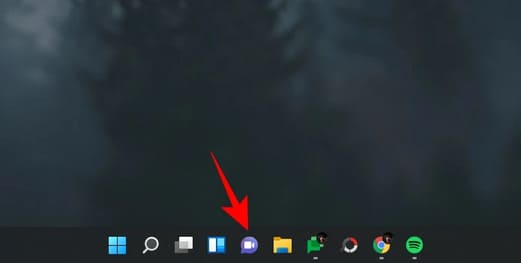
When using it for the first time, click ‘Get Started’.
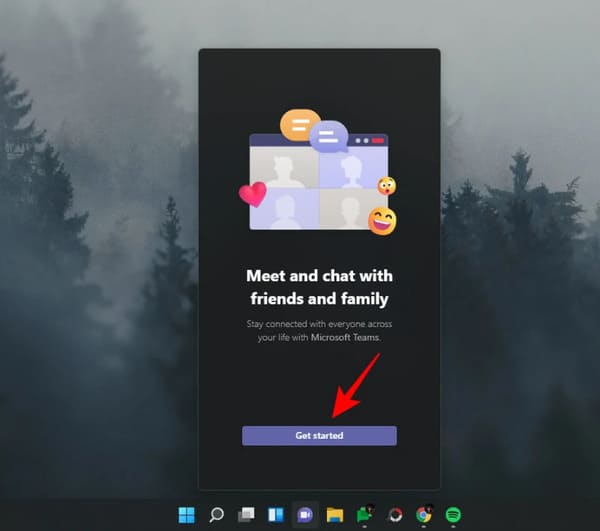
This will open the Microsoft Teams app. Select your account.
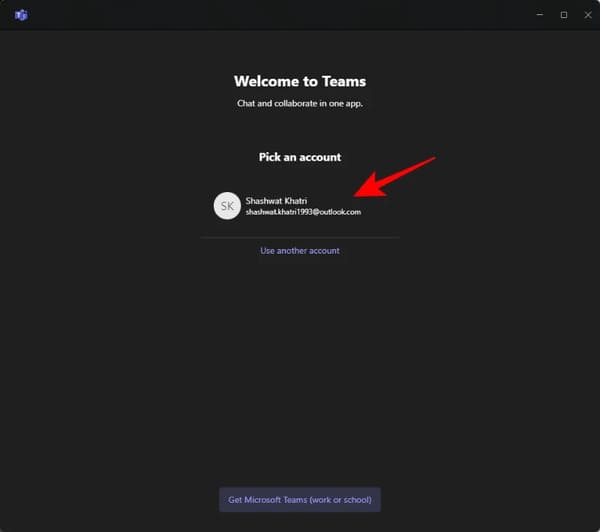
Once signed in, the Microsoft Teams app will be ready and you can start interacting with your contacts.
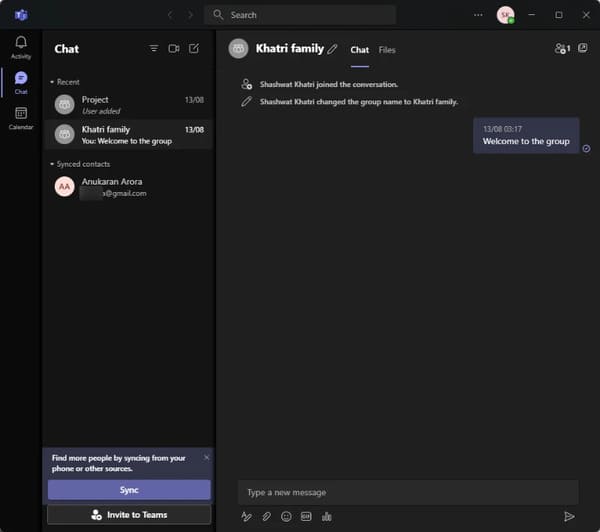
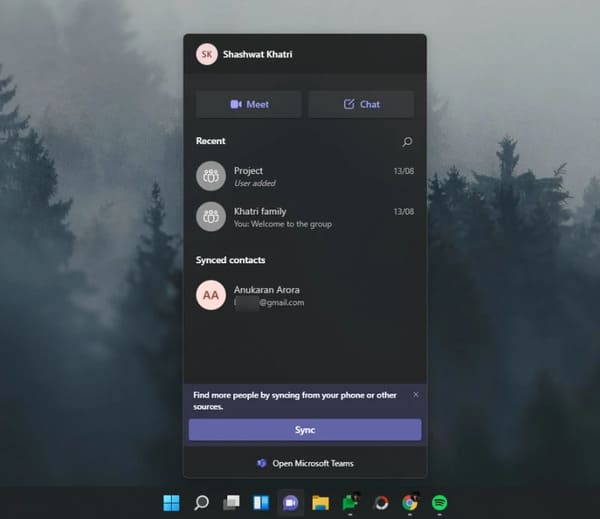
Clicking on the ‘Chat’ icon on the taskbar will bring up a list of your recent contacts for you to continue interacting with, start a new chat or invite them to an online meeting.
If you don’t want Teams ‘Chats’ to appear on your taskbar, here’s what you need to do:
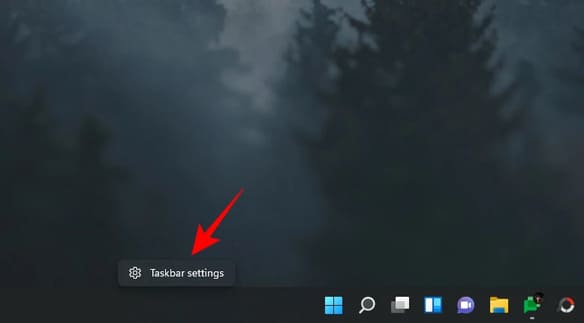
Right click on the taskbar and select Taskbar settings.
Then turn off Chats.
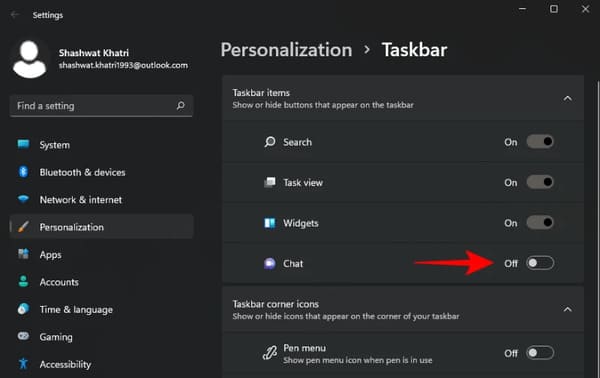
Uh, you can also remove the Chat icon from your taskbar.
7. Using Multiple Desktops
The ability to use multiple virtual desktops on Windows is one of those features that’s been around for a while but isn’t as accessible as on Windows 11.
This ‘Task View’ button is now available on the taskbar. Hover over it to bring up the monitor you’re currently using as well as an option to add a new one.
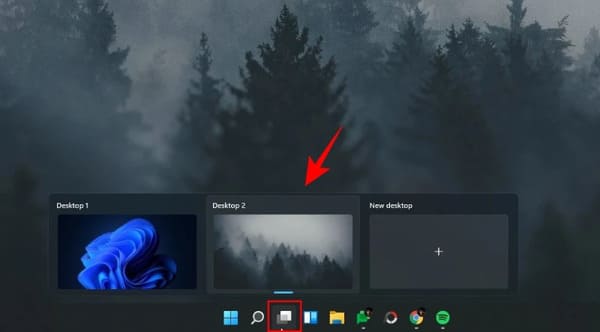
Clicking on the Task View option will display all the open windows on your current desktop. You can drag any window to a new virtual desktop and have it appear there.
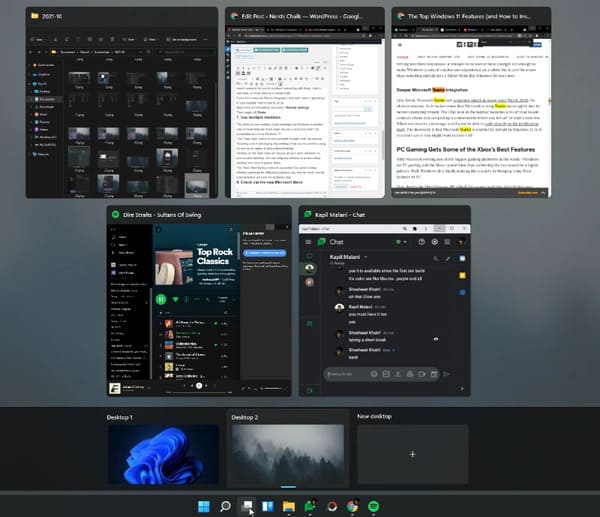
The ‘Task View’ button helps users to categorize screens for different purposes, such as one for work, one for entertainment and one for any other.
8. New Microsoft Store Experience
Windows Store is now called Microsoft Store. But not only the name change but also many changes that both developers and end users will benefit greatly.
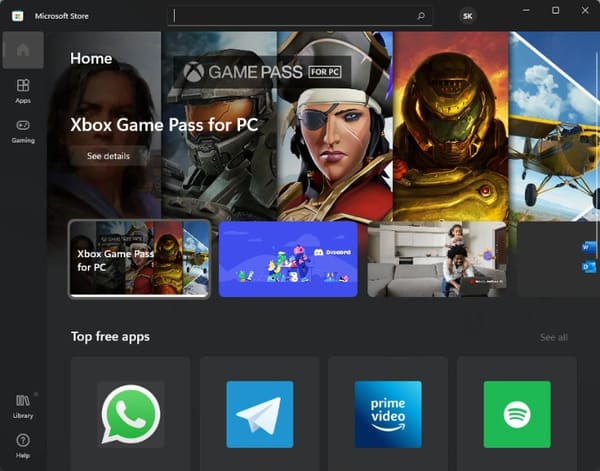
Game developers can now upload win32 versions of their apps to the Microsoft Store, and that convenience is being offered to other app developers as well.
But the best part is that Microsoft is also bringing Android apps to Windows. Although the mechanism is quite strange, it is through the Amazon Appstore that users will be able to search and use Android applications on Windows. But this also means that users will have to sign in to an Amazon account instead of a Google account.
While the idea has yet to materialize in its full form for Windows users, it is enough to attract many developers to put their apps on the Microsoft Store and let users use Android apps on Windows PCs. 11.
9. Default opens This PC when opening File Explorer
This is a small modification, but will make it much more convenient for users to access ‘This PC’ when they open File Explorer. By default, when you open File Explorer, you will be taken to ‘Quick Access’.
Follow these steps to change ‘Quick Access’ to ‘This PC’:
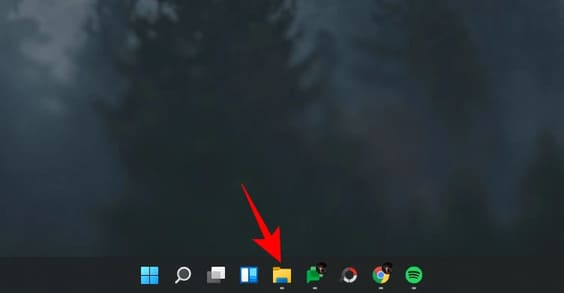
Press Win + E to open File Explorer. Alternatively, you can also open File Explorer on the taskbar.
Click the 3-dot icon in the toolbar above.
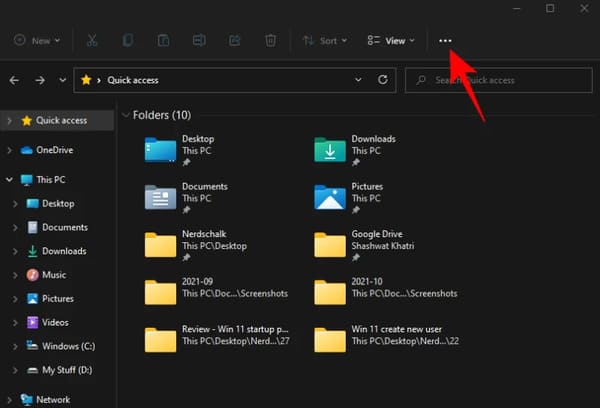
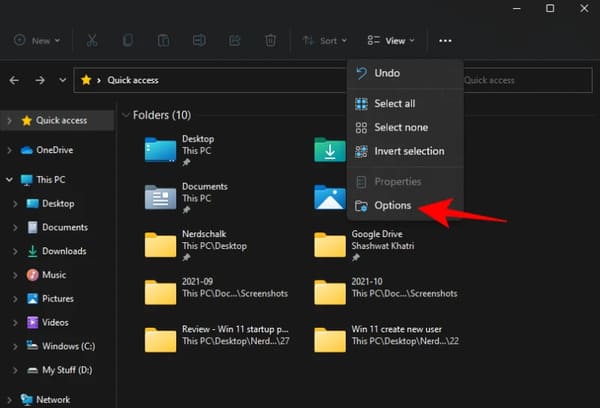
Then click Options.
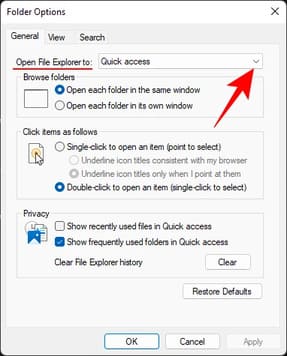
In the ‘Folder Options’ window, click the arrow button next to ‘Quick Access’.
Select This PC.
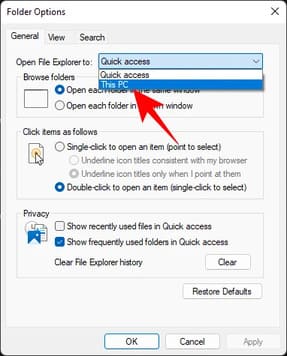
Then press OK.
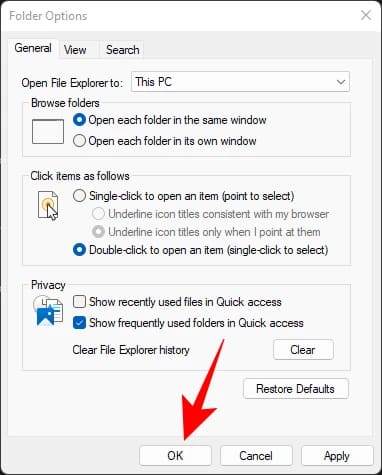
Now, whenever you open File Explorer, you will be taken directly to ‘This PC’.
10. Customize Action Center
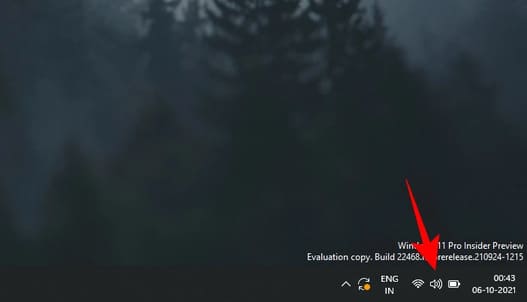
Action Center, or Quick Settings Menu also known as a major revision. You can access it from the right side of the taskbar by clicking the Wi-Fi, speaker, or battery icon.
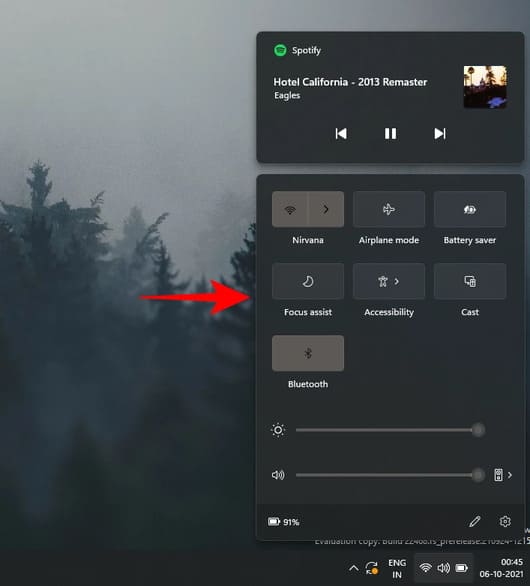
This is where you can enable/disable Wi-Fi, Bluetooth, airplane mode, focus assist, and other prominent shortcuts.
Besides these 10 things, what else do you do when you first upgrade to Windows 11?

