
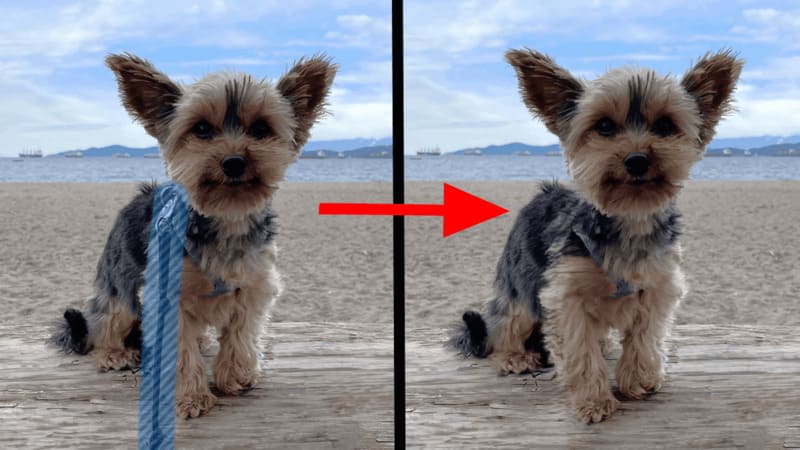
Way remove objects on Windows Photos no longer a challenge thanks to the new Generative Eraser feature. Want to remove unwanted details from your images quickly and effectively? Discover how to use this amazing tool to make your photos perfect in the article below.
| Join the channel Telegram belong to AnonyViet 👉 Link 👈 |
What is Generative Eraser?
Generative Eraser is an image editing feature built into Microsoft Photos. This feature allows users to remove unwanted objects from images easily and quickly. Generative Eraser uses AI technology to analyze and understand images, thereby identifying and removing the selected object without affecting the rest of the image.
This feature is currently in testing on version 2024.11020.28003.0 but if you want to experience Generative Eraser early, follow the instructions below.
See also: How to disable or remove Copilot thoroughly on Windows 11
Instructions for removing objects on Windows Photos
Step 1: Access the link HERE and continue with the steps below.
- Click on URL (link) > select Productld.
- Type 9wzdncrfjbh4 into the blank box.
- Click RP > select Fast.

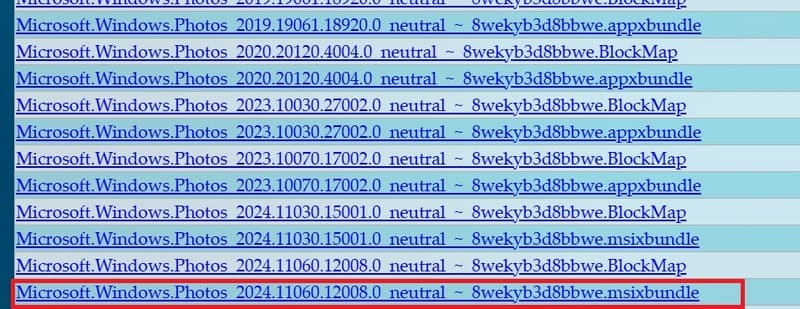
Next, click the v button to get the link to download the latest version of Microsoft Photos app.
Step 2: Once the results are displayed, scroll down to the bottom of the page and you will see Microsoft.Windows.Photos_2024.11060.12008.0_neutral_~_8wekyb3d8bbwe.msixbundleclick on it to download.
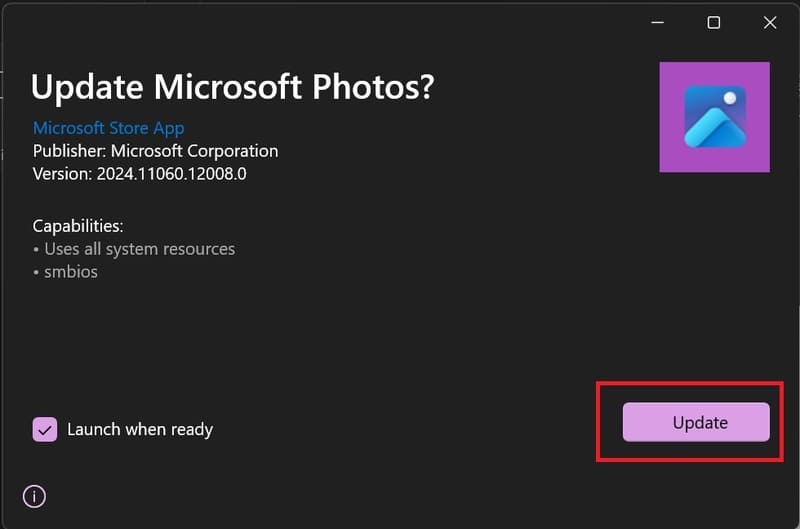
Step 3: Double-click the file and select Update to install or update Microsoft Photos.
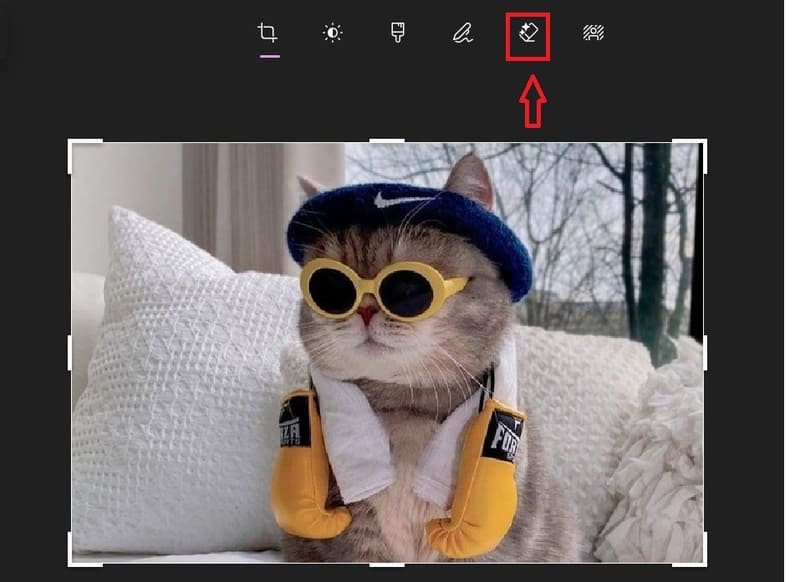
Step 4: Now open any image from which you want to remove the object > click on Edit image icon or use shortcut Ctrl + E.

Step 5: You will see the eraser icon of Generative Eraser, click on it to enter the working interface.
You have two options:
- Auto Apply: It will automatically delete the object after you have selected it.
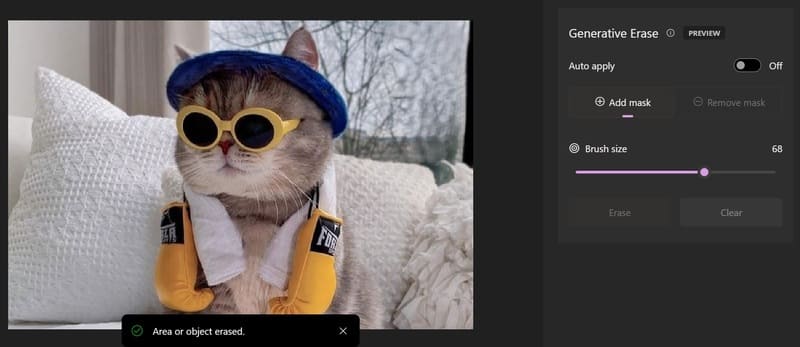
You just need to draw on the object you want to erase and then release, if the drawing line is too big/too small, adjust it at Brush size. The object will automatically erase after a few seconds, if you are not satisfied, click the undo icon button to restore.
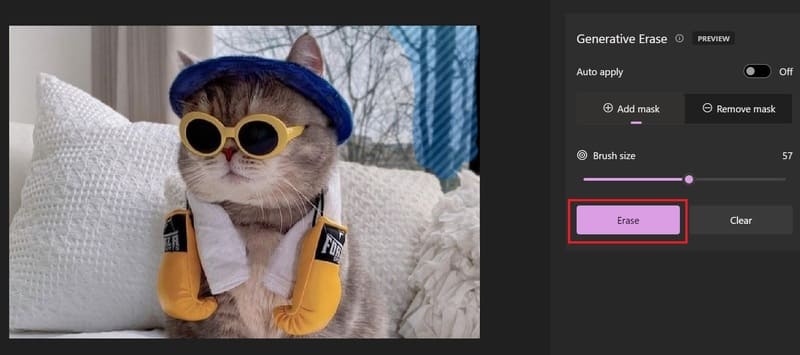
- Active deletion: If you don't want to delete automatically, turn off Auto apply.
Then, adjust the brush size and draw on the object you want to erase > click Erase.
Step 6: Finally, if you are satisfied, click Save options to save the image with the options.
- Save as copy: Save as a new image file.
- Save: Overwrite the original image file.
- Copy to clipboard: Copy to clipboard.
See also: Instructions to clear cache on Zalo to optimize capacity
Conclusion
With the simple steps above, how to remove objects on Windows Photos Now easier and more convenient than ever. Enjoy professional photo editing experience right at home with this Generative Eraser feature.

")


