
Discover how Enable Windows Sandbox on Windows 11/10 – a powerful feature that enhances the security of your computer. This is a perfect solution to test and run unknown applications without worrying about security risks.
| Join the channel Telegram belong to AnonyViet 👉 Link 👈 |
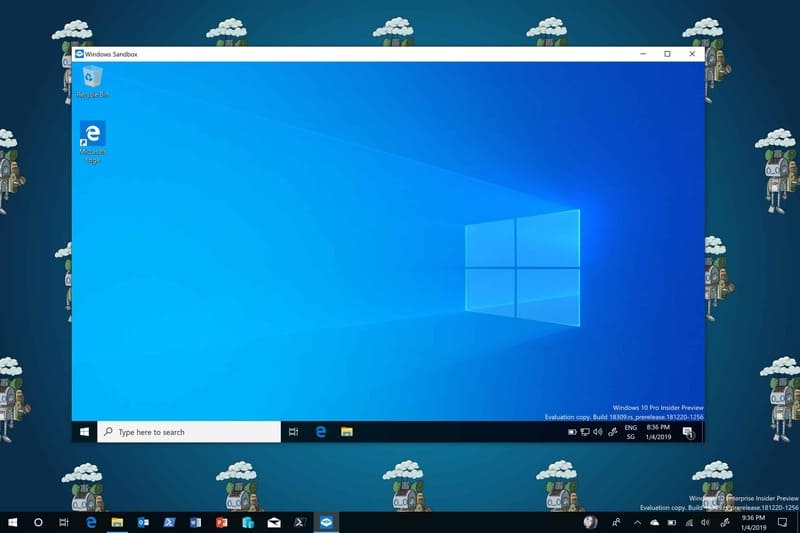
About Windows Sandbox
Microsoft is trying to solve a long-standing problem that Windows users often face: how to safely execute an unknown .exe file on a PC? Previously, there was a method to execute unknown files on Windows, which was to use a virtual machine to test unknown applications, but this method was only suitable for users with in-depth knowledge.
Recognizing this, Microsoft has developed a simpler approach so that any Windows 11, 10 user can launch applications in a temporary desktop environment to isolate a particular application that you suspect may pose a security risk.
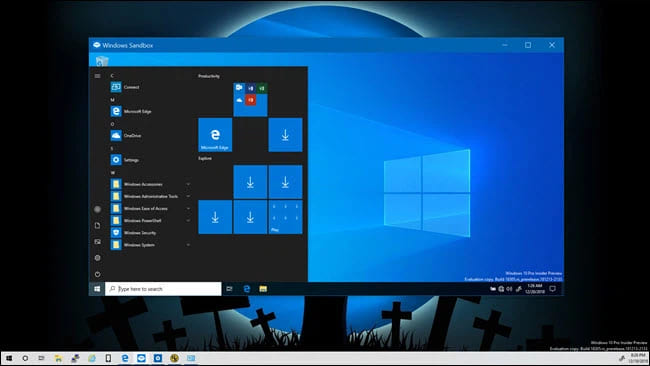
Basically, Windows Sandbox is designed for security and one-time use only, so once you are done using the application in this mode, the entire Sandbox will be deleted.
Additionally, a rather innovative new feature will be implemented, which is that every time Windows Sandbox is enabled, it will simplify the creation of a new lightweight (100MB) Windows installation to execute the application. Microsoft will apply its own hypervisor to create an independent kernel, completely separate from the host computer.
Requirements needed to use Windows Sandbox
- Windows 10 Pro or Enterprise Insider, build 18305 or later.
- Supports AMD64 architecture.
- Virtualization needs to be enabled in BIOS.
- Minimum 4GB RAM (8GB recommended).
- Minimum 1GB free disk space (SSD recommended).
- CPU needs to have at least 2 cores (4 cores with hyperthreading recommended).
See also: Change Spotify Interface with Spicetify
3 ways to enable Windows Sandbox on Windows 11/10
Method 1: Enable Windows Sandbox from Windows Features
Step 1: Search for Turn Windows features on or off and click on the corresponding result
Step 2: Check the Windows Sandbox box > Ok
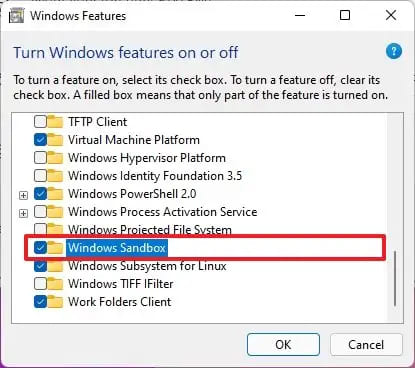
Step 3: Click 'Restart Now'
Once you complete the steps, you can launch the application from the Start menu.
If you want to turn off this feature, you can do the same but in step 3, uncheck the Windows Sandbox box.
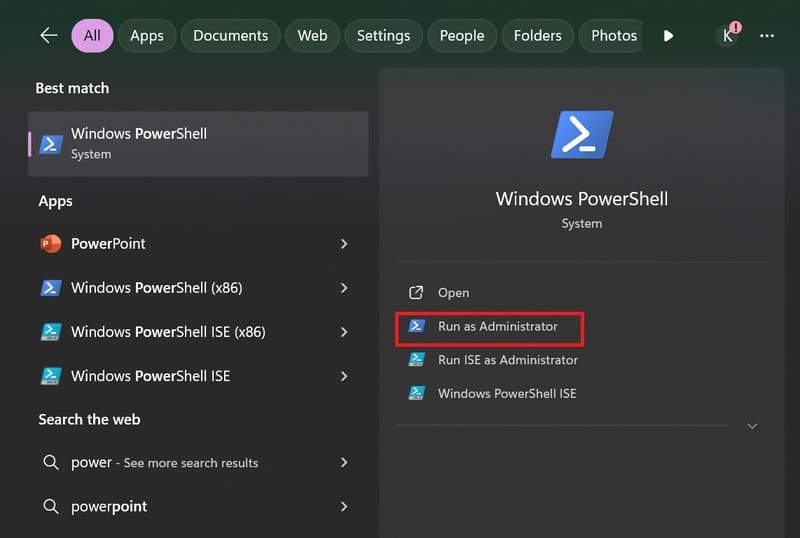
Method 2: Enable Windows Sandbox from PowerShell
To enable Windows Sandbox using a PowerShell command, follow these steps:
Step 1: Search for PowerShell > Click 'Run as administrator' on the displayed result.
Step 2: Paste the following command to enable the Sandbox user and press Enter:
Enable-WindowsOptionalFeature -Online -FeatureName “Containers-DisposableClientVM” -All

Step 3: Type Y and press Enter to restart your computer.
If you want to turn this feature off, in step 3, run the command:
Disable-WindowsOptionalFeature -Online -FeatureName “Containers-DisposableClientVM”
Method 3: Enable Windows Sandbox from Command Prompt
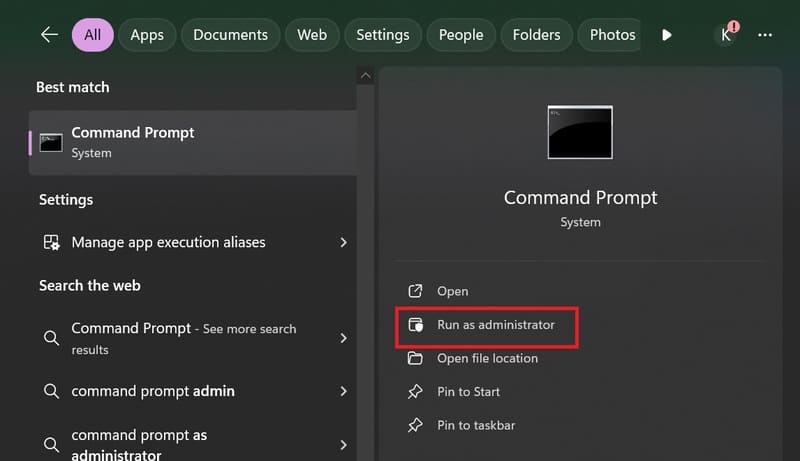
Step 1: Search for Command Prompt > Click 'Run as administrator' to run with administrator rights.
Step 2: Paste the following command and press Enter:
Dism /online /Enable-Feature /FeatureName:”Containers-DisposableClientVM” -All
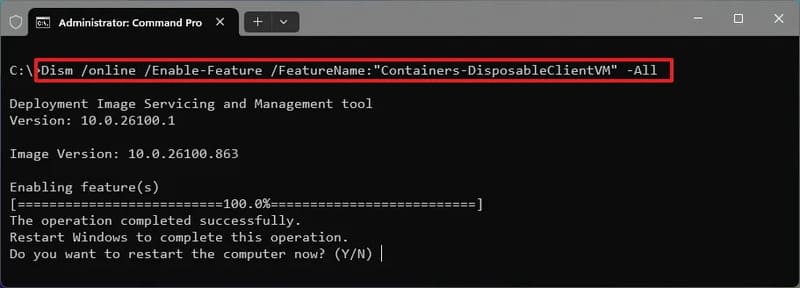
Step 3: Type Y and press Enter to restart the computer.
At this time, you can install any software or applications that you do not trust.
To turn off Sandbox, run the following command:
Dism /online /Disable-Feature /FeatureName:”Containers-DisposableClientVM”
See also: File Converter – Convert file format and size in the right click menu
Conclusion
So, we have learned through the way Enable Windows Sandbox on Windows 11/10. Make the most of this feature to ensure the safety of your computer when testing new applications. Follow AnonyViet to discover many other useful Windows features to enhance your computer experience!


