How to take a screenshot of the entire screen Windows 11 is an essential skill for those who want to save what happens on their computer. You can use this feature to back up data, make videos, slideshows or simply record memorable moments. In this article, AnonyViet will guide you in 3 extremely simple ways.
| Join the channel Telegram belong to AnonyViet 👉 Link 👈 |
3 extremely simple ways to capture the entire Windows screen
Method 1: Use Microsoft Edge
Since its launch in 2015, Microsoft's default browser has seen many improvements. Thanks to features like Sleep tabs, Tab groups, Bing Chat integration, vertical tabs, etc. it has become the favorite browser of many people.
Microsoft Edge also offers a handy Web Capture tool for capturing and annotating screenshots. However, note that this function only works in Edge browser.
Step 1: Launch Microsoft Edge on your computer
Step 2: Visit a website where you want to capture the entire page.
Step 3: Click the 3-dot icon > Select Web Capture
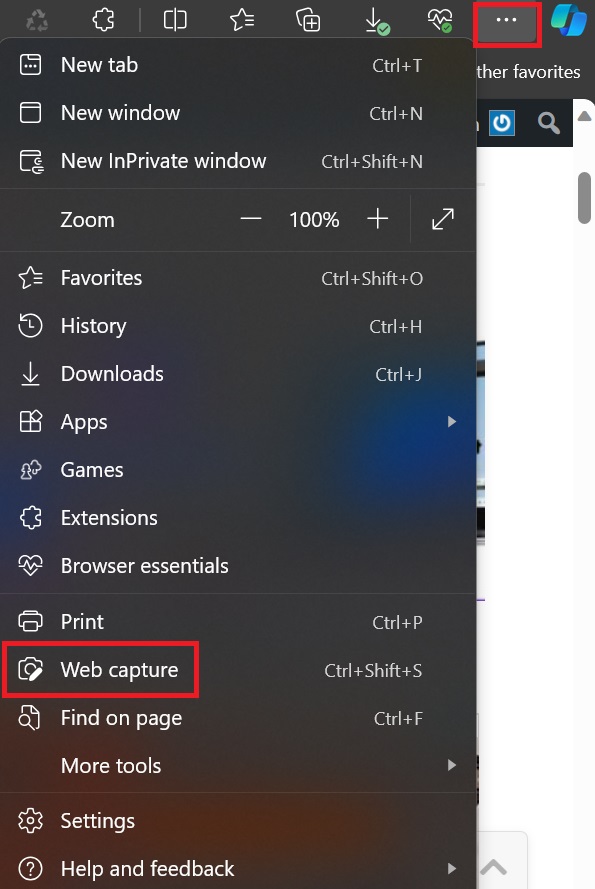
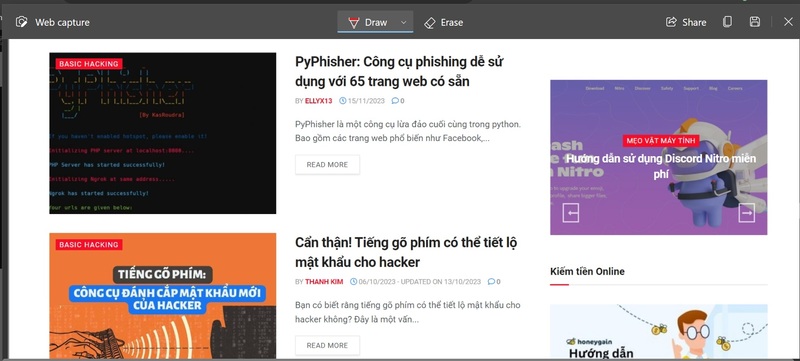
Step 4: A small toolbar appears at the top. Select Capture full page
Now the tool will automatically capture the entire screen for you.
Method 2: Use the Google Chrome extension
There are many third-party extensions for taking scrolling screenshots on Chrome. Scrolling screenshot is one such utility. It is updated regularly and offers features that can help you take screenshots like a pro.
Since it is a Chromium extension, it also works on other web browsers like Opera, BraveVivaldi and Microsoft Edge.
Step 1: Launch Google Chrome and access the link The following to install Scrolling screenshot

Step 2: Select Add Widget and it will appear in the upper corner of the toolbar
Step 3: When you want to take a screenshot scrolling on a web page, click the widget icon above and select Full page.
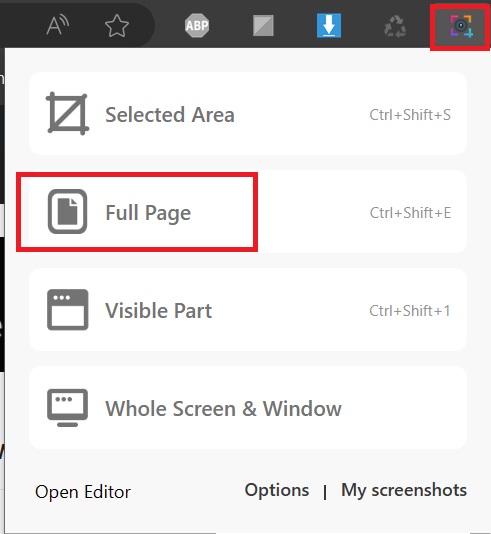
Step 4: Wait a moment for the tool to work. Remember not to move the mouse or scroll while waiting to take a photo.
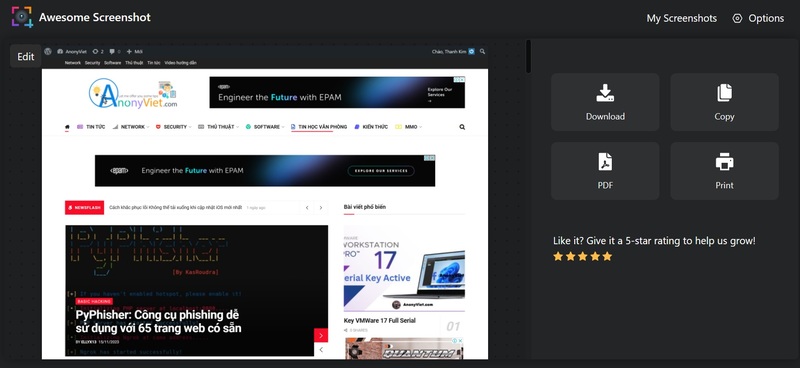
It is done. You can download photos, copy them, create PDF files or immediately print the photos you just took. Very convenient, right!
Method 3: Use ShareX
There is no shortage of third-party screenshot applications on Windows. Among them, ShareX is a free and powerful open source application. You can download it here
After installing ShareX on your computer, follow these steps to take a scrolling screenshot.
Step 1: With ShareX running in the background, click the up arrow icon in the Windows 11 taskbar.
Step 2: Right-click ShareX and select Capture > Scrolling capture
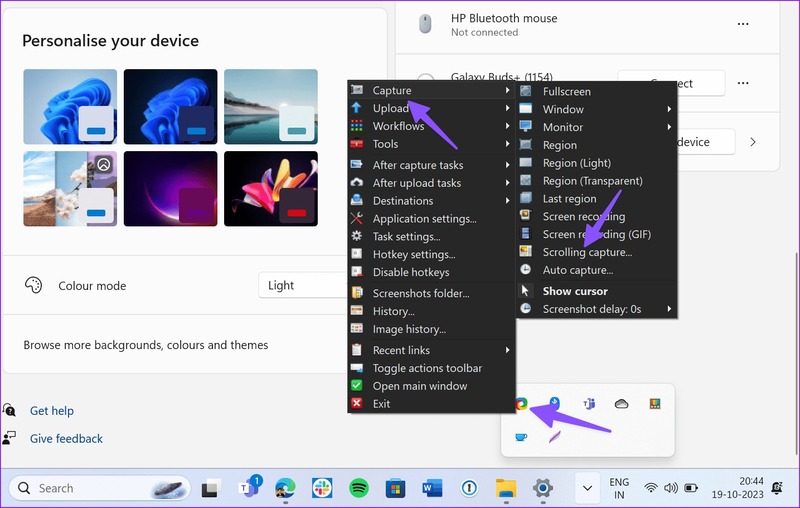
Step 3: Check Capture options and make changes (if necessary). Then click Start scrolling capture.
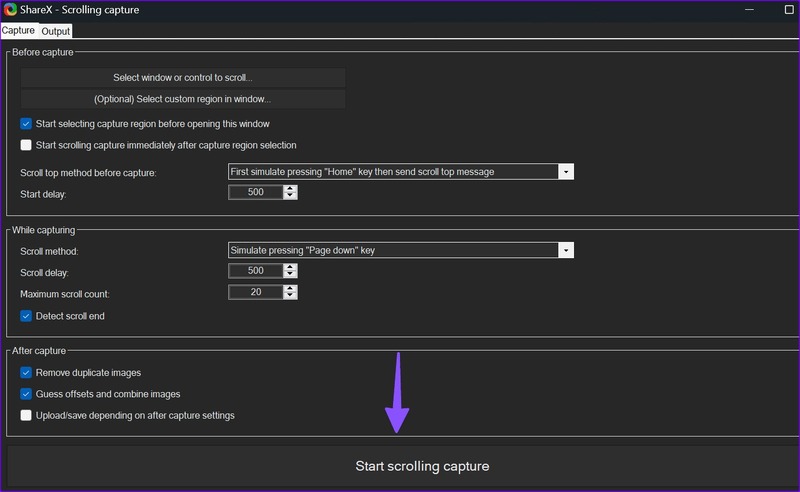
Step 4: ShareX will take screenshots and open the Output menu to make changes (if any).
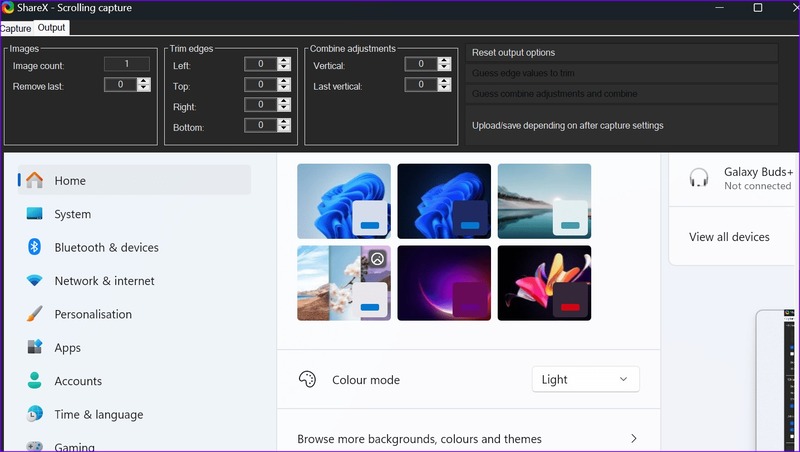
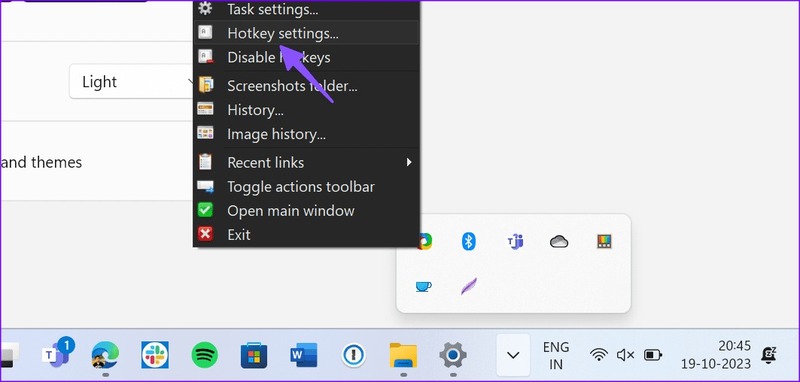
If you often take scrolling screenshots with ShareX, assign a keyboard shortcut to it for more convenient use, as follows:
Step 1: Right-click ShareX in the Windows system tray. Select Hotkey settings
Step 2: Click Add > Select Screen capture > Scrolling Capture
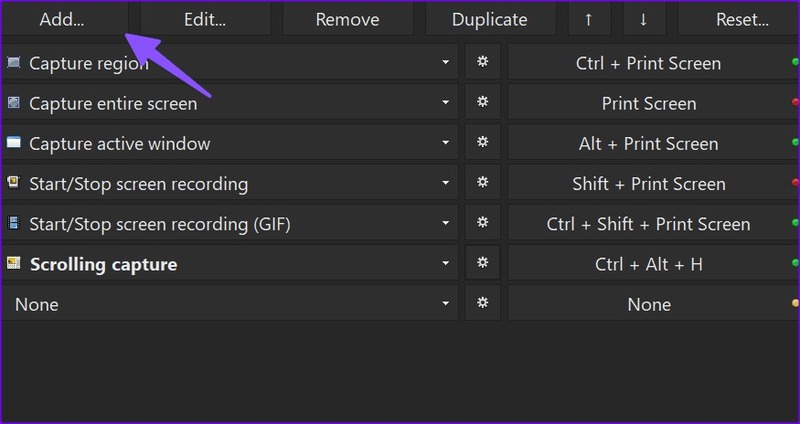
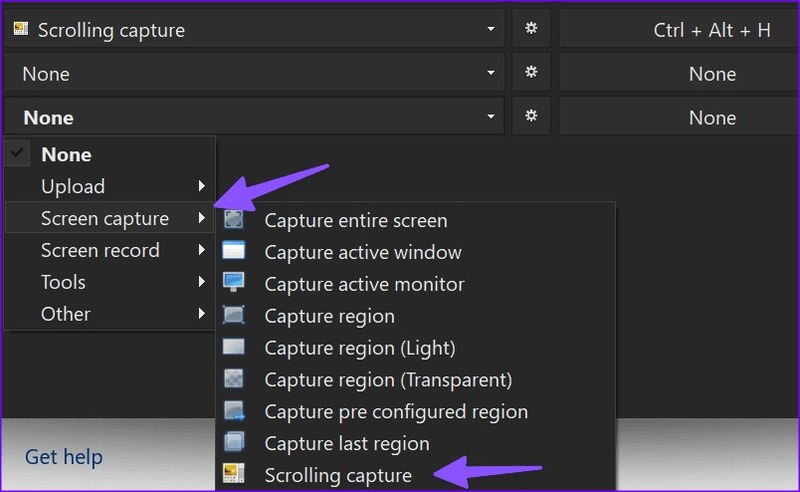
Step 3: Select a keyboard shortcut to enable the scrolling screenshot function. You can use any key you want, as long as it doesn't conflict with other keyboard shortcuts.
Step 4: Click OK to save the shortcut. Now you can use keyboard shortcuts to take scrolling screenshots whenever you want.
Epilogue
So you know How to take a screenshot of the entire Windows screen Already. Hope you can choose the most satisfactory way for yourself. If you have any questions or suggestions, please leave a comment below. Good luck!


![How to restore deleted files on USB flash drive [2025] How to restore deleted files on USB flash drive [2025]](https://anonyviet.com/wp-content/uploads/2025/02/word-image-81877-1.jpeg)
