After Windows 10 installs the Anniversary update, you noticey Windows drive lost more than 10 GB of space for unknown reasons. See why & how to handle it.
After updating the Anniversary update for Windows 10, the Windows installation drive will lose more than 10 GB of storage space. If your computer has little storage space, it’s terrible.
| Join the channel Telegram belong to AnonyViet 👉 Link 👈 |
The reason why the Windows installation drive lost more than 10 GB of space
The Anniversary Update is the biggest update since its release Windows 10 and is considered an upgrade to a completely new Windows operating system.
When you upgrade, Windows creates a folder Windows.old contains the system files of the old version of Windows. This makes it easy to roll back to the version of Windows before the upgrade if you don’t like the new version.
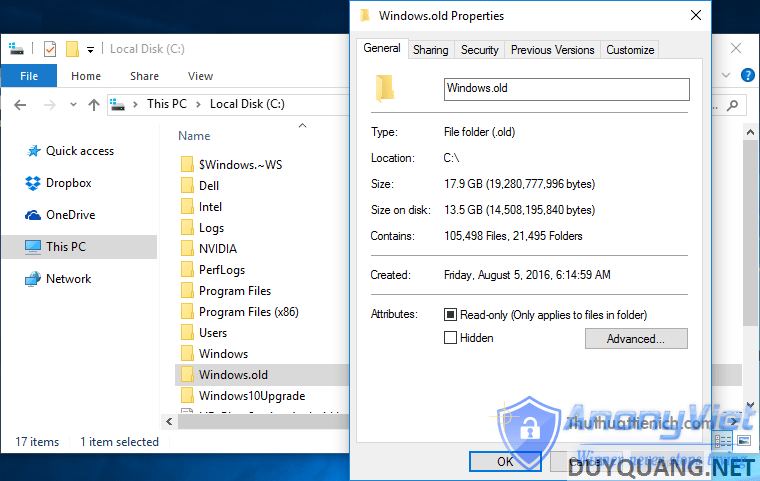
However, this Windows.old folder takes up more than 10 GB of storage space in the Windows installation drive. This is quite annoying if your computer has limited storage space.
Although Windows will automatically delete the Windows.old folder after 10 days (from the date of upgrade). But if you want to reclaim the storage space right away, then follow the instructions below.
Note:Don’t delete the Windows.old folder if you want to roll back to the version of Windows before the upgrade (but it’s recommended to go back within 10 days of the upgrade, because it won’t be back after 10 days).
You can roll back to the version of Windows 10 before the upgrade by opening Settings -> Update & Security > Recovery. Then press the button Get Started in section Go back to an earlier build to begin.
How to reclaim more than 10 GB of space for Windows 10 installation drive
Step 1: Open the Disk Cleanup tool. There are two ways to open the Disk Cleanup tool.
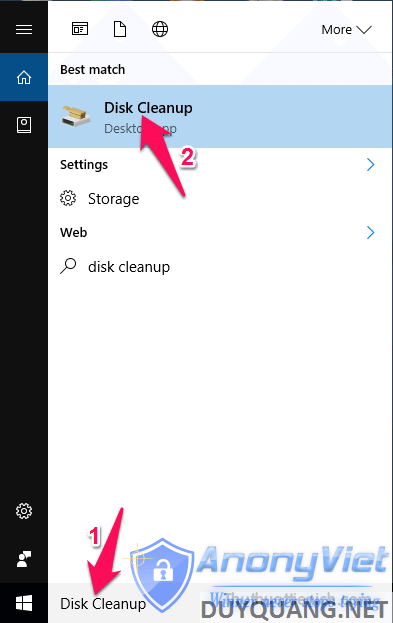
+ Method 1: Press the Start menu button, then enter a keyword Disk Cleanup in the search box then click on the Disk Cleanup tool in the search results.
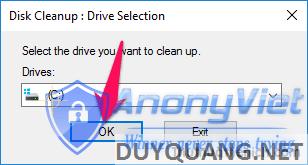
Select the Windows 10 installation drive in the Drives then press the button OK .
Press the button Clean up system files .
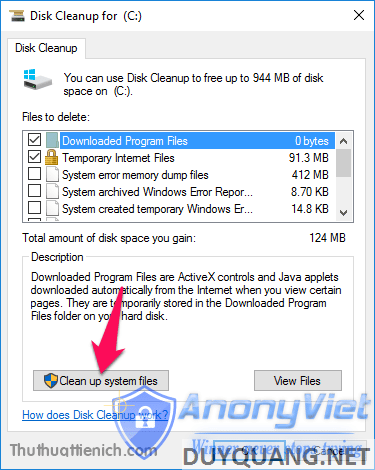
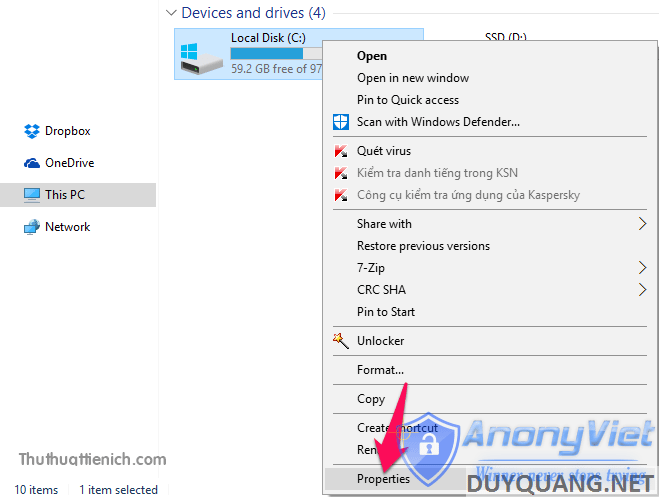
+ Method 2: Right-click on the Windows installation drive and select Properties .
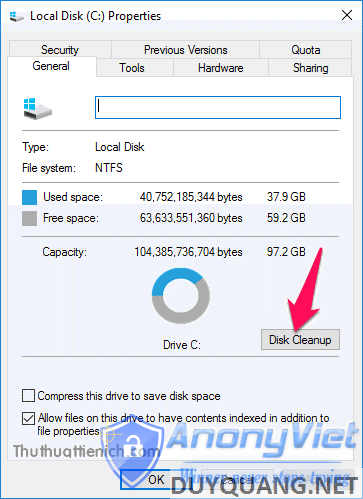
In the General section, press the . button Disk Cleanup .
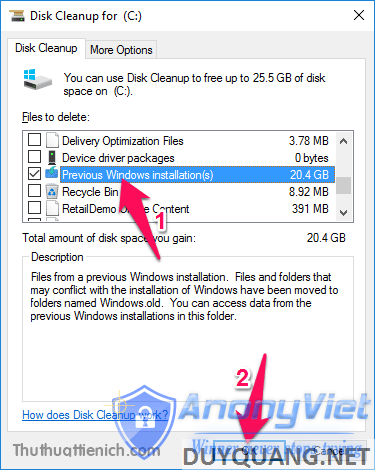
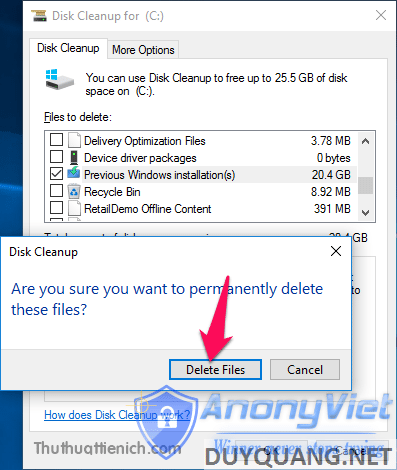
Step 2: After the Disk Cleanup tool is opened, remove all the ticks in the File to delete section, only ticking each section. Previous Windows installation(s) . As you can see, this file is up to 20.4 GB in size.
Next, you press the button OK .
Step 3: A confirmation window pops up, press the . button Delete Files To confirm.
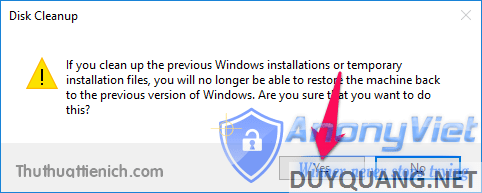
Step 4: Add another warning saying you can’t go back to the version of Windows before the upgrade, press the . button Yes to agree to delete.
Wait a moment for Windows to delete the system files of the old version of Windows, returning space to your drive.
Lmint – Good luck!!!


