In the post: What’s in Hacker Backpack? Hacker’s toys you don’t know, I introduced one of the indispensable items of Hacker: Raspberry Pi. And today, I will show you how to Set Up for Raspberry Pi
| Join the channel Telegram of the AnonyViet 👉 Link 👈 |
What is Raspberry Pi?
The Raspberry Pi is a single board about the size of a credit card, developed in the UK by the Raspberry Pi Foundation with the original purpose of promoting the teaching of basic computer science in schools and universities. the developing countries.
Currently, the Hacker community uses Raspberry Pi as a mini computer, very easy to carry and use very easily. With its nimble processor and usability, you can build yourself a mini computer with just a simple circuit board.
Operating systems that Raspberry can use
- Raspberry Pi OS
- FreeBSD
- Linux
- NetBSD
- OpenBSD
- Plan 9
- RISC OS
- Windows 10 ARM64
- Windows 10 IoT Core[5]
- OS-less Embedded RTL’s.
Prepare
- The source
- MicroSD memory card (at least 8GB or more)
- Mouse
- Keyboard
- HDMI cable (For some versions, you need to use Micro HDMI to convert)
- Screen
- Raspberry Pi (available for purchase here)
- USB SD memory card reader
Instructions for Setting Up Raspberry Pi
Install Raspberry Pi OS
Step 1: Insert the SD memory card into the SD card reader USB
Step 2: Download Raspberry Pi OS here.
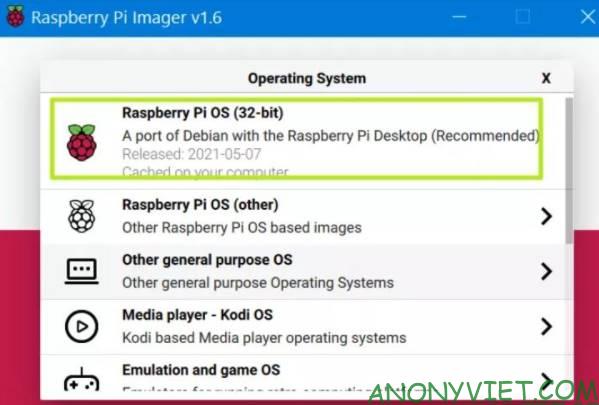
Step 3: Click on Choose Os and choose Raspberry Pi OS (32bit). You can choose another operating system but Raspberry Pi recommends everyone to use
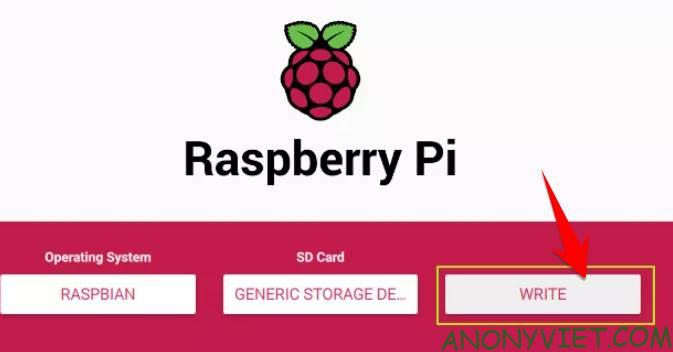
Step 4: Select Choose SD card and select the SD card you are using
Step 5: Click on Write
That’s it, you just need to plug the SD card back into the Raspberry Pi
Changing the configuration of Raspberry Pi OS
For newcomers that require a password or SSH connection, the Username will be “pi” and the Password will be “raspberry”. When you first enter, it will display a dialog box: Welcome to Raspberry Pi
Step 1: Select date, time and Language to use

Step 2: Change password. Otherwise, the password will default to: raspberry

Step 3: Select connect to Wifi. For those of you who are using a cable to connect, you can skip this step by pressing skip

Step 4: After entering wifi, they will ask for software update

Step 5: If a window pops up saying that you need to reboot, please click Reboot

Change screen resolution
Step 1: Click on the logo of Raspberry Pi -> Preference -> Screen Configuration

Step 2: Right click and select Resolution and select the desired screen resolution

Step 3: Click on the check box to apply the change

Step 4: Select OK

So through the last post, you can install and set up your Raspberry Pi yourself. How do you feel? Leave a comment to let me know what you need help with!


