
How to change screen timeout Windows 11 is one of the tricks that many users are interested in. Because the time to turn off the Windows 11 screen affects many factors such as saving battery, protecting eyes, increasing work efficiency, or simply according to personal preferences. In this article, AnonyViet will guide you to change the time and interface of the lock screen easily and quickly.
| Join the channel Telegram belong to AnonyViet 👉 Link 👈 |
What is a screensaver?
Screensavers are a familiar feature to many Windows users, helping to protect the screen from damage caused by displaying the same image for a long time. In addition, screensavers also bring fun and personality to the computer, when you can choose images, videos, or animation effects according to your preferences.
Instructions to change Windows 11 screen off time
Step 1: To enable screensaver on Windows 11you need to access the Settings application, where you can change settings related to your computer. There are two ways to open Settings:
- Method 1: Press the Windows + I key combination
- Method 2: Press the Start button > Select the Setting icon on the right side.
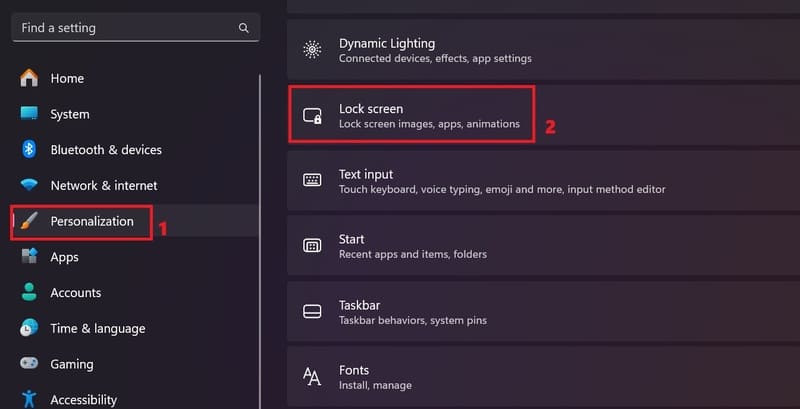
Step 2: Select Personalization, where you can customize your computer's appearance, colors, wallpaper, and screensavers.
Step 3: Next select Lock Screen
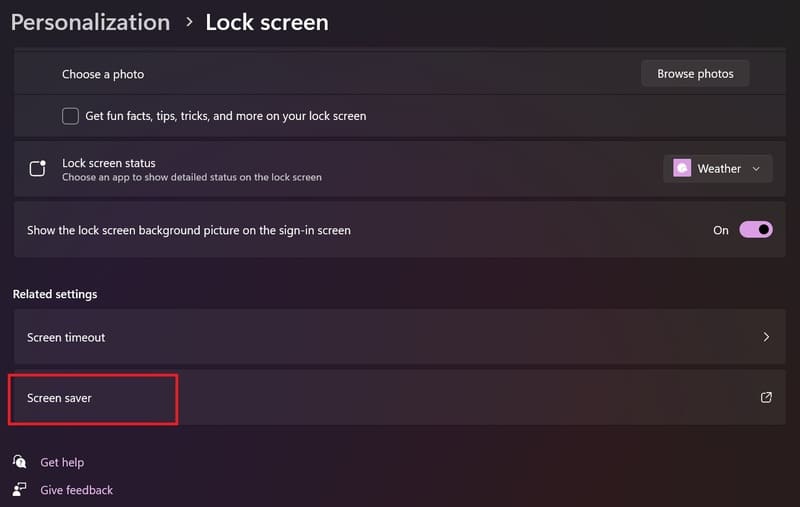
Step 4: Scroll down to the bottom and select Screen Saver.
Step 5: Here you can select the desired screensaver styles and the timeout for the screensaver to run.
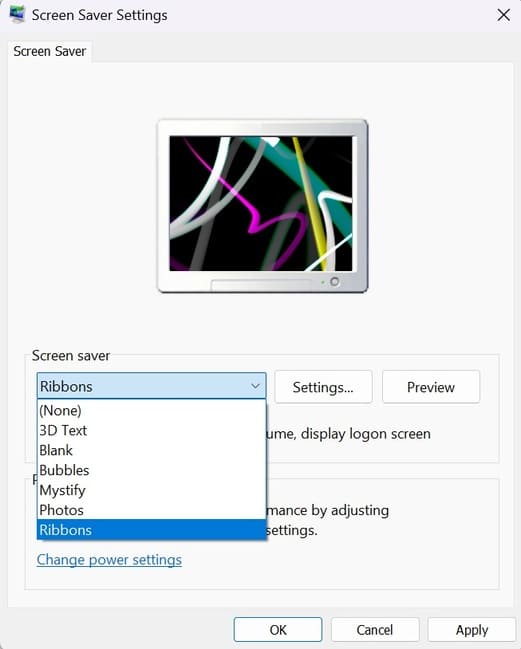
You can click 'Preview' to see the screensaver in action on your screen.
Step 6: Once setup is complete, click Apply > OK to save the settings.
Epilogue
At this point, you have completed the change screen timeout on Windows 11. Through this, you can easily customize the screen lock time and lockscreen interface according to your preferences. Wish you success in applying!
 of Chrome")


