Cloudflare just launched its DNS service for all customers on Lie day (1/4) this year. This DNS service promises to speed up your internet connection to help protect internet privacy. This service is using the address https://1.1.1.1 is a real and pubic IP address for all users.
| Join the channel Telegram of the AnonyViet 👉 Link 👈 |
With the fastest response time, DNS cloudflare is currently the fastest service to help you access Webstie in the world.
What is DNS?
DNS (Domain Name System) plays an important role in the resolution of IP addresses into domain names. Normally, websites have a fixed IP address, in the old days to access websites, people often had to remember each IP of each web address they wanted to access. Memorizing an IP address is difficult, because it’s full of numbers. DNS was born to overcome that problem, it helps to convert the IP address into a specific domain name. Makes it easier to remember Web addresses.
DNS is an essential part of the internet, but DNS servers provided by ISPs are often slow and unreliable. Your ISP or any Wi-Fi network you connect to may use DNS servers to identify all visited websites, however no one can guarantee the safety and security of your privacy. user.
What’s New in Cloudflare DNS?
Cloudflare DNS provides support for both DNS-over-TLS and DNS-over-HTTPS . Cloudflare’s DNS currently has a global response time of 14ms, compared to 20ms for OpenDNS and 34ms for Google’s DNS, so it’s the fastest DNS solution for all of the time.
How to adjust DNS to 1.1.1.1 to speed up web surfing
How to adjust DNS on Windows 10
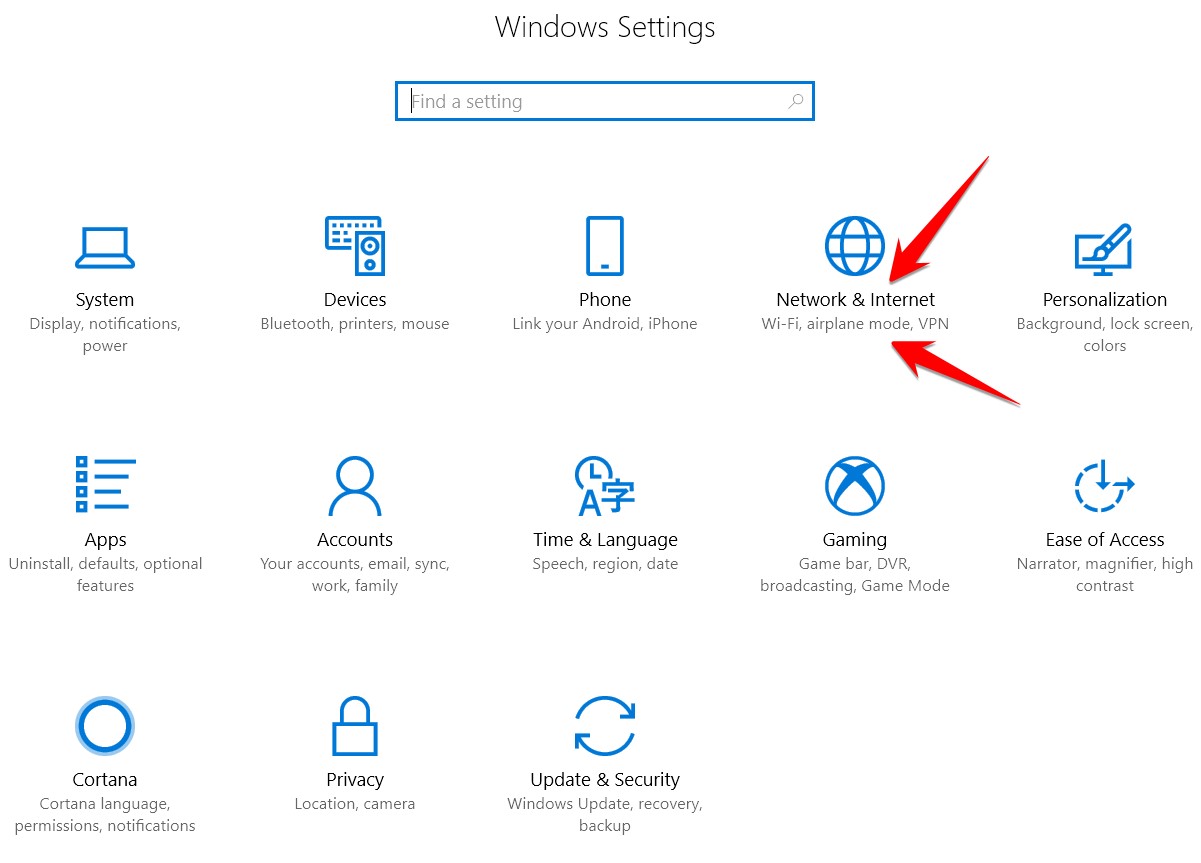
First you enter Settings -> Select Network and Internet
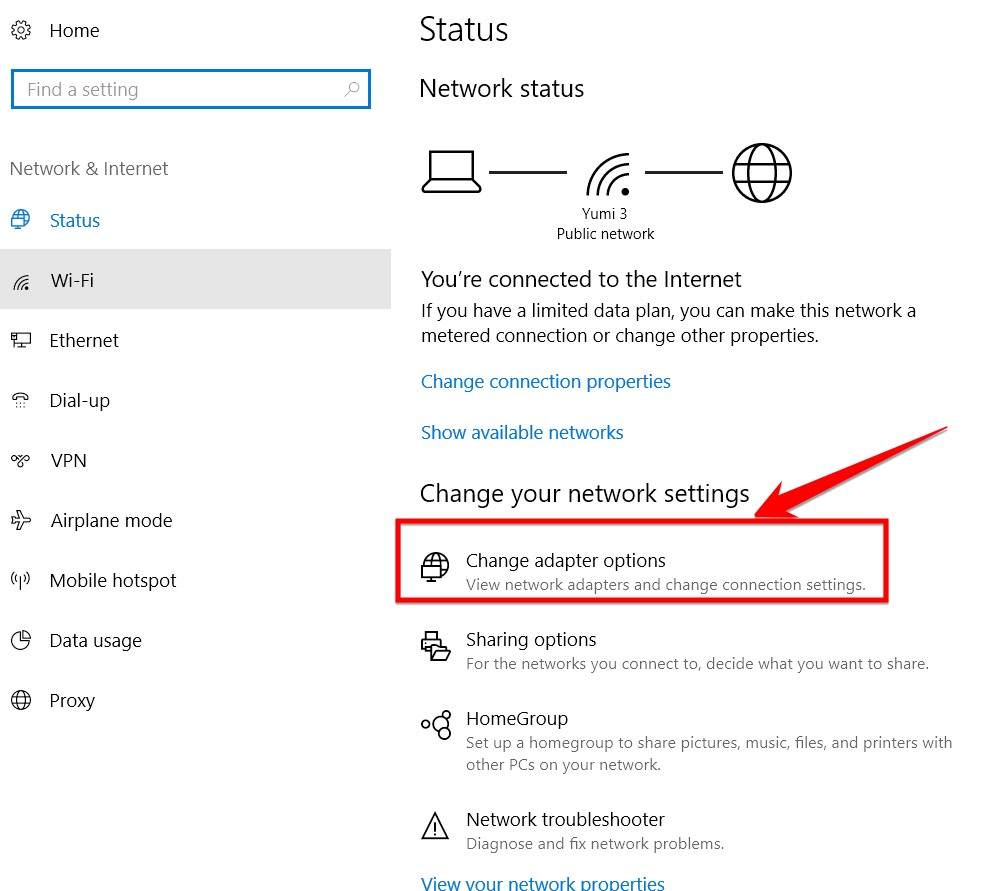
Select Change Adapter options
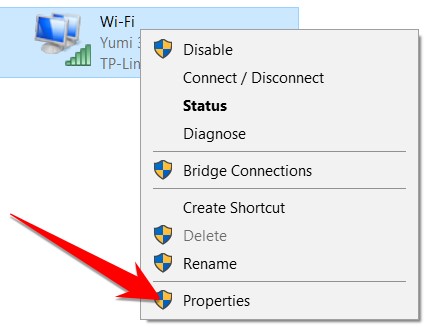
Right click (right click) go to the network card to adjust DNS
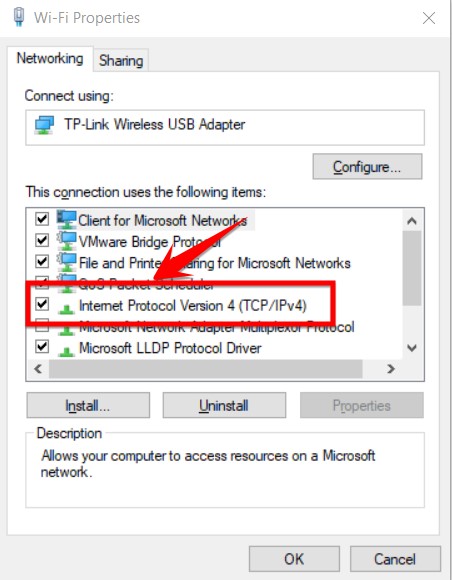
Double Click into the Internet Protocol Version 4 (TCP/IPv4)
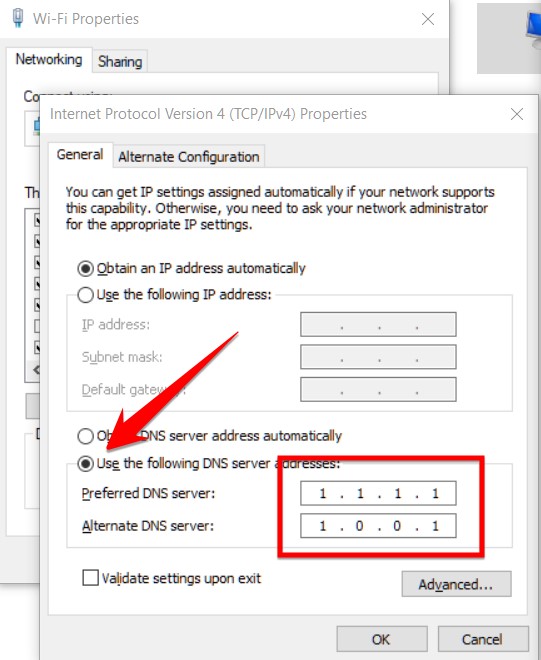
In the tab General, You can edit the image below
Check check box Use the following DNS server address:
- Preferred DNS server: 1.1.1.1
- Alternate DNS server: 1.0.0.1
For IPv6 only, you use this address:
- 2606:4700:4700::1111
- 2606:4700:4700::1001
Then click OK to finish.
How to adjust DNS with CMD for all Windows
With the way to adjust DNS with CMD, you can apply it to any Windows from Windows 7 to Windows 10.
Step 1: You need to open CMD with Administrator rights.
Step 2: Type the command below to display the names of all network cards available on the computer
wmic nic get NetConnectionID
Step 3: Enter the command below to start setting up the network card, press Enter
netsh
Step 4: Type the following command to set up the primary DNS IP address and press Enter :
interface ip set dns name="ADAPTER-NAME" source="static" address="X.X.X.X"
In this command, remember to change ADAPTER-NAME with the name of the network card you queried in Step 2 And change XXXX with the DNS server address you want to use.
Eg: I want to change the network card named WIFI with DNS is 1.1.1.1 of then I would use the following command:
interface ip set dns name="Wi-Fi" source="static" address="1.1.1.1"
Step 5: Type the following command to set up a backup DNS
interface ip add dns name="ADAPTER-NAME" addr="X.X.X.X" index=2
Eg: I want to change the network card named WIFI with DNS is 1.0.0.1 of then I would use the following command:
interface ip add dns name="Wi-Fi" addr="1.0.0.1" index=2
After completing the DNS adjustment commands, we will come out like this:
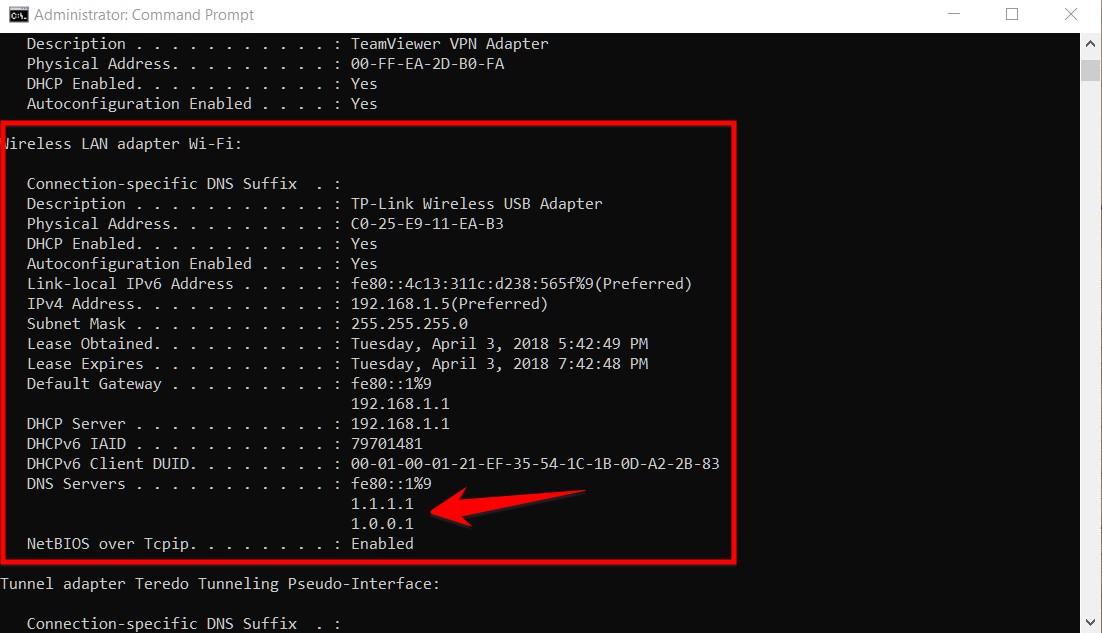
To check if the DNS change is correct, press the command exit to escape netshand type the command:
ipconfig /all
Scroll down to the adjusted network card name above, and look at the DNS section.
With the article Instructions to adjust DNS to 1.1.1.1 to speed up web surfing. AnonyViet wishes you to have more knowledge about DNS. You can change DNS on Windows in two ways: using the interface and using the command. With Cloudflare’s new free DNS service, you’ll get a significant speed boost when accessing the Internet.








![[Tạo 2D Platformer Game với Godot] Part 10: Player’s Attack [Tạo 2D Platformer Game với Godot] Part 10: Player’s Attack](https://anonyviet.com/wp-content/uploads/2021/11/13-11-2021-10-19-23.png)


