I will give this trick to those who want to protect their computers from strangers. This measure applies to computers running the Windows 10 operating system. You will be protected against people who want to discover your computer lock password.
| Join the channel Telegram belong to AnonyViet 👉 Link 👈 |
Entering the wrong password on Windows 10
By default, Windows 10 does not limit the number of times the screen unlock password is entered incorrectly. Therefore, people will be able to guess your computer password as many times as they want. If you want more security for your computer, check out the solutions in this article.
This function is actually available on Windows 10 but has not been activated. If you enable it, your computer will become much more secure. When someone intentionally discovers your computer screen unlock password, this function will put the computer into a completely locked state.
Below, I share with you 2 ways to activate this security function.
Method 1 – Securely lock your Windows 10 computer with PowerShell
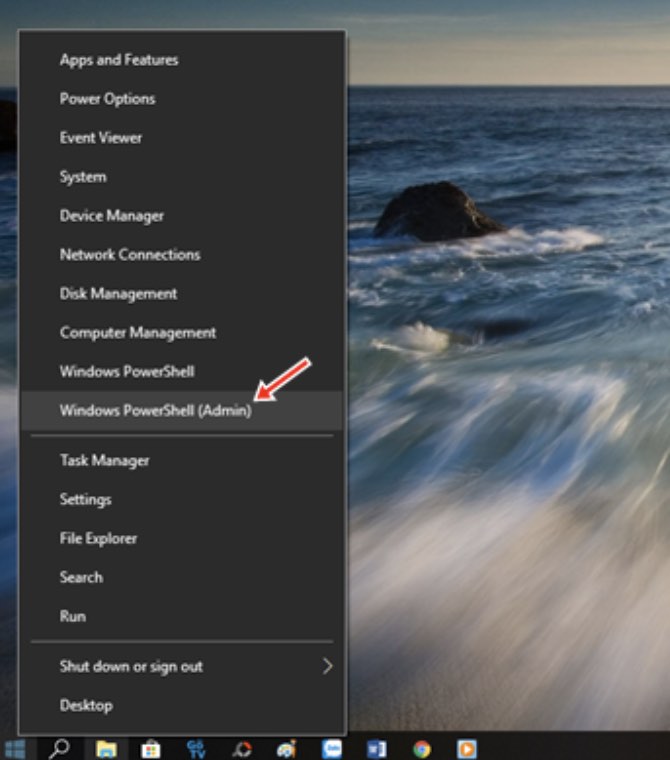
This method only applies to people using Windows 10 versions Home never mind. If you use a higher version, refer to method 2 below. Now, right click on the icon Windows and choose Windows PowerShell and run with permissions Administrator.
Type the command net accounts and press ENTER to run.
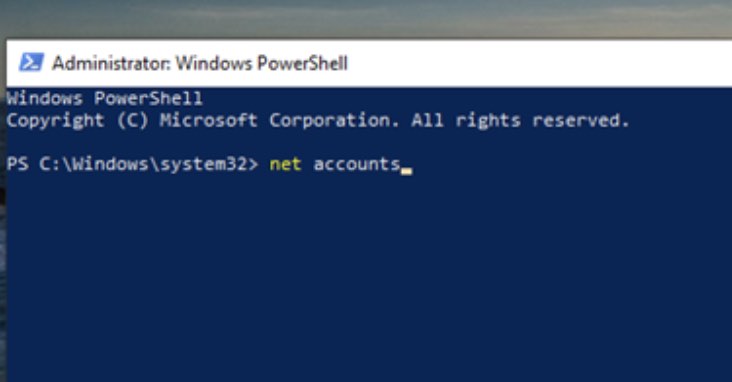
By default, Windows 10 will not limit the number of incorrect password attempts when unlocking the screen. Hence in line Lockout threshold you will see the text Never (i.e. never limited). So our job now is to set it a certain limit.
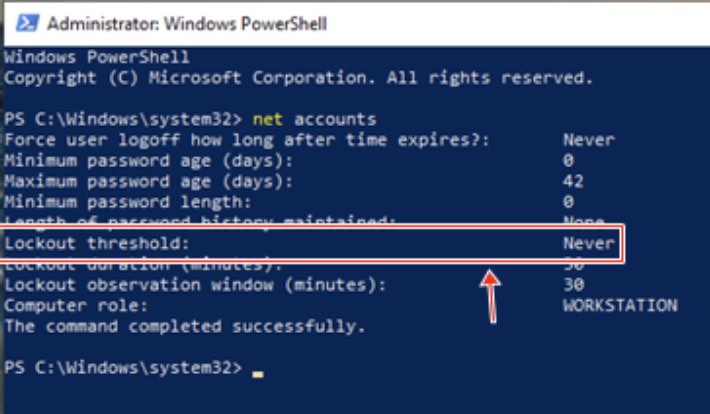
Now type the command net accounts /lockoutthreshold:number_of_incorrect_inputs. Customize the number of times you can enter the wrong password as you want. Here I will change to 5 times so I will enter as net accounts /lockoutthreshold:5
Press ENTER to run the command and the result will be as shown below!!
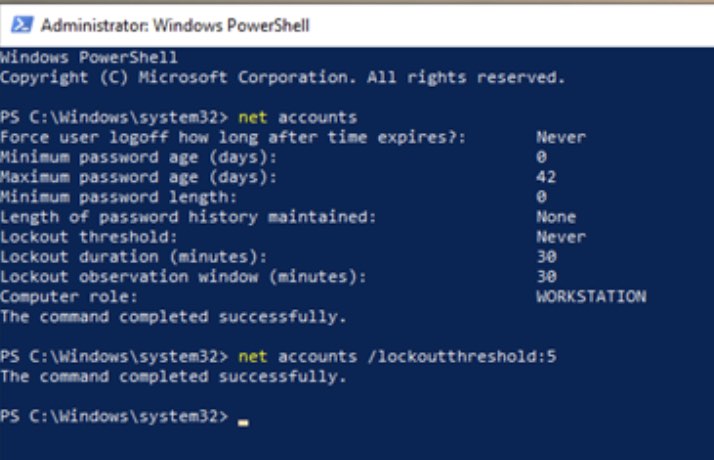
After running the command you will see the message: The command completed successfully. This means the command has been executed successfully. Continuing, we will set up the runtime to lock the machine with the following command:
net accounts /lockoutduration:số_phút
For example, here I want to automatically lock the computer after 60 minutes when entering the wrong password 5 times, then I will type and run the command: net accounts /lockoutduration:60
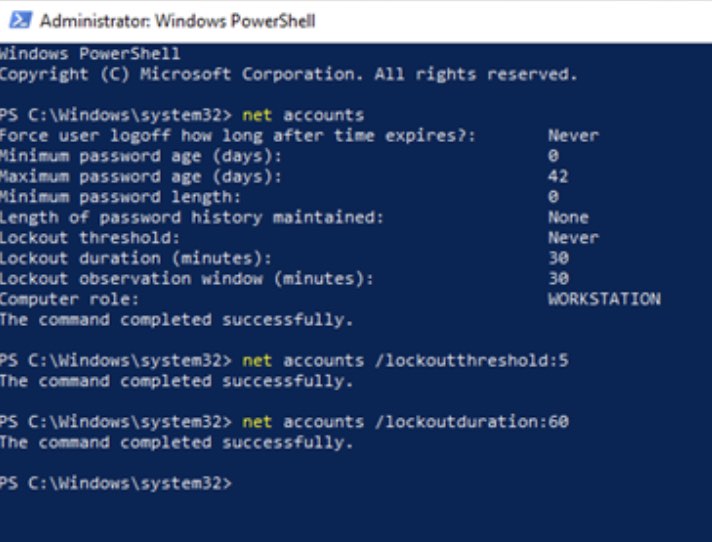
Next, you need to set the time when the lock screen appears again. This means that after automatically locking the computer, after this set time, the screen will automatically reopen. To do this, we use the following command:
net accounts /lockoutwindow:số_phút
The word position number of minutes in the command to the number of minutes you want to set (like the example above).
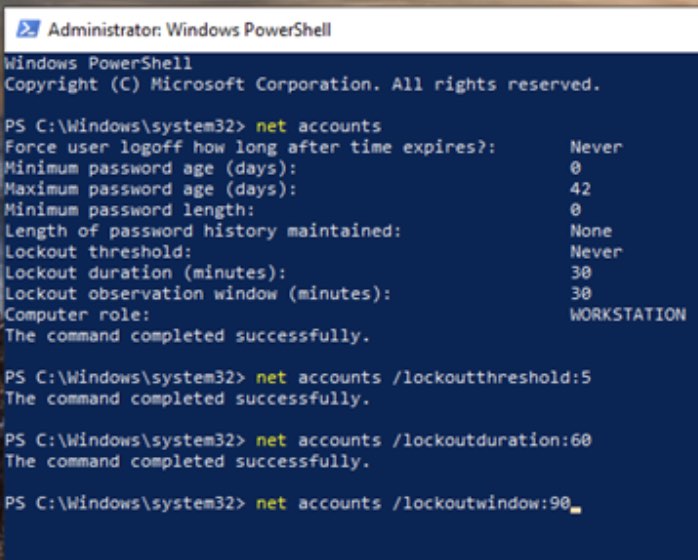
Finally type the command net accounts to double check your settings.
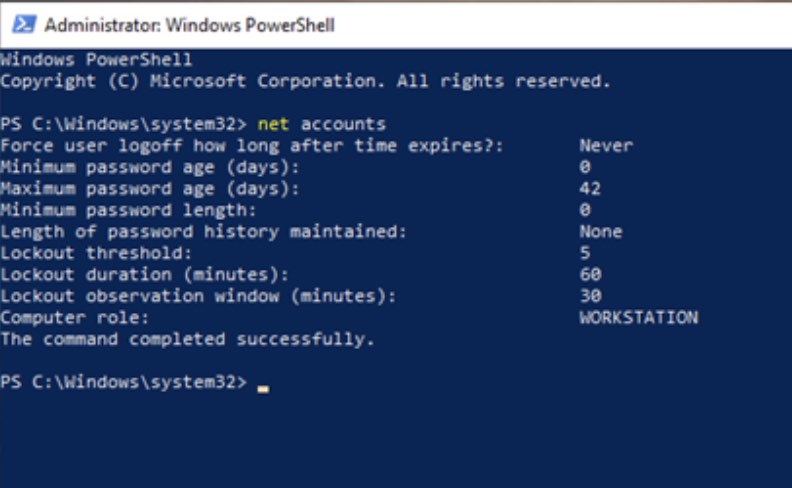
If you want disable If this feature is available by default, type the command: net accounts /lockoutthreshold:0
Method 2 – Use Windows Local Group Policy Editor
Method 01 is only applicable Windows 10 Home never mind. If you use Windows 10 Pro, Education, Enterprise… then follow this guide.
Please press the key combination Windows + S and type in keywords gpedit.msc and press ENTER.
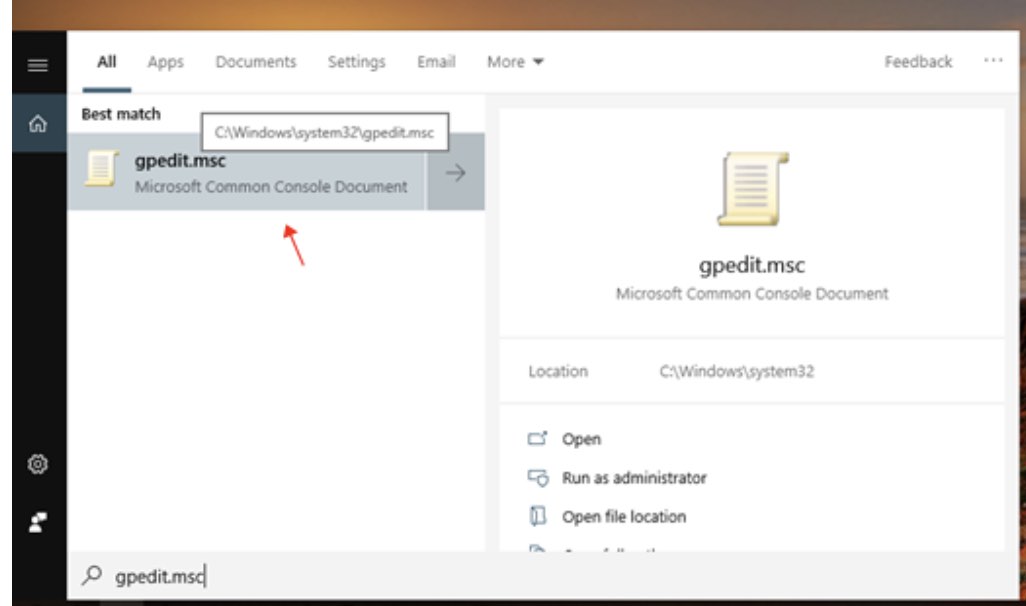
- After opening Windows Local Group Policy Editor, access it in the following order:
- Computer Configuration > Windows Settings > Security Settings > Account Policies > Account Lockout Policy.
- Then open the item Account lockout threshol.
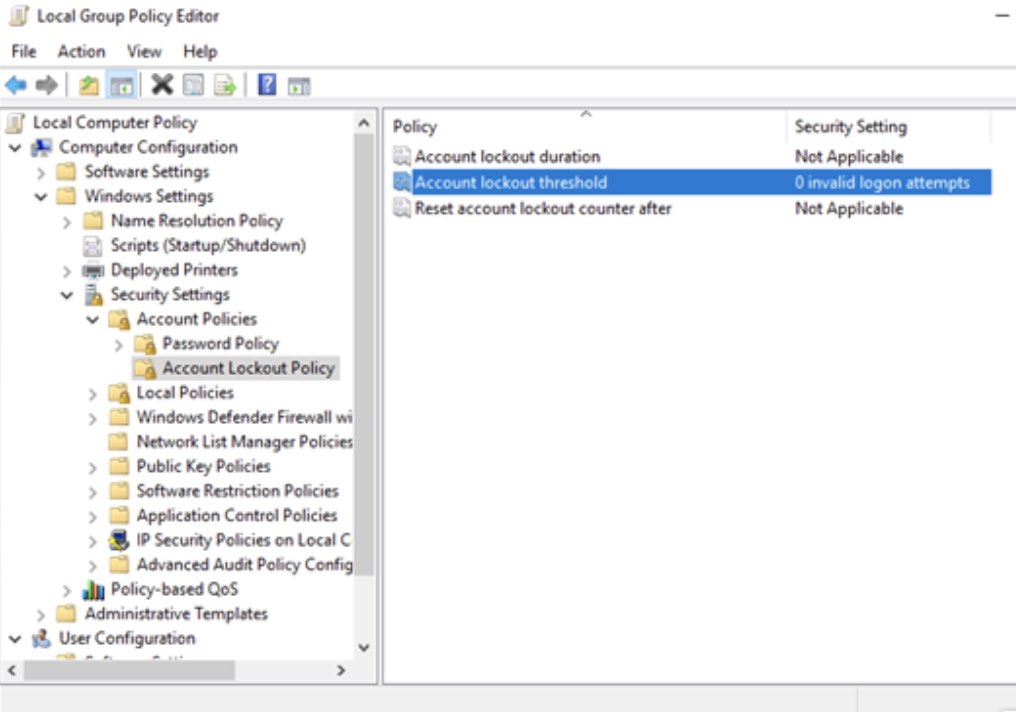
In the Account Lockout Threshold window, enter the number of times you want to allow incorrect password entries.
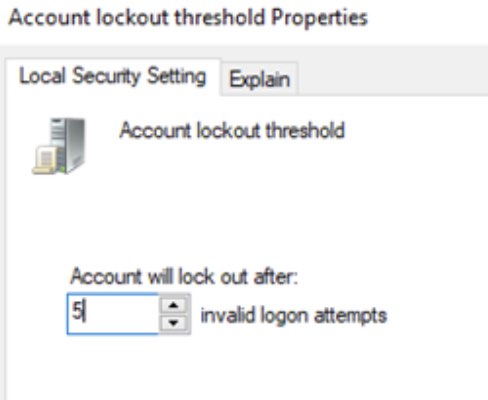
In this photo, I limited it to 5 times.
After entering, press OK to save. Now a confirmation dialog box will appear with setting the time to automatically lock the computer and automatically unlock (default is 30 minutes for both). You can customize it again if you want.
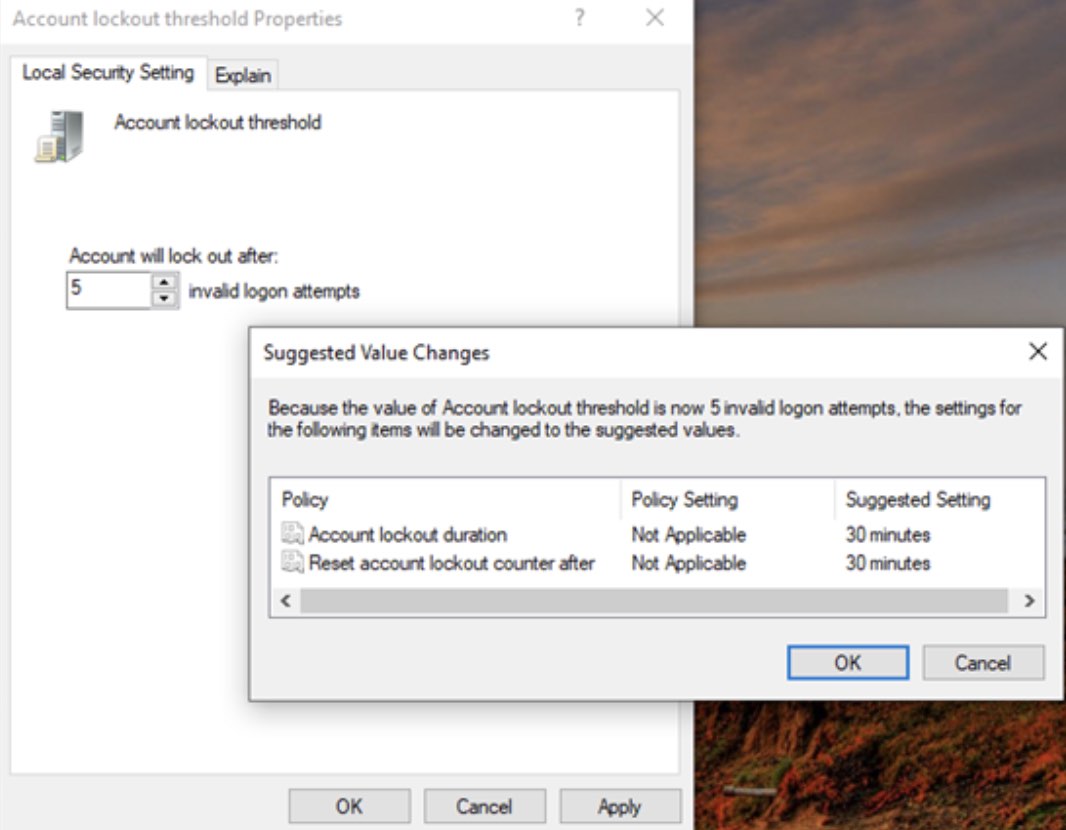
Press OK to confirm setup is complete. If you want to disable this function, just change it Account Lockout Threshold Returning to 0 is fine.


