Windows 7 will no longer be patched on January 14, 2020, this is the time for you to Update to Windwos 10. You can Update from Windows 7 to Windows 10 by downloading the ISO file and clicking setup through each interface step by step. If you don't want to see the boring scene of clicking next forever, you can use the PowerShell command to upgrade Windows 7 to Windows 10. The update process will be completely automated. You just need to copy the command and press Enter.
| Join the channel Telegram belong to AnonyViet 👉 Link 👈 |
Now is the best time to upgrade your system to Windows 10, especially if you are using Windows 7 and upgrading to Windows 10 can be free. With just a super simple PowerShell script, you can easily perform the upgrade.
Update Windows 7 to Windows 10 using PowerShell command
This script only supports Windows 7 SP1, if you have not upgraded to SP1 then download the package update of Microsoft.
Now you click on the button Starttype PowerShellright click and select Run as Administrator.
For security reasons, Windows blocks some PowerShell commands. You need to change some registry keys. In the PowerShell window, type the following command and Enter.
Set-ExecutionPolicy Unrestricted
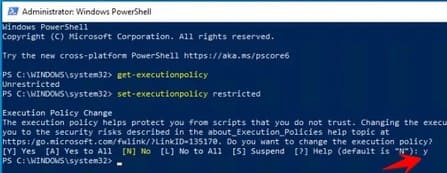
On the notification screen type: Y (note Y on flower), press Enter.
You can now close the PowerShell window.
Create a script to upgrade Windows 7 to Windows 10
Open notepad, copy the script to update Win 7 to Win 10 below, save it as a file: upgrade.ps1
Or you can Download file upgrade.ps1 about computer
$dir = "c:\temp"
mkdir $dir
$webClient = New-Object System.Net.WebClient
$url = "https://go.microsoft.com/fwlink/?LinkID=799445"
$file = "$($dir)\Win10Upgrade.exe"
$webClient.DownloadFile($url,$file)
Start-Process -FilePath $file -ArgumentList "/quietinstall /skipeula /auto upgrade /copylogs $dir" -verb runas
Start upgrading
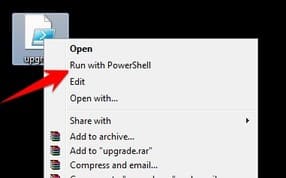
Right click on the upgrade.ps1 file and select run as PowerShell.
You will see a PowerShell window asking you to allow Microsoft Windows to make changes to your system. Don't worry about it. Everything on the screen will be as if nothing happened.
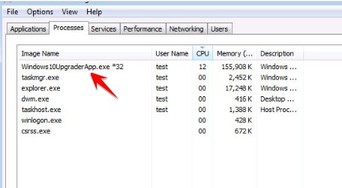
To know exactly how the Windows 10 upgrade process is going, you can open Task Manager, through the Tab. Processes will see the process named Windows10UpgraderApp.exe is running. Your system will automatically restart when needed and the Windows 10 installation process will take care of itself, without you having to do anything else.
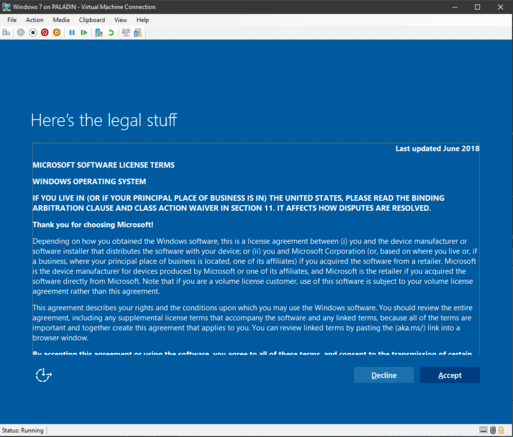
After the Windows 10 installation process is complete, you will see a message similar to the one below:
You need to click 1 or 2 more actions to access the Windows 10 Desktop. When accessing Windows 10, 1 of the following will happen:
One is: All your data and applications will be in their original location. Since this is an upgrade from Windows 7, rather than a reinstall from scratch).
Or: Some programs may not work, because they are compatible with Windows 10. You can find and install other versions of this software. But most of the software that works on Win 7 will run on Win 10.
Reset PowerShell Execution policy
Remember in the first step, we allowed file execution from PowerShell? Now, let's turn this feature off for security. Open PowerShell with Administrator rights and enter the command:
Set-ExecutionPolicy Restricted
Windows 10 installed will be the latest version released by Microsoft, you do not need to update further. If you want to install additional necessary software, you should Use chocolatey to install multiple software at once for fast
According to: lifehacker.com

