Microsoft released Windows 11, where you can experience a fresh graphical interface. Although Microsoft has said that you need to update Windows 11 to get the latest features and security patches, for whatever reason you can disable Windows updates.
| Join the channel Telegram of the AnonyViet 👉 Link 👈 |
How to turn off Auto Update on Windows 11
Microsoft has made it clear that Windows 11 updates will not be forced on Windows 10 users. If you want to check for Windows 11 updates, you need to go to “Settings > Update & Security > Windows Update“.
But some users have accidentally enabled Windows’ automatic update feature, they want to block this feature to free up disk space in Windows 11. So I thought I would guide you to turn off Auto Update on Windows 11.
Note: Normally, disabling Windows 11 updates will not cause data loss. But if you lose data due to improper operation, stop using the drive immediately and use professional Windows 11 data recovery software to recover lost data.
Method 1: Turn off Windows update service in Windows 11
One of the best methods to turn off Windows updates using a computer is to turn off the Windows update services.
Step 1. Press “Window + R” to open the Run window.
Step 2. Open “Services Window” by typing services.msc and press the “Enter” key.
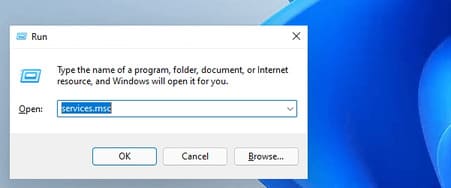
Step 3. Select “Windows Update” from the “Services” list, then click the “Stop” button.
Step 4. Change “Startup Type” to “Disabled” by clicking on the “General” tab.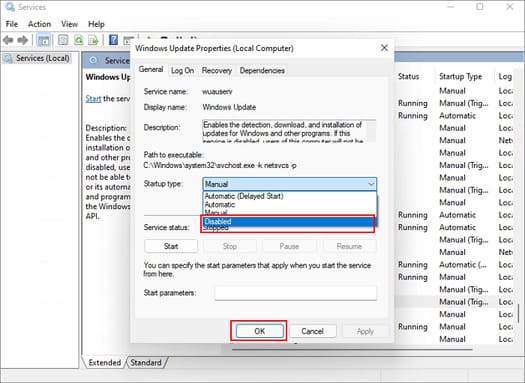
Method 2: Block Windows 11 updates with Group Policy Editor
If you don’t mind delaying the installation of Windows 11, you can disable Windows 11 updates using the Group Policy Editor.
Step 1: Press Win + R. Type gpedit.msc to enable Group Policy Editor.
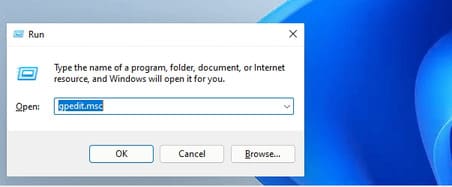
Step 2. Go to “Local Computer Policy > Computer Configuration > Administrative Templates > Windows Components > Windows Update > Windows Update for Business”.
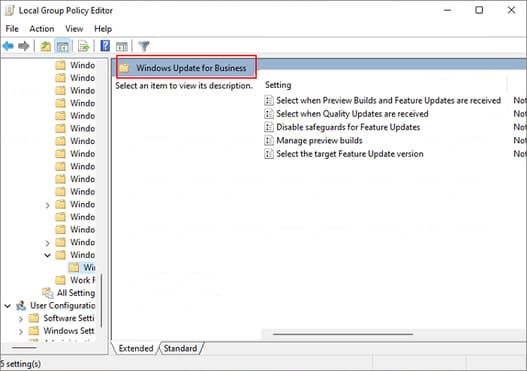
Step 3. Double click on “Select the target feature update version”.
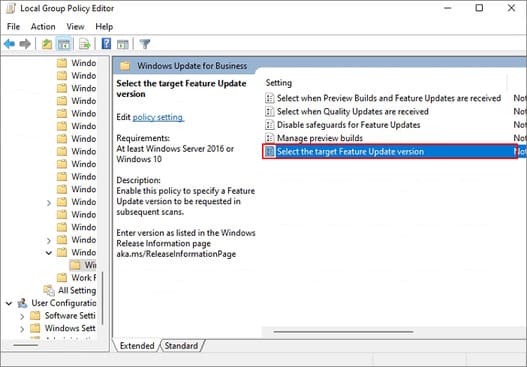
Step 4. Set the policy to “Enabled”, enter 21H1 and close the Group Policy Editor.
Method 3: Pause weekly Windows 11 updates
Another way to turn off Windows 11 updates is to pause weekly updates. To pause Windows 11 computer updates, follow the steps below.
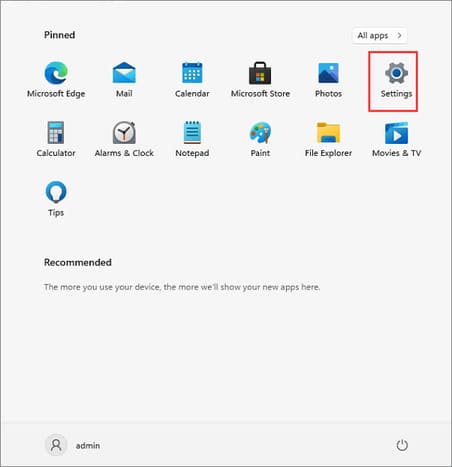
Step 1. Click on the Start icon and select “Settings”.
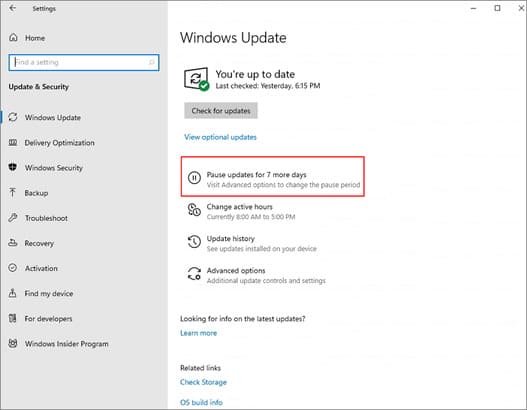
Step 2. Select “Update & Security” and click “Pause updates for 7 days”.
Method 4. Stop updating Windows 11 with Registry Editor
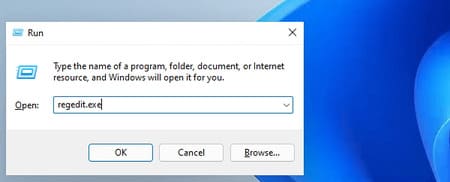
Step 1. Press Win + R and type regedit.exe to open the Registry Editor.
Step 2. Into the “HKEY_LOCAL_MACHINE\SOFTWARE\Policies\Microsoft\Windows\WindowsUpdate“.
Step 3. Set the “DWORD (32-bit)” value to 1.
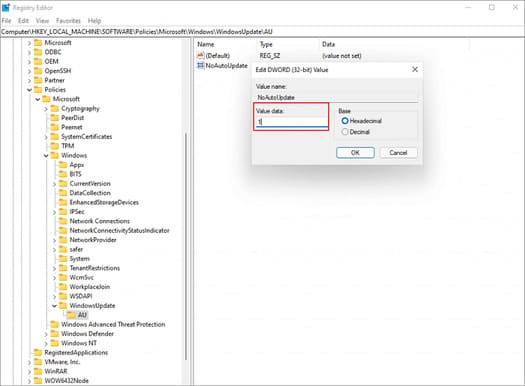
If the value does not exist, right-click Windows Update and select New > Dword (32-bit) Value. Then set the value of TargetReleaseVersionInfo to 21H1.
Method 5. Turn off Windows 11 Updates Using Third Party Tools
If you are looking for an easy way to stop Windows 11 updates, you can run a third-party software – EaseUS Clean Genius. With this tool, you can turn off windows 11 automatic update permanently without taking much of your time.
Step 1. Load EaseUS CleanGenius and install it on your computer.
Step 2. Launch EaseUS CleanGenius and go to “Optimization”.
Step 3. The tool will automatically detect the status of the Windows Update service. If Windows Update is currently enabled, click the switch to stop the service.
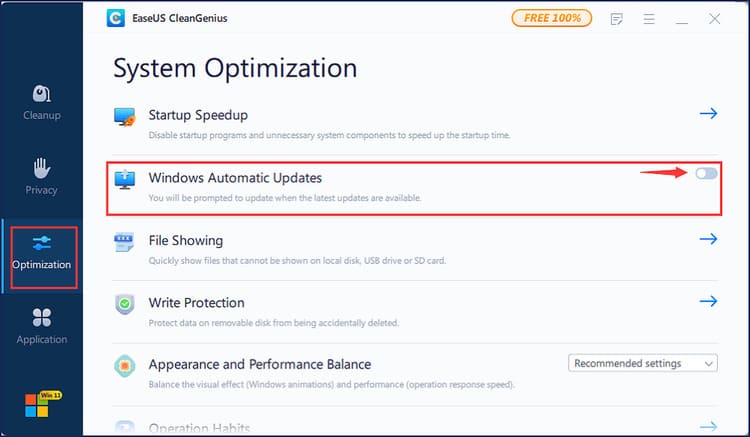
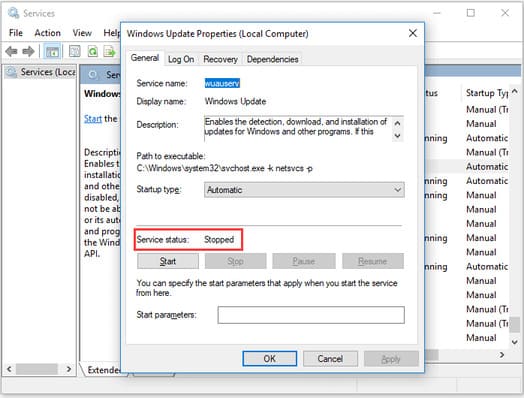
Step 4. If you want to check if you have turned off the automatic update service, go to Start > type “Services” > right click on “Services” and select “Run as administrator”.
Step 5. In the list of services, find and right-click Windows Update > Properties. In the “Service status” section, you will see the service has been stopped.
 Conclusion
Personally, I want to update all my devices and activate Windows 11 to enjoy the latest features of Windows 11. But Windows updates can sometimes cause errors. So if there is a new update, you should wait 12 weeks to see user feedback.

 Conclusion