vDDOS is an Antiddos Layer 7 solution that helps to limit the current DDoS problem. Hackers often use DDoS Tools that are publicly shared on the Internet or hire services from Stresst Test sites to immediately congest the Web server network, depleting resources, resulting in the Web unable to function properly. To avoid DDoS, there are many ways from basic to advanced, usually using Cloudflare as a proxy to cover the Web and you can increase the power of Antiddos Webserver tool with vDDoS, Proxy Protection . A product of Uncle Vo Duy is being used by a large server in the world.
As you all know, 1 month ago I opened Delightful DDoS Event to your Web site. And the Web is protected by CloudFlare and vDDoS. The resulting DDoS resistance reaches 99% of the time. And today I will share how to configure vDDoS to help you protect Layer 7 open Web Server.
Instructions for AntiDDoS Layer7 with vDDoS Proxy Protection
vDDoS is a Proxy that will stand in front of the Webserver and receive the request before reaching the main Server. vDDOS has the function of analyzing and filtering out clean requests and bad requests to make a decision whether it is for that request to continue to go to the Webserver or not. How to configure vDDos as follows:
Prepare:
- 1 VPS at least 1Gb RAM, 1 Core CPU. Can create permanent free Oracle VPS to do vDDoS for savings.
- Or you can install vDDOS or on your VPS Webserver.
- Use Centos 7 or Ubuntu operating system (recommended to use Centos 7 because there will be configuration at the advanced Kernel level)
Install vDDOS:
You can install vDDos on a separate server as a proxy or install it right on your VPS Webserver.
Centos:
yum -y install epel-release ; yum -y install wget zip unzip tar curl  && \
yum -y install nano net-tools curl wget gc gcc gcc-c++ pcre-devel zlib-devel make wget openssl-devel libxml2-devel libxslt-devel gd-devel perl-ExtUtils-Embed GeoIP-devel gperftools gperftools-devel perl-ExtUtils-Embed  && \
yum -y install screen htop iotop iptraf nano net-tools gcc automake libffi-devel zlib zlib-devel gcc gcc-c++ autoconf apr-util-devel gc gcc gcc-c++ pcre-devel zlib-devel make wget openssl openssl-devel libxml2-devel libxslt-devel gd-devel perl-ExtUtils-Embed GeoIP-devel gperftools gperftools-devel  perl-ExtUtils-Embed && \
yum -y install gnutls-utils sshpass rsync && \
yum -y install bind-utils sysstat bc tar curl wget gc gcc gcc-c++ pcre-devel zlib-devel make wget openssl-devel libxml2-devel libxslt-devel gd-devel perl-ExtUtils-Embed GeoIP-devel gperftools gperftools-devel perl-ExtUtils-Embed gcc automake autoconf apr-util-devel gc gcc gcc-c++ pcre-devel zlib-devel make wget openssl openssl-devel libxml2-devel libxslt-devel gd-devel perl-ExtUtils-Embed GeoIP-devel gperftools gperftools-devel perl-ExtUtils-Embed perl perl-devel perl-ExtUtils-Embed libxslt libxslt-devel libxml2 libxml2-devel gd gd-devel GeoIP GeoIP-devel gperftools-devel wget yum-utils make gcc openssl-devel bzip2-devel libffi-devel zlib-devel screen htop iotop iptraf nano net-tools gcc automake libffi-devel zlib zlib-devel gcc gcc-c++ autoconf apr-util-devel gc
wget https://files.voduy.com/vDDoS-Proxy-Protection/latest.sh ; chmod 700 latest.sh ; bash latest.sh
Ubuntu:
apt update; apt -y install wget zip unzip tar curl ca-certificates && \
apt install -y perl libperl-dev libgd3 libgd-dev libgeoip1 libgeoip-dev geoip-bin libxml2 libxml2-dev libxslt1.1 libxslt1-dev  && \
apt-get -y install build-essential libpcre3 libpcre3-dev zlib1g zlib1g-dev libssl-dev libgd-dev libxml2 libxml2-dev uuid-dev  && \
apt -y install curl wget build-essential checkinstall   && \
apt -y install net-tools sshpass rsync sysstat bc dnsutils  && \
apt -y install libncursesw5-dev libssl-dev libsqlite3-dev tk-dev libgdbm-dev libc6-dev libbz2-dev libffi-dev zlib1g-dev
wget https://files.voduy.com/vDDoS-Proxy-Protection/latest.sh ; chmod 700 latest.sh ; bash latest.sh
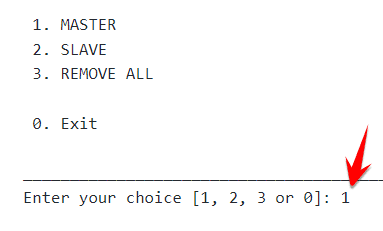
After the command finishes running, enter the number first and press Enter let vDDOS install in Master mode.
 The installation process takes about 5 – 10 minutes, will run in the background in Terminal, so if you find yourself standing still for a while, just leave it alone, don’t turn off Terminal. As shown in the picture below, the wait is a bit long.
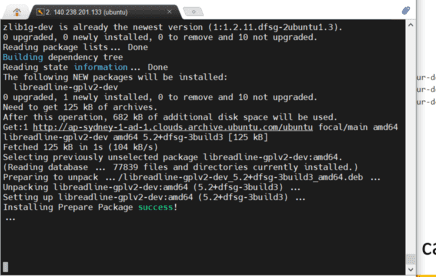
After the installation is complete, go to the vDDoS configuration section to anti DDoS Layer 7
Add Website to vDDOS to Antiddos Layer7
The vDDos folder after installation will be located at: /vddos
Website configuration is protected by vDDos: nano /vddos/conf.d/website.conf
The file structure will be:

- Website: Your Website Domain Name
- Listen: listen at Port 80 and 443 (2 lines)
- Backend: Your IP Webserver, if you install vDDOS in the same VPS with Webserver, leave 127.0.0.1 and leave 2 Port 80, 443. In case vDDOS is installed on another Server, change 127.0.0.1 to the IP of your current Webserver.
- Cache: Yes
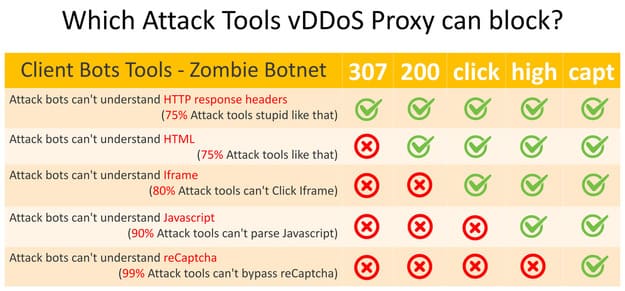
- Security: There are 4 levels: 307 , 200, click, high, capt. If the Web is not attacked, it should be 200, if it is attacked, change it to high or capt.
- SSL-Prikey: the path of the domain’s primary key SSL file
- SSL-CRTkey: CRT key SSL file path of the domain
After the setup is complete, you save again and type the command: vddos reload
So you have configured the Website with vDDoS at a basic level.
Self-Renew SSL when using vDDoS-Auto
If you already have SSL already No need to perform the steps below.
nano /vddos/auto-add/setting.conf
Replace HTTP_Backend and HTTPS_Backend about the correct Webserver IP.
Then type the command: vddos-add your-domain.org (replace your-domain.org to your Website Domain)
Check Log to see if SSL has been created: tail -f /vddos/auto-add/log.txt
In the log file with the generated SSL path, you edit the path of 2 files your-domain.org.pri and your-domain.org.crt in /vddos/conf.d/website.conf let it be right.
In case the SSL creation fails, enter the command: /usr/bin/vddos-autoadd ssl-again
Restart vDDoS: vddos restart
Enable AntiDDos mode for Website with vDDoS
If one fine day, your Website suffers from DDoS, you need to move Mod Security for vDDoS to a higher level. This is a list of 5 protection levels of vDDoS.
Method 1: Open the website.conf file and edit the column Security
nano /vddos/conf.d/website.conf
Method 2: type command: vddos-switch your-domain.com cấp-độ
Eg: vddos-switch your-domain.com high
If you want to move all domains to another level, use the command: vddos-switch allsite cấp-độ
Eg: vddos-switch allsite no
At level: no then vDDOS will work as normal Proxy, no Antiddos function only Limit Rate is active.
Turn on AntiDDos automatically when Website is hacked
vDDOS has a very nice feature that when it detects that the Website is being DDoSed, it will automatically turn on Mod Security to fight DDoS. Normally you can leave Mod nobut when there are signs of being attacked, you can let vDDOS automatically switch to Mod high and after about 1 time return to Mod no again.
That feature is called vddos-autoswitchyou do the following:
Open file setting.config in /vddos/auto-switch:
nano /vddos/auto-switch/setting.conf
You only need to care about 2 lines:
default_switch_mode_not_attack=”no” //set no when Web is working properly
default_switch_mode_under_attack=”high” // set high or capt when the Web shows signs of DDoS
Later save Go back and run Crontab for vddos-autoswitch:
echo '*/5 * * * * root /usr/bin/vddos-autoswitch checkalldomain high' >> /etc/crontab
echo '0 */3 * * * root /usr/bin/vddos-switch allsite no && /usr/bin/vddos reload' >> /etc/crontab
echo '* * * * * root /usr/bin/vddos-sensor' >> /etc/crontab
Check the Antiddos log
If your Website is being hacked or has just been hacked, you can check the Connection Log with the following command:
tail -f /var/log/vddos/tên-website.com.access.log
If you view the log as the interface on the Web, then open the file Monitor_GUI.txt in folder /vddos, accessing the path in the file you will see a very intuitive statistical interface:
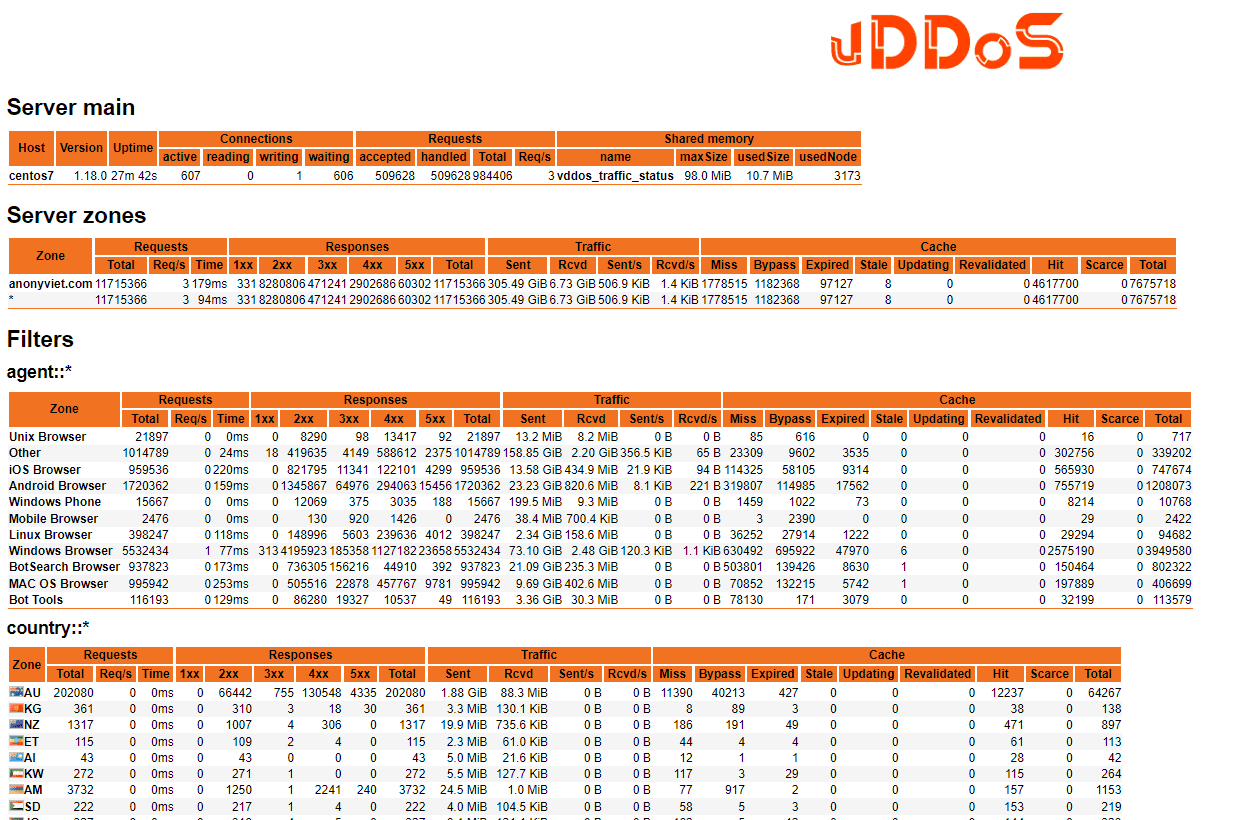
vDDOS Advanced Configuration
- Block specific country from accessing Webserver:
nano /vddos/conf.d/blacklist-countrycode.conf - Add IP whitelist to not be blocked by vDDOS:
nano /vddos/conf.d/whitelist-botsearch.conf - Configure recaptcha for Mod capt:
nano /vddos/conf.d/recaptcha.conf - vDDOS is fully compatible with Cloudflare, so it is recommended that you enable Cloudflare Proxy to hide the original IP.
To configure advanced vDDoS to Antiddos Layer7 comprehensively for Webserver such as:
- Configure random cookies
- Combined Cloudflare turns on Rule Cloudflare when there is a DDoS signal
- Incorporating CFS AntiDDoS Layer 4
- Configure Limit Rate, limit connections per IP
- Optimize SEO while AntiDDoS is on
- Configuring Load Balancing
- Configure High Availability
- ….
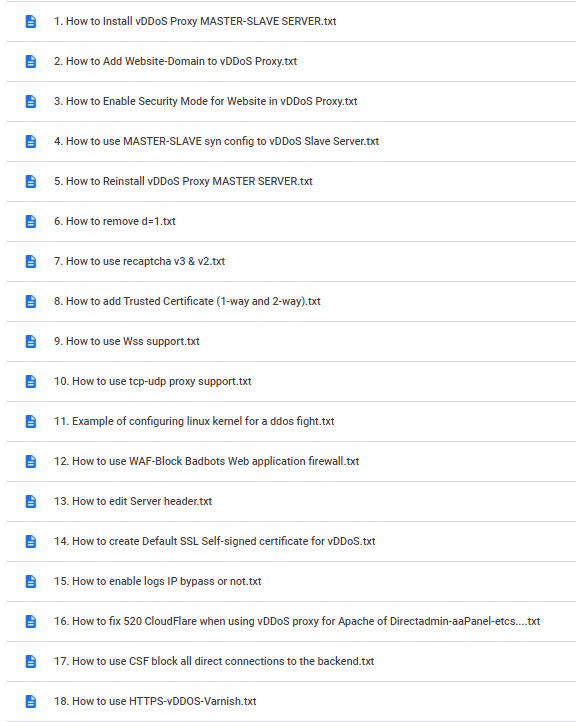
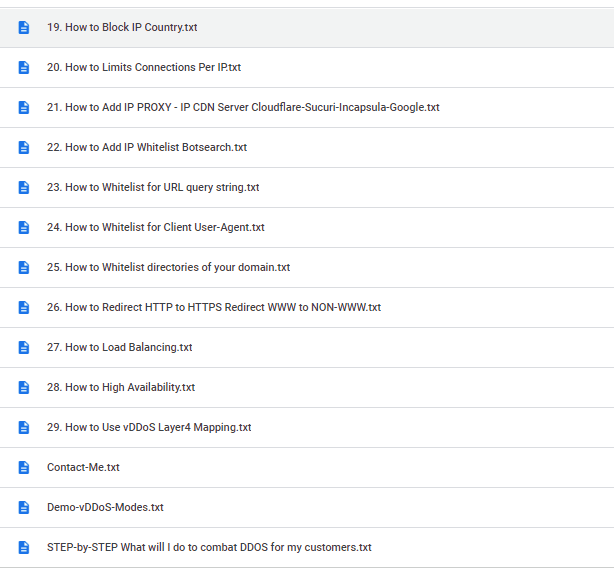
You can donate for me Vo Duy (skype/telegram: voduy13) to receive the full set of vDDoS configuration documentation. The cost of Donate is quite cheap, only equal to 1 bowl of Pho Saigon.
For units is schools, government agencies If there is a need to fight DDoS by vDDoS, we are ready Free support within the capacity.


