With writing articles to share on the Website, I often have to take a lot of screenshots. Especially the caption on each photo. After using a lot of software, TinyTake is my top choice. In addition to the screen capture feature, you can also record videos, compress photos and especially Save Online to TinyTake’s Cloud. Let’s take a look at some of the great features of TinyTake.
| Join the channel Telegram of the AnonyViet 👉 Link 👈 |
TinyTake – Screen capture software, create annotations with many features
TinyTake is software Screenshots and free video recorder built by MangoApps. With TinyTake, you can take photos and videos on your computer screen, add captions, and share them with others in minutes. This is a compact, free and feature-rich screen capture software that supports both Windows and MAC. TinyTake allows you to store 2GB online for videos and still capture the screen.
- Screen video recording (up to 120 minutes)
- Record video with webcam
- Capture an area, a window, or the entire screen
- Take a picture with a webcam
- Open, annotate and share an existing image
- Copy to clipboard or save to computer
- Store screenshots and videos in the cloud
- Share a link to screenshots and archived videos
- Zoom in, zoom out
- Specify custom keyboard shortcuts
- Support using Proxy
Set up basic features
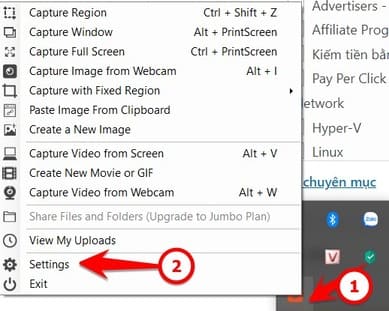
To use TinyTake You need to download the installer to your computer. You need Internet because you will have to install Online. After the installation is complete, you will see an orange icon at the bottom of the screen tray.
Friend right click Click on the icon of TinyTake to see the screen capture or screen recording features with the corresponding shortcut (HotKey). You choose to go to Settings to proceed with setting up the basic features.
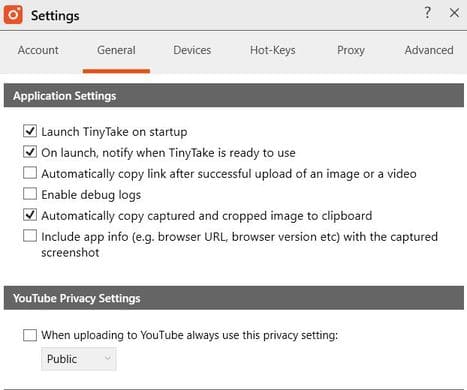
General tab: You should only check the 3 boxes below:
- ✓ Launch Tiny Take on startup
- ✓ On launch, notify when Tiny Take is ready to use
- ✓Automatically copy link after successful upload of an image or a video
When uploading to YouTube always use this privacy setting: Public This is a feature to choose privacy mode when Uploading Screen Recorded Videos to Youtube. Default will Select public mode (Public)
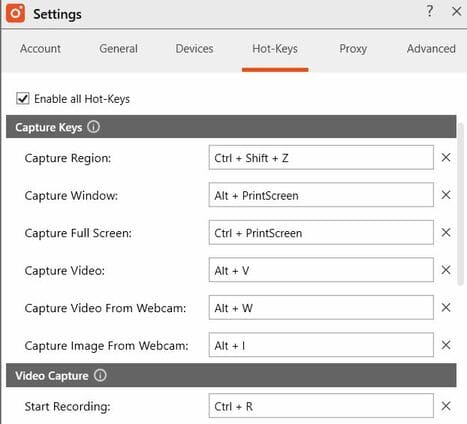
 HotKey Tab: Specifies keyboard shortcuts to initiate screen capture or video recording. You can reset HotKey according to your habits.
You click on the corresponding function box and then hold the . key Ctrl or Shift or Alt accompanied by an alphanumeric key on the keyboard. Can be combined Ctrl Shift Alt same time.
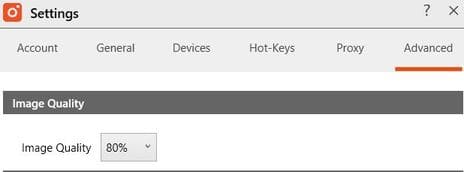
Advanced Tab:
A nice feature is that allows you to choose the image compression when taking screenshots with TinyTake. To be good for SEO, I usually try to compress images at the lowest size to speed up Web loading. So for screenshots I usually leave 80% shooting quality.
How to use TinyTake to take screenshots and record videos
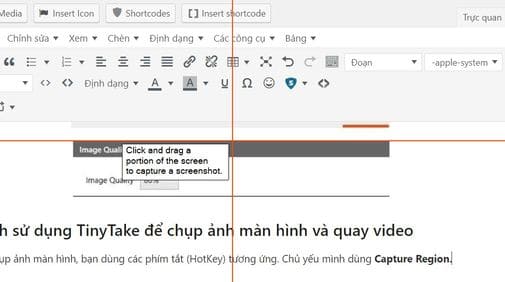
To take a screenshot, you use the corresponding shortcut (HotKey). Mostly I use Capture Region. When the shortcut is finished, you will see on the screen a picture orange + sign. Conduct click and middle mouse to select the area to capture on the screen.
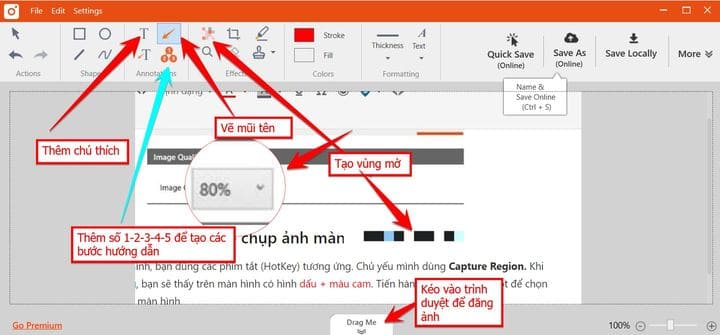
When the capture is complete, you will see the Editor window appear. Here you can add captions, draw arrows, add text, cover photos….
After editing you can click:
Ctrl + S: Save Online to Cloud by TinyTake
Ctrl + Shift + S: to Save to the computer
There is a pretty cool feature that other screen capture programs don’t have is Drag Me: When you’re done taking a photo, you can drag the photo straight into the browser to Upload the photo or send it. If you are writing an article in WordPress, you can drag it directly to the article, the image will automatically upload to Libary. This feature can drag photos into comments or chat on Facebook.
Tips to increase storage space and video recording time
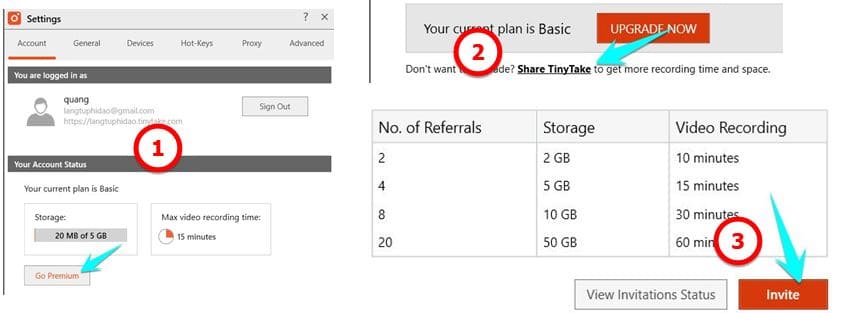
By default, TinyTake only gives you 2GB of Online storage and 5 minutes of screen recording. To increase the video recording time on TinyTake, you can invite more friends to register for TinyTake via the ref link. I use virtual mail to create my own mail clone to self-ref, so I can shoot up to 15 minutes.
Into the Settings select Go Premium -> Select Share TinyTake -> Invite
You enter 5 Clone emails or friends invite them to register and use TinyTake. When they confirm Email and successfully log in to TinyTake, you will get 1 Ref.
Download TinyTake
Tinytake supports both Windows and MACOS, you can download TinyTake at home page and install it online.
All you need to get started is Windows 7, 8, 8.1 or 10, an internet connection (broadband is best); speakers and microphone (most computers have it built in); a webcam (optional) to capture from the webcam





![[Update] How to receive Google Ai pro 1 year free with telegram [Update] How to receive Google Ai pro 1 year free with telegram](https://anonyviet.com/wp-content/uploads/2025/09/cach-nhan-google-ai-pro-1-nam-mien-phi.jpg)
