About Phoenix Os ROC
Phoenix OS is the operating system Android but installed on tablets, laptops and desktops. This is an “enhanced” version of Android with Windows features like the famous “Start Menu” and “Taskbar”. The goal is for users to feel more comfortable when switching from Windows to Android.
| Join the channel Telegram of the AnonyViet 👉 Link 👈 |
If you want to experience Android and use the power of computer hardware then Phoenix OS is for you. Today, I will guide you to install Phoenix Os android operating system in parallel with Windows, this is an operating system that I am also using for my laptop to fight android games on pc.
And I fight pubg medium setting 50-60fps. This is one thing that if playing on Windows even the lowest graphics mod can’t do it. And COD, my device 40-50fps if playing pvp still Battle Royal then 20-30 fps. When the beta version was smooth, I don’t understand why it’s so laggy when it comes to VN.
Note: Phoenix OS is an operating system, not an emulator, so many games will encounter errors when installing, so don’t wonder. And only applies to UEFI standard devices
DOWNLOAD
First of all, you need to download 3 of them:
1. Phoenix Os installation file: https://www.phoenixos.com/download_x86
You choose the version suitable for your device, 32bit use 1.6.1, 64bit use 3.6.1
Download Exe if you use windows and ISO for MAC


2: Phoenix Os ROC
And why download this? Because this is the official phoenix os mod and this mod will optimize performance and productivity when playing games.
To download, please go to this link.
This is the Phoenix os mod team, they will regularly update new mods, so please come here to install.
And here Phoenix OS ROC – Instinct IV It’s the latest version at the time of writing so I’ll choose it
As in the picture you will see there are 2 types, COD Special Edition and PUBG Special Edition and these are 2 different versions so you can play COD and PUBG to combine playing 2, wait for the next version ^^ Then next you can download whatever you want

3. Explore++
Download at: https://explorerplusplus.com/download
This is to adjust the boot, I will guide at the end of the post.
SETTING
Split Drive
First: If your computer only has 1 drive, please divide the drive, you guys Mini tools to split the hard drive
Here I separate the drive E is 19gb, you don’t need to divide by yourself, you can install it here EASY or split, but not installed in the drive containing win. And 19gb here, 16gb here is data, and the remaining 3gb is the file of Phoenix OS.
You can split the data into as many as you want, as long as you don’t > 4gb it’s ok.
Set Installer
Next open the Phoenix Os Installer.

Press install
Here, you choose the drive, I choose E Is that the drive I created for Phoenix OS

Then press next it will install for you
After installing, it asks you to restart your computer, then press are not Please.
Decompress Phoenix Os ROC
Next, extract the Phoenix Os ROC and Mount it to disk or extract it. You can use UltraISO or Win7/10 both have built-in ISO Mount feature.

Delete Files In Phoenix Os . Drive
Then you go to the settings phoenix os offcical
Delete yourself 5 files as shown below:

Copy File Again
Then go back to the phoenix os that we mounted & unzipped
Then copy the deleted ones and paste them into the phoenix os official folder

Note: If your drive is NTFS, use data.img, EXT4 then delete data to create a new folder data
Change Boot
Then next we have to change the boot so that it receives the ROC
You guys come in mini tools or similar partition management software.
Can you find something without a name for me or *: then right click > Hide Partition

Right click once again select Unhide

Then put letter for it (This is set the drive letter)

Then click Ok, Then Apply again

Then go in Explorer++ and remember Run As Admin Please
And you will see the Local Disk WOOD (G is my letter that I set above) and go there
Then you guys Don’t Follow EFI > Phoenix os
You will see 2 files initrd.img and kernel

Next, you delete those 2 and copy them from the phoenix os roc

Running Phoenix Os
Then Reset the device and go to phoenix os and set up as follows
When you open it for the first time, it will setup boot then it will automatically reset the device and then you go back in then wait for it to load like the picture below 10-30p if more than 30 minutes but not, then reset the device

Then come to this step and you are successful :”)
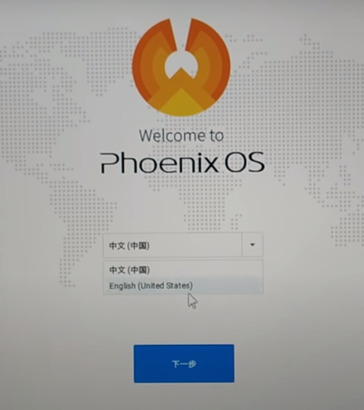
You choose English language
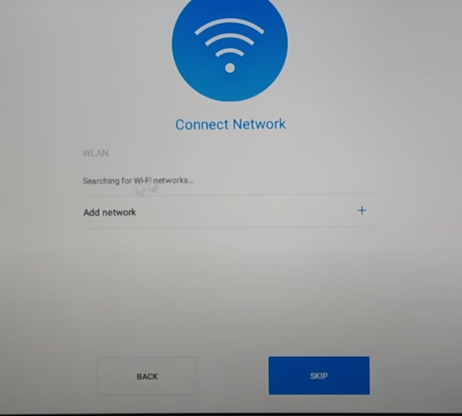
Next, choose wifi
Then enter your name.
Note to change Vietnamese language in Phoenix Os:
If you want Vietnamese like a phone, then come here settings > language & input > search Vietnamese then there will be 2 languages. English above Vietnamese below, you can hold down the mark with picture 3 / then drag it to the top.

