
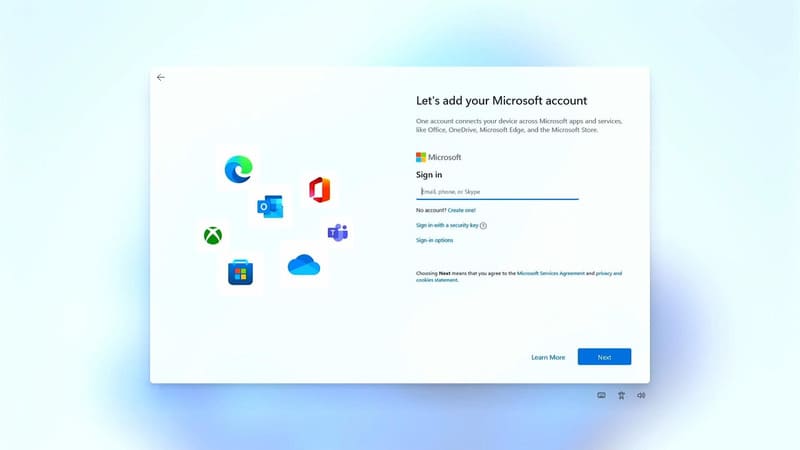
Installing Windows 11 usually requires users to log in with a Microsoft account. However, not everyone wants to use a Microsoft account for personal computers. This article will show you how Skip the Microsoft sign-in step when installing Windows 11 in a detailed and easy to understand way.
| Join the channel Telegram belong to AnonyViet 👉 Link 👈 |
Necessary system requirements when installing Windows 11
Before you begin, make sure your computer meets the minimum system requirements to install Windows 11.
- Processor: 1 GHz or higher with 2 or more cores on a compatible 64-bit processor or System on Chip (SoC).
- Memory (RAM): 4 GB.
- Storage capacity: Hard drive 64GB or more.
- System Firmware: Must use UEFI Firmware and be able to enable Secure Boot.
- TPM: Trusted Platform Module (TPM) version 2.0.
- Graphics card: DirectX 12 compatible or higher with WDDM 2.0 driver.
- Screen: High resolution (720p), size larger than 9 inches (diagonal), 8 bits/color channel.
- Internet connection: Required for Windows 11 download and update.
Note: Microsoft may change system requirements from time to time. Please check the latest information on Microsoft's official website.
See more: Instructions for turning on Spatial Sound on Windows 11 to enjoy vivid sound
How to skip the Microsoft login step when installing Windows 11
Here are detailed step-by-step instructions to skip the Microsoft sign-in step during Windows 11 installation:
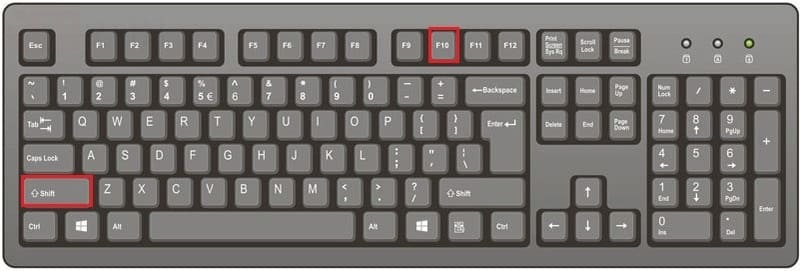
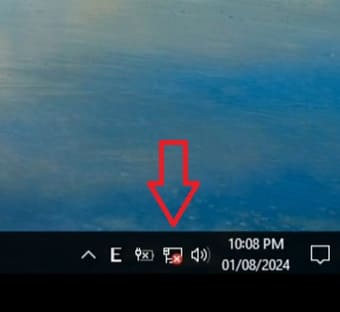
Step 1: As soon as you see the screen asking to sign in with a Microsoft account, press the key combination Shift + F10. This will display the Command Prompt interface.
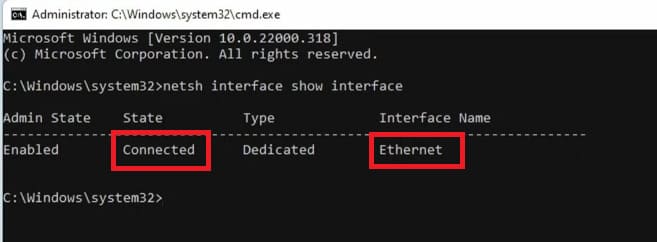
Step 2: Type the following command to list the network cards on the computer
netsh interface show interface

When your computer is connected to the network, you will see the word 'Connected', and in the Interface Name section is the name of the network card on the computer. For example, in the picture, my network card is called Ethernet.
Step 3: Next, type the following command:
netsh interface set interface “Tên card” admin=disable
Replace “Card name” with the network card name you just found in step 2. Remember to type correctly, including both upper and lower case letters.
For example: netsh interface set interface “Ethernet” admin=disable
This command will temporarily disable your network connection.
Step 4: Click the back arrow button on the Windows 11 installation screen. Now, because there is no internet connection, Windows will not be able to ask you to sign in with a Microsoft account. Instead, you will see the option to create a local account (offline account).
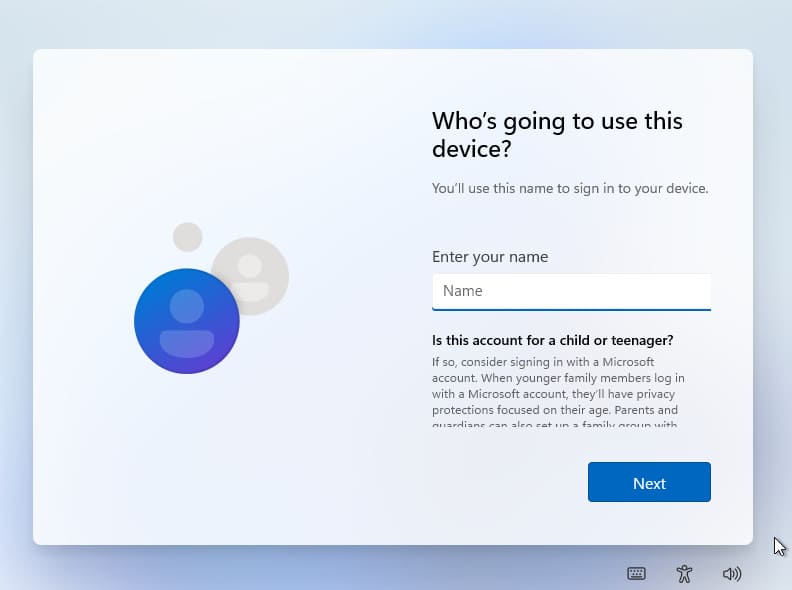
Step 5: Fill in the information needed to create a local account, including username and password (if desired).
Step 6: After this step, there will be some additional security questions and privacy-related settings such as location sharing, data sharing, advertising ID, etc. After completing the steps, the installation process will take place.

Once everything is done, you will reach the Windows 11 home screen.
Step 7: To turn the network card back on, press the up arrow key to avoid wasting time retyping the code > Change disable wall enable > Enter and you're done.
Benefits of using local accounts
- Local accounts help limit remote access to personal data by Microsoft.
- You're in complete control of your data and don't have to share it with Microsoft.
- Easy to manage and use, no internet connection required to log in.
Note: Using a local account may limit some Windows 11 features and services that require a Microsoft account. You should consider carefully before making a choice.
See more: Super Drag Drop – Drag and drop to open links and images in new tabs
Conclusion
By following the simple steps above, you can Skip the Microsoft sign-in step and use a local account when installing Windows 11. This helps you protect your privacy and have more control over your personal computer. Wish you success!


