Hyper-V is a virtualization feature integrated by Microsoft in Windows. It is possible that Hyper-V was born to compete with other virtualization platforms like VMWare or VirtualBox, but sadly it is not available on the Home edition of Windows 11. You can use the tools of third party, but Hyper-V works much better and is easier to use. I found the neatest solution to enable Hyper-V in Windows 11 Home, similar to how we enable Hyper-V in Windows 10 Home.
| Join the channel Telegram of the AnonyViet 👉 Link 👈 |
 Enable Hyper-V in Windows 11 Home
In this article, I will show you how to install Hyper-V in Windows 11 Home, along with the steps to create virtual machines in Hyper-V.
What is Hyper-V?
Hyper-V is a hardware-based hypervisor developed by Microsoft. It allows users to run multiple versions of different operating systems on the Windows operating system. Currently, Hyper-V also supports Windows, Ubuntu, and other Linux distributions. Since this tool was developed by Microsoft itself, the performance when running Windows VM through Hyper-V is very impressive compared to other third-party tools.
In terms of customization, Hyper-V doesn’t have as many features as other hypervisors, but importantly, it’s very fast. The reason is that most drivers run independently of the hardware layer, resulting in fewer virtual machine maintenance resources. In addition, you can also assign memory, cores and provide internet access via default options. In case you want to quickly create a virtual machine, you have that option too.
How to install Hyper-V in Windows 11 Home
1. First, open a new Notepad file on your PC. You can do that by searching for Notepad after pressing the Windows key, or using the Win + R Windows 11 keyboard shortcut to open Run. You need to type notepad and press Enter to open it. Now copy the below script and paste it in the Notepad file.
pushd "%~dp0"
dir /b %SystemRoot%\servicing\Packages\*Hyper-V*.mum >hyper-v.txt
for /f %%i in ('findstr /i . hyper-v.txt 2^>nul') do dism /online /norestart /add-package:"%SystemRoot%\servicing\Packages\%%i"
del hyper-v.txt
Dism /online /enable-feature /featurename:Microsoft-Hyper-V -All /LimitAccess /ALL
pause

2. Next, click “File” on the menu bar and select “Save as”.

3. On the next prompt, select “All files(*.*)” in the “Save as type” drop-down menu. Then name the file. For example, I renamed the file to “HyperV”. Then add the .bat extension at the end to save it as batch. Make sure no .txt or other file extension is added at the end. Finally, click “Save”.

2. Now, to enable Hyper-V in Windows 11 Home, right click on the batch file you just saved and select “Run as administrator“.

3. After you do that, the file will open a Command Prompt/PowerShell window and start installing Hyper-V on Windows 11 Home. Remember that you need to be connected to the Internet to enable this feature. Furthermore, if the CMD window is frozen, press the “Enter” key.

4. Once the Hyper-V installation is complete, restart your Windows 11 computer. Now, press Windows key and R at the same time to open Run. Here, type optionfeatures.exe and press Enter.

5. A Windows Windows Features window will open. Scroll down and enable Hyper-V, Virtual Machine Platform, and Windows Hypervisor Platform. Finally, press the OK button. It will start installing the necessary packages and ask you to restart your computer once the installation is complete.

6. Finally, Hyper-V will be enabled on the computer running Windows 11 Home. Press the Windows key once and search for “Hyper-V”. It will show up in the search results and you can open it.
 7. If Hyper-V does not show up in the search results, open the Run window with the keyboard shortcut Windows + R. Then type Virtmgmt.msc and press Enter.

8. It will directly open Hyper-V Manager on a Windows 11 Home PC.

Create virtual machines with Hyper-V in Windows 11 Home
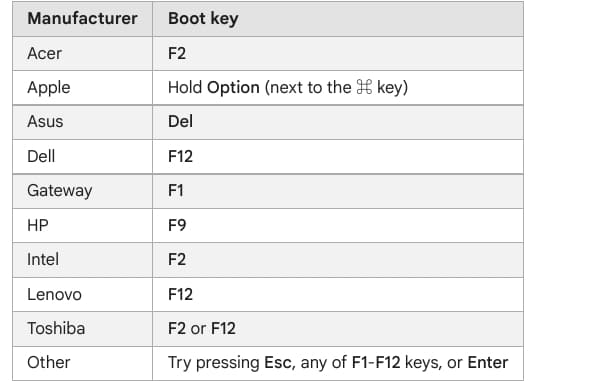
1. After you have installed Hyper-V in Windows 11 Home, restart your computer and access the BIOS or UEFI. Usually, it’s the F10 or F9 key, but it can vary depending on your PC manufacturer. So if you’re not sure, try to get into the BIOS online or see the list below.
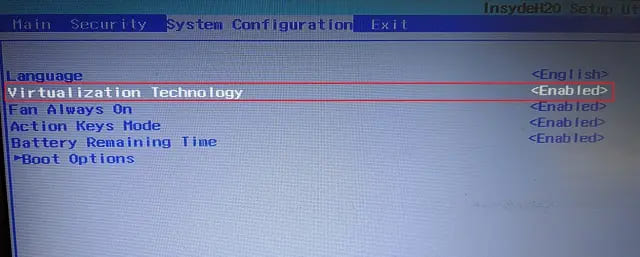
2. Generally, you will find the option “Virtualization” in the System Configuration or Advanced tab. All you have to do now is enable it and save the changes by pressing the F10 key. After that, restart your computer and virtualization will be enabled.
3. Now, launch Hyper-V by pressing the Windows key and search for it using Windows Search.

4. Click the “option”Quick Create” on the menu on the right. It allows you to set things up pretty quickly.

5. Now select the operating system that you want to create on Windows 11. The great thing here is that Hyper-V also supports Linux (Ubuntu). Alternatively, you can also select the ISO file if you have already downloaded it.

6. Now press the button “Create Virtual Machine” and wait for the process to complete.

7. Next, click the button “Connect” and it will launch the virtual machine you just created.
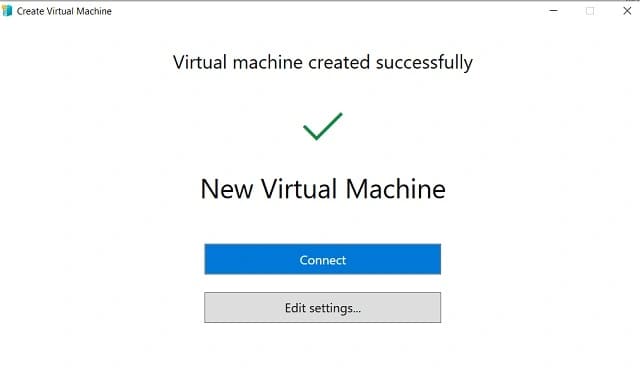
8. Finally, the virtual machine is ready in Hyper-V and you can go through the installation process as usual.
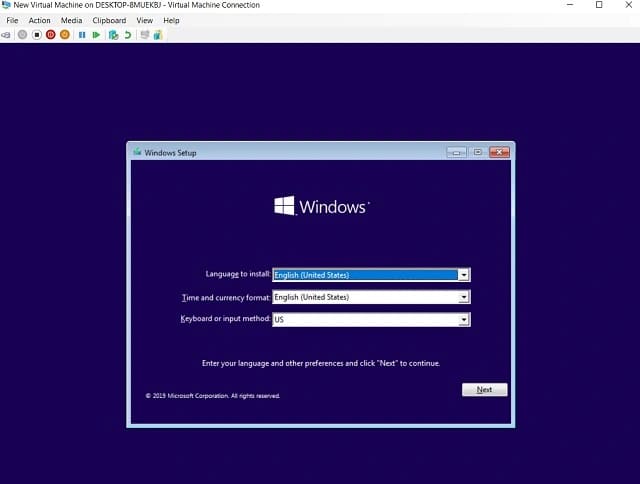
That’s how you can enable and run Hyper-V in Windows 11. Or you can also use some third-party virtualization programs like VirtualBox and VMware on Windows 11 Home.

 Enable Hyper-V in Windows 11 Home
