How to install Ubuntu on Windows 11 Actually easier than you think. Many people used to think that they had to use a virtual, lumbering machine, but it turned out not to. If you are a code, or simply a curious person who wants to “play” Linux, then the integration of Ubuntu right on Windows 11 will be an “unimaginable” experience.
| Join the channel Telegram belong to Anonyviet 👉 Link 👈 |
Conditions to be prepared before installation
Before going into the instructions, you need to ensure the computer Windows 11 My owned. There are two you have to check and activate.
1. Activate Windows Subsystem for Linux
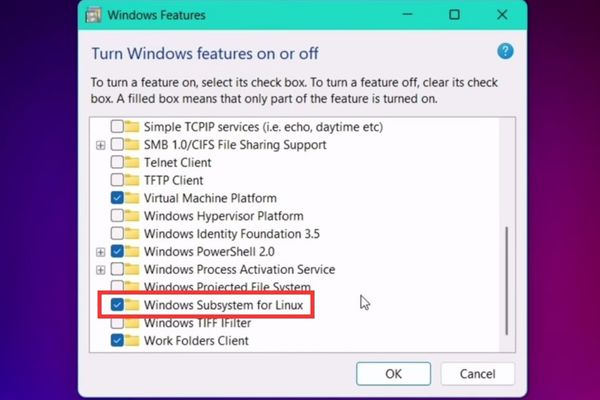
- Open Start menu, type “Turn Windows Features on or OffAnd click Enter.
- In the window appears, scroll down and find items “Windows Subsystem for Linux“. OK.
- Once completed, you must restart the computer to set the effect.
2. Turn on Virtualization
In order for the WSL to operate effectively, the Virtualization of the CPU should be turned on:
- Right -click on the Taskbar and select Task Manager.
- Switch to tab Performance.
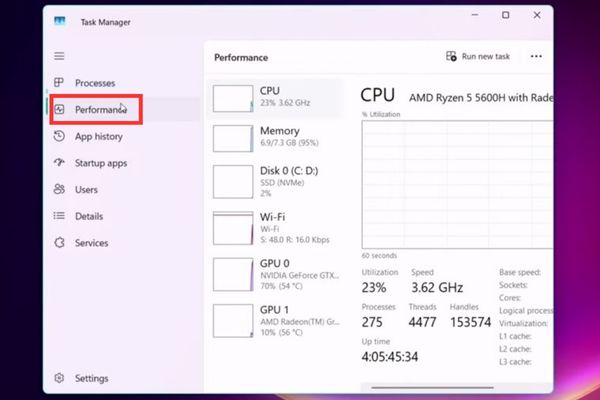
- Select the CPU item. In the lower right corner, you will see information about Virtualization. If the state is “Enabled“You are ready.
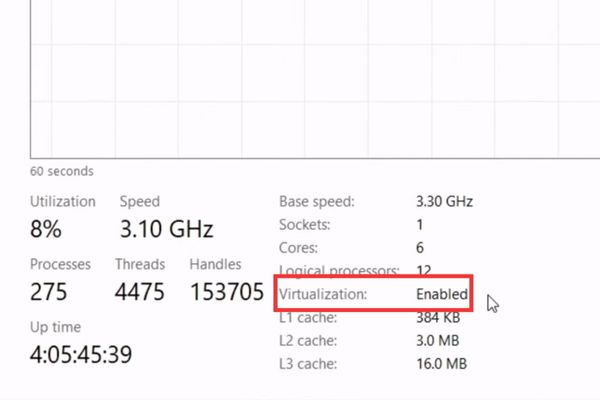
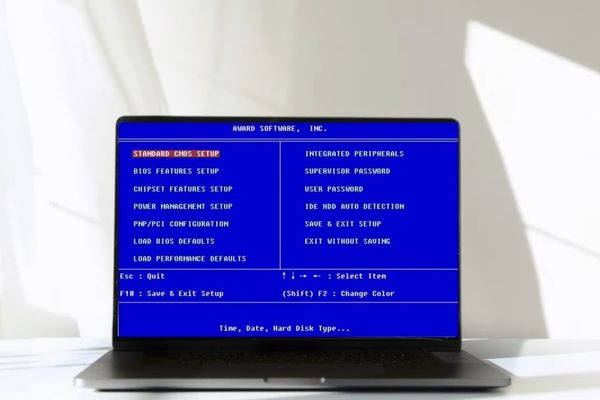
- If the state is “Disabled“, You need to restart the computer and access the BIOS/UEFI to enable this feature (usually called Intel VT-X, AMD-V, or SVM Mode).
Instructions on how to install Ubuntu on Windows 11
Once the preparation is completed, now we use the power of the command line to install Ubuntu.
- Press the key simultaneously Windows + R To display the dialog box.
- Enter “CMD“Then click Enter to open the Command Prompt window.
- Paste the following command to list the installed Linux distribution and display whether they are using WSL 1 or WSL 2: WSL -L -V
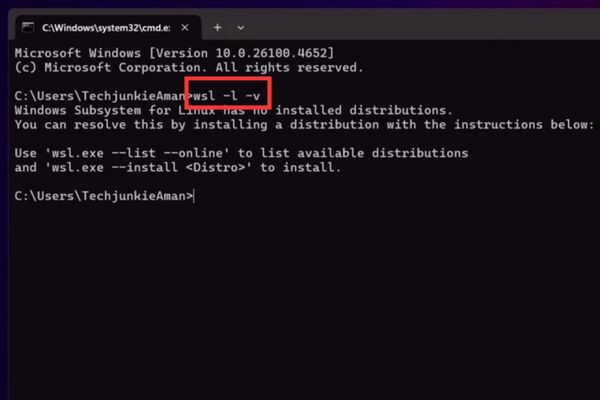
- To see the list of Linux distributions available to install, type the following command and press Enter:
WSL –List –Online
You will see a list of versions such as Ubuntu, Debian, Kali Linux, … Here, we will install Ubuntu-22.04 version.
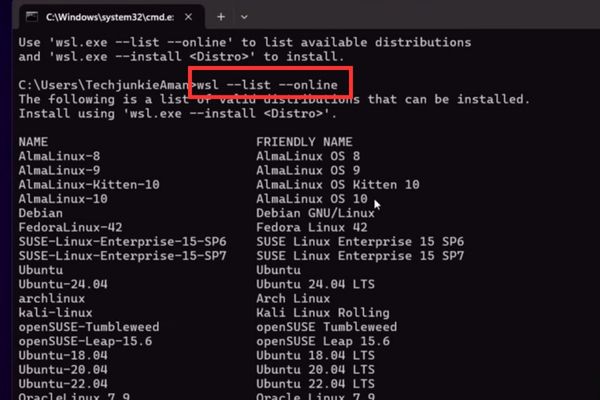
- To start installing, using the following command (replacing Ubuntu-22.04 with the version you want if necessary):
WSL –Install (Name)
For example: WSL –Install Ubuntu-22.04
The system will automatically download and install Ubuntu. This process may last for a few minutes depending on the speed of your network connection.
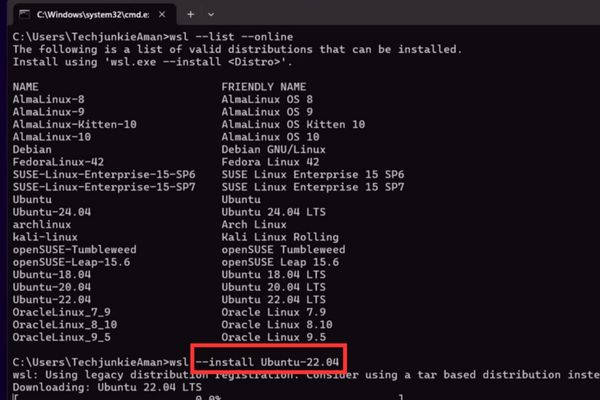
After the installation is completed, an Ubuntu’s Terminal window will automatically open and ask you to create a user account.
- Enter New Unix Username: Enter the username you want (write instant, unsigned, no space).
- New password: Enter the password for this account. Note, when you type the password there will be no character appear, this is a security feature of Linux.
- Retype new password: Enter the password again to confirm.
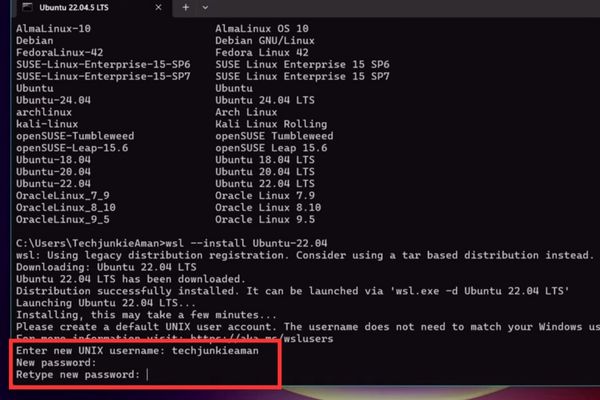
When you see the notice “Installation Successful!“, You have officially installed Ubuntu successfully!
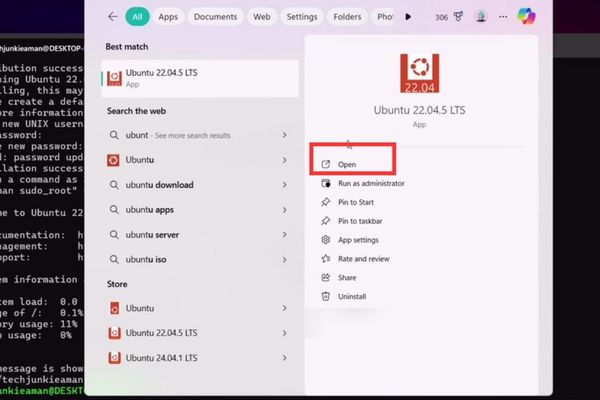
Steps to do after successful installation
To ensure the system operates stably and fully, you should take a few more updates:
In Terminal Ubuntu, type the following command to update the list of software packages:
Sudo APT Update
The system will ask you to enter the password created in the above step.
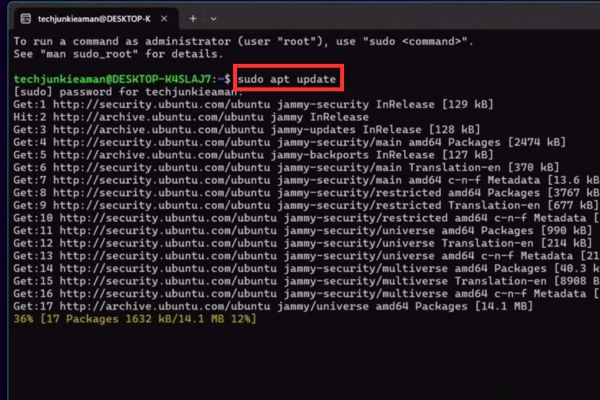
Next, type this command to upgrade all the installed packages to the latest version:
Sudo Apt Upgrade -Y
Parameter -Y Will automatically agree with all the confirmation questions, helping the process to happen faster.
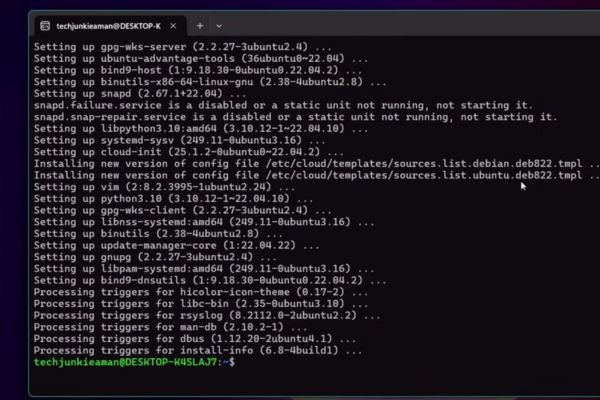
Now you can install whatever you like. For example, I often use the Gedit editor for light, installed it with the command:
Sudo Apt Install Gedit -Y
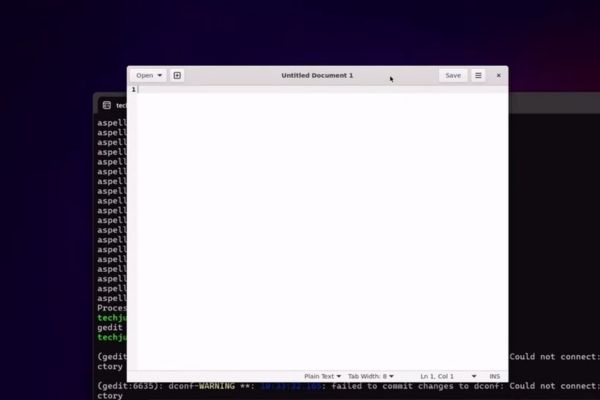
After installation, you can launch it by typing Gedit right in the Terminal, and an application window will appear.
Conclusion
There, you see How to install Ubuntu on Windows 11 Is it easy? Just a few simple steps, you have an extremely powerful “hybrid” working environment. Now you are ready to code as a god and explore the end of the Linux world. Wish you successful!


![[Update] How to receive Google Ai pro 1 year free with telegram [Update] How to receive Google Ai pro 1 year free with telegram](https://anonyviet.com/wp-content/uploads/2025/09/cach-nhan-google-ai-pro-1-nam-mien-phi.jpg)


