Windows Subsystem for Android️ allows devices Windows 11 run Android apps available in the Amazon Appstore. Now you can play games or run Android APK apps on Windows 11 easily. In this article, I will guide you to install Windows Subsystem for Android on Windows.
| Join the channel Telegram of the AnonyViet 👉 Link 👈 |

Install Windows Subsystem for Android
You can download the .msix package from Micorosft or directly from the Microsoft Store. Once you have the .msix package on your computer, and use PowerShell or Terminal to install Windows Subsystem for Android on your computer. You can use one of the ways below to install Windows Subsystem for Android.
Method 1: Use PowerShell and download it manually
In this way, I will use the .msix package saved on One Drive and Google Drive. You can then use PowerShell to install and use Windows Subsystem for Android on your PC.
Step 1: Download Windows Subsystem for Android Msixbundle
Access to Google Drive or Fshare to get the Msixbundle file for Windows Subsystem for Android. Then tap “Download”.
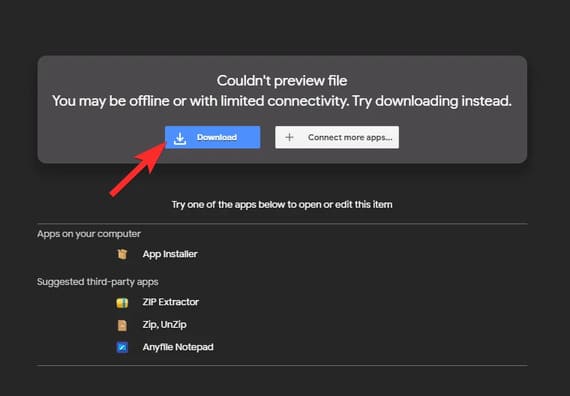
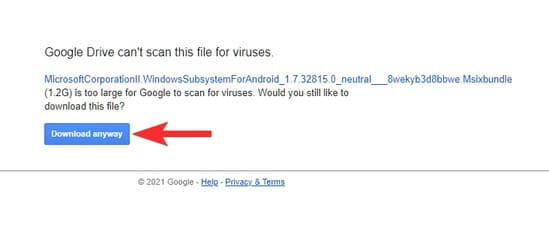
Press next “Download anyway”.
Step 2: Install Windows Subsystem for Android Msixbundle
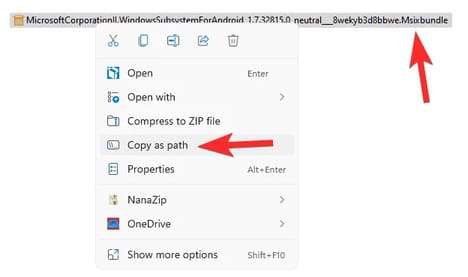
Copy the path of the Msixbundle. Open the folder where the downloaded file is saved. Right click on the file and select “Copy as path”.
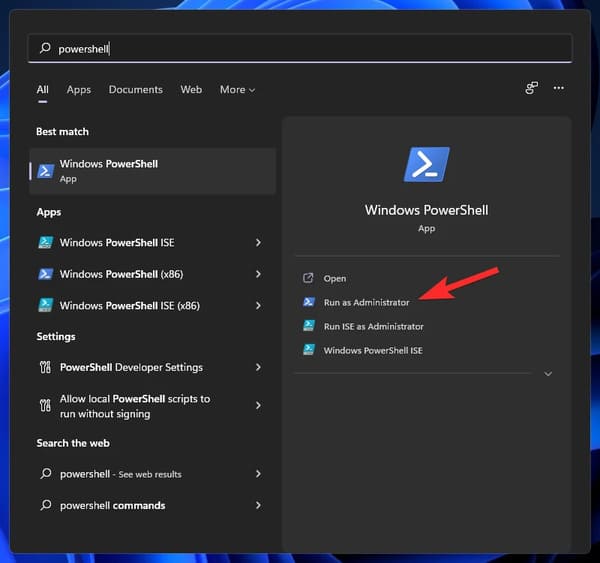
Open Powershell by pressing the Windows button and then enter Powershell and select Run as administrator.
In Powershell, enter the following command:
Add-AppxPackage -path "path-of-the-file-comes-here"
Explanation of the above command:
- You can paste the path of the copied file in place
path-of-the-file-comes-here. - Do not remove double quotes around filenames.
- If your file path is:
C:\Users\AnonyViet\Downloads\1quick\12\MicrosoftCorporationII.WindowsSubsystemForAndroid_1.7.32815.0_neutral___8wekyb3d - So our command will be:
Add-AppxPackage -path “C:\Users\AnonyViet\Downloads\1quick\12\MicrosoftCorporationII.WindowsSubsystemForAndroid_1.7.32815.0_neutral___8wekyb3d"
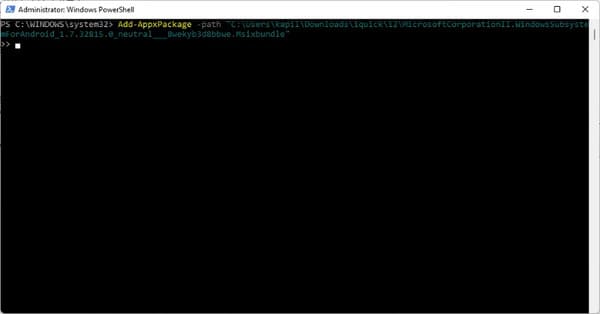
Press Enter to run the command.
You will get the message “Deployment operation progress” and when done, Windows Subsystem for Android will be installed on your PC with Windows 11 Dev channel.
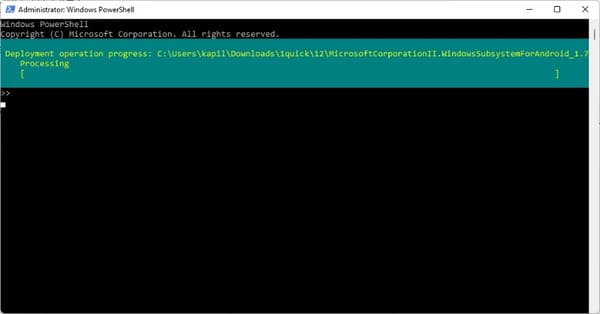
When done, type Exit and then press Enter to exit Powershell.
To open Windows Subsystem for Android and run Android applications, press the . key Windows and search for Windows Subsystem for Android.
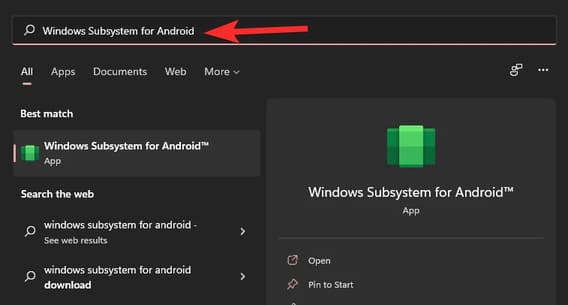
Select Windows Subsystem for Android. Or press Open.
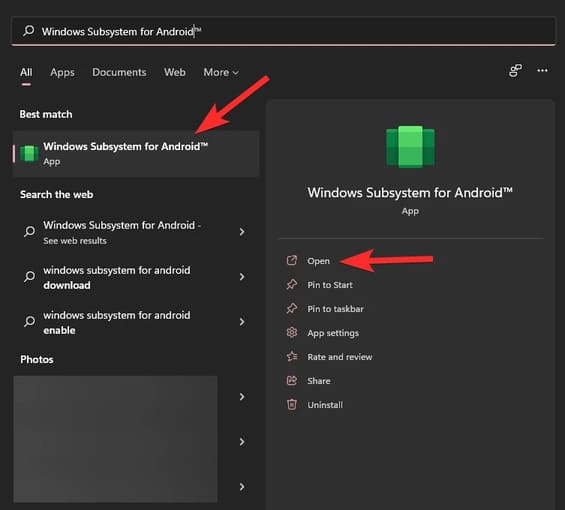
You can now run Android apps on your Windows 11 Dev channel.
Method 2: Download the .msix package directly from the Microsoft Store
If you do not like the above method or for some reason you cannot download the file, you can use this method instead. Here, I will provide the .msix package for Windows Subsystem for Android directly from the Microsoft Store.
Step 1: Download Windows Subsystem for Android Msixbundle
You access the link from the Microsoft Store and then copy the link in the search box on the browser.

Then go to the link generator and paste the copied link into the box “Sample Data”.
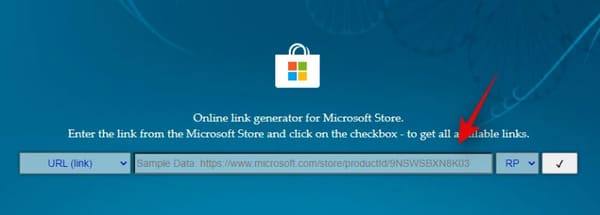
Click the menu next to the box “Sample Data” and choose “Slow”.
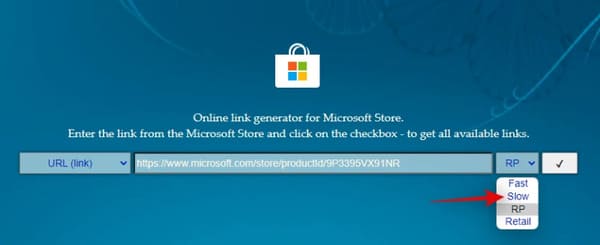
Finally, click on the tick icon to the right of the item “Slow”.
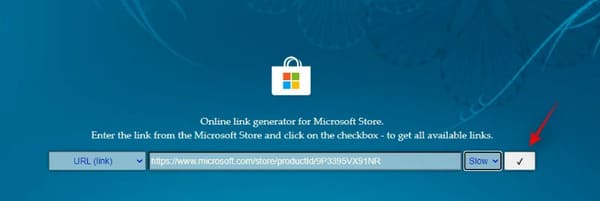
You will now get download links for all files when you download Windows Subsystem for Android. Scroll to the bottom and right click on the 1.2 GB “.msix” file.
Now click “Save as” and download the file to your PC.
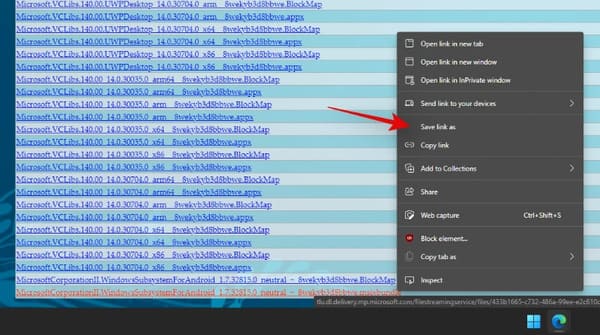
Once the file is downloaded, we will move on to step 2 to install the Windows Subsystem for Android.
Step 2: Install Windows Subsystem for Android Msixbundle
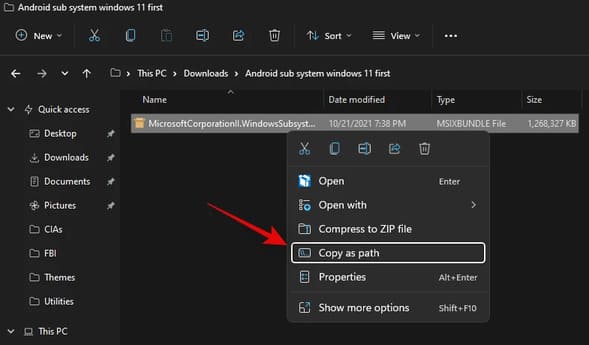
Navigate to the folder where you downloaded the .msix file and right click on the .msix file and select “Copy as path”.
Press Windows + X and choose “Windows Terminal (Admin)”.
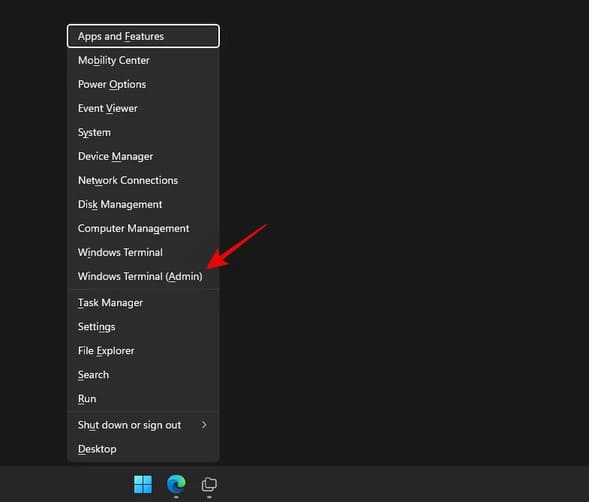
Now type the following command. Replace ‘PATH’ with the path to the .msix file you just copied.
Add-AppxPackage -Path PATH

Windows Subsystem for Android should now be installed on your system.

Import Exit to close Terminal.

You can now configure it from your Settings app, and see below for Android app installation troubleshooting tips if you’re having any issues.
How to fix the error can’t use Windows Subsystem for Android
How to install APK file on Windows using Windows Subsystem For Android
To install the APK file on Windows 11, you just follow this paragraph.
Fixes “Virtual Machine Platform can’t be found“
This is a common mistake and it is simply missing one of the Windows extras. Just follow the instructions below.
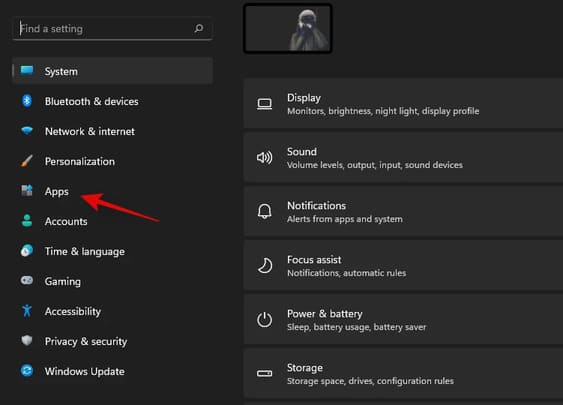
Press Windows + i to open the app Settings and select ‘Apps’ from the left menu.
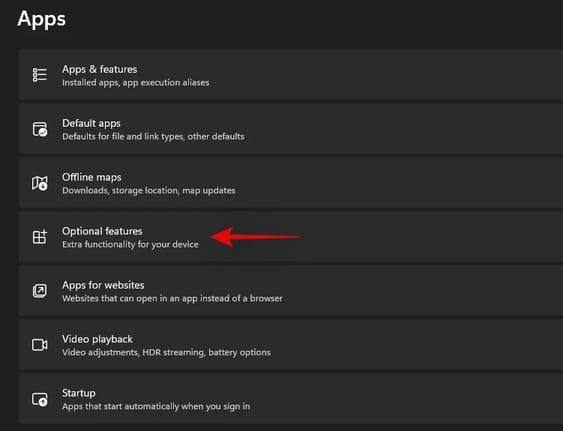
Press “Optional features”.
Press “More Windows features” at the bottom.

Find “Virtual Machine Platform” in this list and select the box on the left.
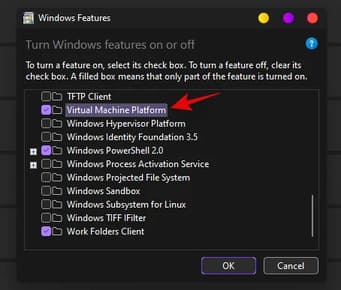
Now click ‘Ok’.
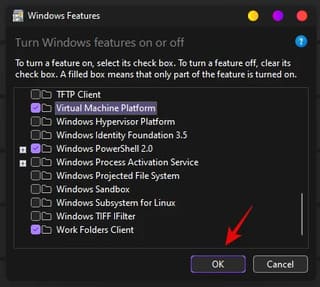
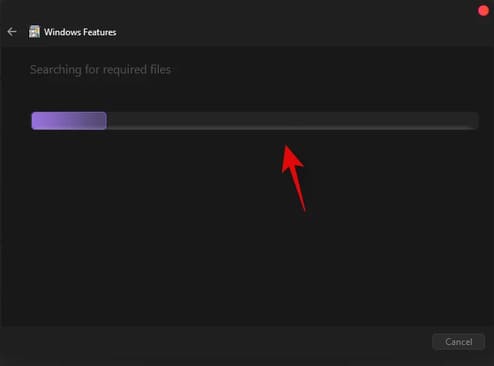
This feature will be installed on your PC. Once installed, you will be prompted to restart your PC. You should restart your PC at this point.
Press “Restart Now” to restart the PC.
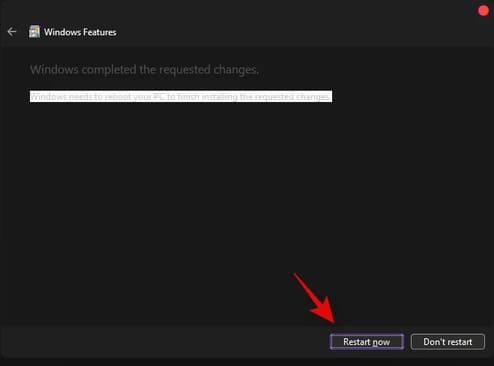
After your system reboots, Windows Subsystem for Android will be up and running on your computer.
How to use Amazon App Store?
If you want to use the Amazon App Store to download Android apps, you’ll need to enable your VPN and change your region to the US. This will allow the Amazon App Store to connect to the necessary servers, then sign in to your Amazon account and download the app on your PC.
So that’s it then.


